

There’s nothing quite like the snap of a perfectly crunchy cucumber coated in tangy, sweet, and warmly spiced brine. Homemade refrigerator pickles elevate humble cucumbers into a star appetizer or snack without the fuss of traditional canning. In just over twenty minutes of hands-on time—fifteen minutes to prep and ten to simmer your flavorful brine—you’ll be on your way to a batch of pickles that promise to stay satisfyingly crisp for weeks. As the vinegar mingles with sugar and salt, it creates that quintessential pickle balance: a bright zing that makes your taste buds tingle, a touch of sweetness to soften the vinegar’s edge, and that gentle savory underpinning thanks to garlic, mustard seeds, and peppercorns.
But what truly makes these refrigerator pickles irresistible is the effortless ritual of layering vibrant cucumber rounds and onion rings into a bowl, then pouring over the steaming brine that carries delicate red pepper flakes, dill seeds, and fresh sprigs of dill. Once tucked away in mason jars and left to chill for at least 24 hours, the flavors marry beautifully. The result is a refreshing, crunchy treat—perfect alongside lunch sandwiches, as part of a colorful charcuterie spread, or simply as a guilt-free snack straight from the refrigerator door. Whether you’re a newcomer to pickling or a seasoned home cook looking for a quick, foolproof recipe, these crisp refrigerator pickles will become a staple in your kitchen.
KEY INGREDIENTS IN CRISP HOMEMADE REFRIGERATOR PICKLES
Every standout recipe starts with top-notch ingredients that each play a key role in building layers of taste and texture. In this refrigerator pickle recipe, we blend fresh produce with pantry spices to achieve that perfect balance of crunch, tang, sweetness, and warm spice. Here’s a closer look at what you’ll need:
- Cucumbers
These form the backbone of your pickles, offering that coveted snap and fresh, green flavor. Opt for firm, fresh cucumbers with thin skin to ensure they stay crisp under the brine’s acidity.
- Onions
Thinly sliced onions introduce a gentle sweetness and textural contrast. Their natural sugars meld beautifully into the pickling liquid, brightening each bite.
- White Vinegar
The powerhouse acid that preserves and tangifies, white vinegar provides a clear, clean sharpness that won’t discolor your cucumbers.
- Water
Adding water moderates the vinegar’s intensity, creating a balanced brine that’s neither too harsh nor too mild.
- Salt
Beyond flavor enhancement, salt draws out moisture from the cucumbers, intensifying the crunch and promoting safe preservation.
- Sugar
A touch of sugar rounds out the sharpness, lending a hint of sweetness that balances the tang without overpowering the spices.
- Mustard Seeds
These tiny seeds burst with mild pungency and a toasty aroma when steeped in the hot brine, infusing each slice with warmth.
- Whole Black Peppercorns
Offering a subtle earthiness and gentle heat, peppercorns add depth and a slight piquancy that keeps the palate engaged.
- Dill Seeds
Packed with herbaceous, slightly anise-like notes, dill seeds elevate the classic pickle flavor profile.
- Garlic Cloves
Smashed to release their essential oils, garlic cloves bring a hearty, savory punch that complements the cucumbers beautifully.
- Red Pepper Flakes
Optional but irresistible for heat lovers, these flakes lend a lingering, tongue-tingling bite that makes each crunch a little more exciting.
- Fresh Dill
The sprigs of fresh dill tucked into the mixture contribute a bright, floral-herbaceous aroma that screams “homemade.”

HOW TO MAKE CRISP HOMEMADE REFRIGERATOR PICKLES
If you’ve ever been intimidated by pickling, rest assured this refrigerator pickle method is refreshingly straightforward. You’ll be layering veggies, cooking a quick brine, and marinating everything with minimal fuss. Let’s dive into each step so you can achieve perfectly tangy, snappy pickles every time:
1. Thoroughly wash your cucumbers and onions under cold running water. Then slice the cucumbers into uniform 1/4-inch thick rounds to ensure consistent texture, and slice the onions into thin, delicate rings for a touch of sweetness.
2. In a large mixing bowl, layer the cucumber rounds and onion rings. This step lets the veggies rest while you prepare the brine and ensures they’re evenly mixed once the hot liquid arrives.
3. In a medium saucepan, combine the white vinegar, water, salt, and sugar. Heat the mixture over medium heat, stirring occasionally, until the salt and sugar have fully dissolved into a smooth, shimmering brine.
4. Once the solution is clear and fragrant, remove from heat and add the mustard seeds, whole black peppercorns, dill seeds, smashed garlic cloves, and red pepper flakes (if you’re going for a spicy touch). Stir to combine, allowing the spices to bloom in the warm liquid.
5. Carefully pour the hot brine over the layered cucumbers and onions, making sure every slice is fully covered. Use a clean spoon to mix, distributing the seeds and spices evenly throughout the bowl.
6. Tuck the fresh dill sprigs into the mixture, then cover the bowl with a lid or plastic wrap. Let the contents cool to room temperature—this helps preserve the crunch and ensures no steam builds up inside the jars.
7. Once everything is cool, transfer the pickled cucumbers and onions into sterilized mason jars or airtight containers, ensuring the brine completely covers the vegetables.
8. Seal the jars tightly and place them in the refrigerator. Allow the flavors to meld for at least 24 hours; this resting time gives the spices a chance to penetrate every slice.
9. Your pickles are ready to enjoy immediately after chilling, but they only get better with time. Aim to finish them within 2 to 3 weeks for the best combination of flavor and crunch.
SERVING SUGGESTIONS FOR CRISP HOMEMADE REFRIGERATOR PICKLES
Now that your refrigerator pickles are brimming with bright, tangy, and spicy notes, it’s time to think about how to serve this crunchy delight. These versatile pickles transform everyday meals into flavor-packed experiences. From lazy weekend lunches to festive gatherings, these tangy goodies bring a pop of freshness and color wherever they go. Here are some mouthwatering ways to present and enjoy your homemade pickles, each designed to highlight their crisp texture and balanced flavors in the best possible light.
- Classic Side Dish
Serve your pickles alongside grilled meats, burgers, or hot dogs for a refreshing contrast. Arrange them on a small dish with a garnish of fresh dill sprigs for a restaurant-style touch.
- Sandwich Upgrade
Layer several pickle slices on your favorite deli sandwich—think ham and cheese or turkey club—to introduce zesty crunch that cuts through rich, creamy ingredients.
- Charcuterie Companion
Add these pickles to a cheese board or charcuterie platter. Their tangy profile pairs beautifully with soft cheeses, cured meats, and crusty bread. Use small tongs or forks so guests can easily pick them up.
- Salad Garnish
Chop the pickles into bite-sized pieces and toss them into a potato or green salad for an unexpected burst of acidity. The crunchy texture will keep every forkful lively.
HOW TO STORE CRISP HOMEMADE REFRIGERATOR PICKLES
Proper storage ensures that your pickles remain as flavorful and crunchy on day 20 as they were on day 2. Because these are refrigerator pickles—no traditional canning or pressure canner required—they rely on cold temperatures to stay fresh and safe. Follow these guidelines to keep them at peak quality, and you’ll have tangy bite-sized treats on demand for up to three weeks.
- Use airtight containers or mason jars with tight-fitting lids. This prevents oxygen from dulling the flavors and keeps the brine from evaporating. Ensure the jars are clean and completely dry before filling.
- Keep the pickles fully submerged in brine at all times. If the cucumber slices peek above the liquid, they may become soft or moldy. Consider using a small weight or clean cabbage leaf to tuck under any floating pieces.
- Store the jars in the coldest part of your refrigerator, typically near the back or bottom shelf. Avoid placing them on the door, where temperatures fluctuate with each opening.
- Always use clean utensils when retrieving pickles. Introducing crumbs or moisture from other foods can promote spoilage. A dedicated set of tongs or spoons is ideal to maintain maximum freshness.
CONCLUSION
These crisp homemade refrigerator pickles demonstrate how a handful of simple ingredients—fresh cucumbers, onions, vinegar, sugar, salt, and a blend of aromatic spices—can transform into a snack or side that’s bursting with flavor and texture. With just fifteen minutes of prep, ten minutes of simmering, and a day to allow those flavors to meld, you’ll have a batch of perfectly crunchy pickles that can elevate any meal. Whether you’re an aspiring home cook looking to dip your toes into pickling or a seasoned foodie craving a quick, impressive condiment, this recipe is beginner-friendly and endlessly adaptable. Feel free to tweak the sweetness, swap in coriander or fennel seeds, or skip the red pepper flakes for a milder result—each variation will yield a delicious array of tastes and aromas.
This guide was crafted to be your trusty reference. You can print the full article and keep it tucked into your recipe binder or save it digitally so you’ll always have clear instructions at your fingertips. Below this article you’ll also find a handy FAQ section to address any extra questions or troubleshooting tips that might arise. I’d love to hear how your refrigerator pickles turn out—please leave a comment if you try the recipe, share adjustments that worked for you, or ask any questions you have about the process. Your feedback helps me refine recipes and inspire even more flavorful kitchen adventures!
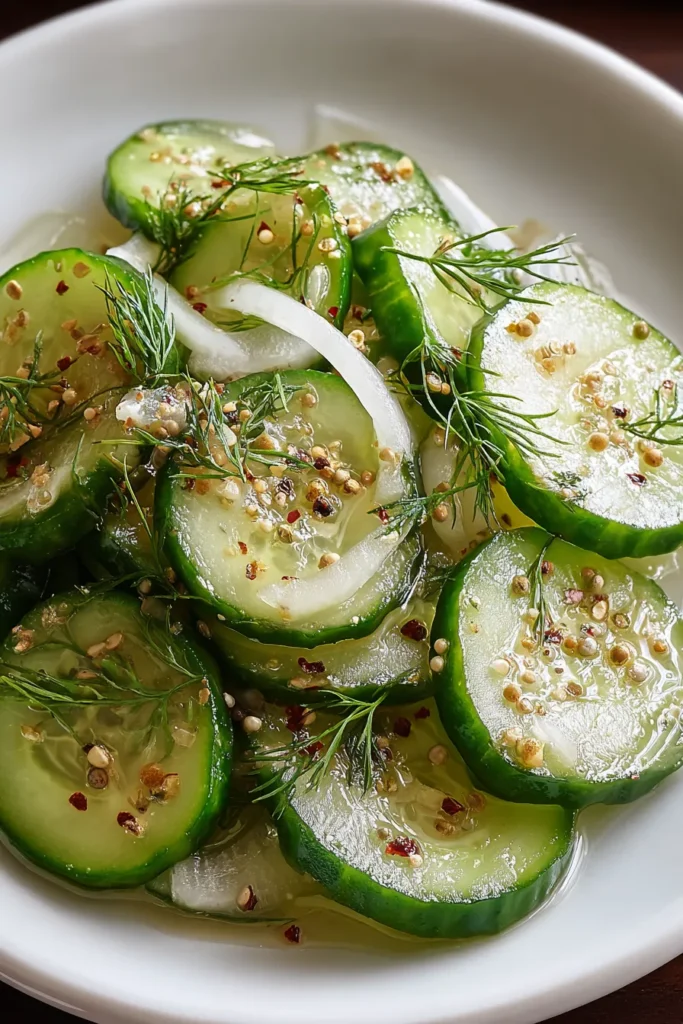

Crisp Homemade Refrigerator Pickles
Description
These homemade refrigerator pickles combine the crispness of cucumbers with tangy vinegar and warm spices for a refreshing snack or tasty side. Perfectly crunchy and quick to make!
Ingredients
Instructions
-
Start by thoroughly washing your cucumbers and onions. Slice the cucumbers into rounds, about 1/4-inch thick. Slice the onions into thin rings.
-
In a large bowl, layer the cucumber slices and onions. Set aside while you prepare the pickling brine.
-
In a medium saucepan, combine the white vinegar, water, salt, and sugar. Heat the mixture over medium heat, stirring occasionally, until the salt and sugar have dissolved completely.
-
Once the brine solution is ready, remove it from heat and add the mustard seeds, black peppercorns, dill seeds, garlic cloves, and red pepper flakes (if using). Stir well to combine.
-
Carefully pour the brine over the cucumber and onion mixture, ensuring all vegetables are fully covered. Use a spoon to mix everything, so the spices are evenly distributed.
-
Tuck the fresh dill sprigs into the mixture. Cover the bowl with a lid or plastic wrap and let it cool to room temperature.
-
Once cooled, transfer the pickled vegetables into mason jars or airtight containers. Make sure the brine covers the cucumbers and onions completely.
-
Seal the jars or containers and place them in the refrigerator. Allow the pickles to marinate for at least 24 hours before enjoying, though they will get more flavorful the longer they sit.
-
Enjoy your crisp homemade refrigerator pickles within 2 to 3 weeks for optimal taste and crunch.
Note
- These pickles are perfect as a side dish, sandwich topping, or even as a snack.
- Feel free to experiment by adding other spices like coriander seeds or fennel seeds to customize the flavor.
- If you're not a fan of spicy foods, simply omit the red pepper flakes.
- Always use fresh cucumbers for the best texture and taste.
- Adjust the sweetness of your pickles by increasing or decreasing the sugar based on your taste preferences.

