

There’s something special about that very first bite of school cafeteria pizza, the way the cheese stretches as you lift it from the tray, and the playful tug between sauce and dough. As a home cook who grew up devouring those uniform slices, I love how this recipe brings that vibe right into my kitchen. The crust isn’t overly fancy—it’s sturdy and slightly chewy, just the way we liked it between math class and the playground. Each mouthful is a throwback to lunchtime chatter with friends, but you get to control the toppings, the herbs, and the exact amount of cheese. Whether you go classic pepperoni or load up with colorful veggies, there’s a joy in recreating that cafeteria magic with better ingredients and more love.
This recipe is perfect for busy weeknights when you want a taste of nostalgia without hours of effort. It’s rated Beginner difficulty, making it ideal for novice pizza makers and seasoned home cooks alike. You’ll spend about 30 minutes getting hands-on with kneading and rolling, then pop it in the oven for 20 minutes while you set the table or sip a cold drink. After an hour of dough resting, you’ll have a pizza that serves eight generous slices at around 300 calories each. Whether it’s a casual family dinner or a laid-back lunch with friends, this school cafeteria pizza hits the spot every time. So let’s dive in, channel our inner cafeteria chefs, and soon we’ll be savoring slices that taste like school days—only better.
KEY INGREDIENTS IN SCHOOL CAFETERIA PIZZA
Every great pizza starts with simple, reliable ingredients that come together in delicious harmony. In this section, we’ll break down each element and explain why it’s essential for achieving that beloved school-lunch flavor right at home.
- Warm Water
This is the gentle warmth that wakes up the yeast without scorching it. It helps dissolve the sugar and yeast granules so they can activate and create those all-important bubbles in your dough.
- Sugar
More than just sweetness, sugar feeds the yeast and speeds up its activity. It contributes to a slightly golden-brown crust and a hint of caramelized flavor in every bite.
- Active Dry Yeast
These tiny living organisms are the heart of your dough. As they feast on sugar, they release carbon dioxide, which forms bubbles and gives the crust its light, airy texture.
- All-Purpose Flour
The sturdy foundation of your pizza base, all-purpose flour strikes a balance between strength and lightness. It creates a dough that’s easy to roll and yields a chewy, satisfying bite.
- Salt
A small amount of salt elevates every flavor in the dough. It strengthens gluten bonds, controlling how the dough stretches and ensuring a consistent texture.
- Vegetable Oil
This provides a tender crumb and a slight crisp on the crust’s edges. It also helps keep the dough from sticking during rising and rolling.
- Pizza Sauce
A classic tomato-based pizza sauce brings acidity and herbaceous notes. It keeps the crust moist and adds depth to every savory bite.
- Mozzarella Cheese
The stretchy, milky layer that defines cafeteria pizza. Mozzarella melts evenly and creates that irresistible pull when you lift a slice.
- Cheddar Cheese
Adding a sharp tang and vibrant color, cheddar cheese balances the mellow mozzarella and lends extra flavor complexity.
- Toppings of Choice
Pepperoni, sausage, or an array of vegetables let you personalize each slice. They add textural contrast and bursts of flavor, making this pizza truly your own.

HOW TO MAKE SCHOOL CAFETERIA PIZZA
Time to roll up your sleeves and dive into the fun, hands-on process of crafting a pizza that tastes just like the good old cafeteria—but even better. These steps walk you through every stage, from bubbling yeast to golden-brown crust.
1. In a large mixing bowl, combine the warm water and sugar. Stir gently until the sugar is completely dissolved, ensuring an even environment for the yeast to thrive.
2. Sprinkle the active dry yeast over the water. Let the bowl sit undisturbed for about 5 minutes, until the mixture becomes frothy and bubbly—this shows the yeast is awake and alive.
3. Add the all-purpose flour, salt, and vegetable oil directly to the yeast mixture. Use a sturdy spoon or spatula to mix until a shaggy dough forms.
4. Transfer the dough to a lightly floured surface. Knead it for 8–10 minutes, folding and pressing until it feels smooth and elastic. This develops gluten and gives the crust its signature chew.
5. Lightly oil a clean bowl, place the dough inside, and cover it with a damp cloth. Allow it to rise in a warm spot for about 1 hour, or until it’s doubled in size.
6. Preheat your oven to 475°F (245°C). Grease a large baking sheet to prevent sticking and help the crust crisp up.
7. Punch down the risen dough to release excess air, then roll it out on a floured surface until it fits your baking sheet perfectly.
8. Evenly spread the pizza sauce over the dough, leaving a small border around the edge for the crust.
9. Generously sprinkle mozzarella and cheddar cheeses across the sauced surface, ensuring every slice will be ooey-gooey.
10. Arrange your favorite toppings—pepperoni, sausage, or veggies—in an even layer so that each bite is balanced.
11. Bake in the preheated oven for 15–20 minutes, until the crust turns golden and the cheese is melted, bubbly, and starting to brown at the edges.
12. Remove the pizza from the oven and allow it to cool for a few minutes before slicing. This helps the cheese set just enough for clean, perfect slices.
SERVING SUGGESTIONS FOR SCHOOL CAFETERIA PIZZA
When your school-style pizza emerges from the oven, bubbling and golden, you’ll want to serve it in a way that feels just as fun and casual as grabbing a slice from the lunch line. Below are a few of my favorite ideas for bringing that lunchroom energy to your table, complete with vibrant colors, playful textures, and that undeniable cafeteria charm.
- Cut into Squares
Instead of the traditional triangular slice, slice your pizza into uniform squares or rectangles. This retro presentation makes it easy for guests to grab a piece and reminds you of pizza trays in the cafeteria.
- Serve with Dipping Sauces
Place small bowls of ranch, garlic butter, or marinara sauce alongside the pizza. Dipping adds a new dimension to each bite, just like sneaking an extra packet of ketchup back in the lunchroom.
- Pair with a Crisp Salad
Balance the cheesy richness with a fresh side salad of mixed greens, cherry tomatoes, and a zesty vinaigrette. The crisp veggies and tangy dressing brighten every mouthful of pizza.
- Offer Fun Beverage Pairings
Think chocolate milk or lemonade for a nostalgic twist, or iced tea and soda for a classic combo. The playful drink choices take you right back to lunchtime banter.
HOW TO STORE SCHOOL CAFETERIA PIZZA
After the last slice has been served, it’s all about preserving that cafeteria-inspired goodness for later cravings. Proper storage keeps your pizza tasting fresh and prevents the crust from drying out. Whether you plan to savor leftovers the next day or freeze slices for a future lunch, these tips will help you hit repeat on that cafeteria magic.
- Refrigeration
Place cooled slices in an airtight container or wrap them tightly in plastic wrap. Store in the refrigerator for up to 3 days. When you’re ready to eat, reheat in a 350°F (175°C) oven on a baking sheet for about 5–7 minutes to crisp the crust.
- Freezing
Lay slices on a baking sheet and flash-freeze for 1 hour. Transfer the frozen pieces to a freezer-safe bag or container, separated by parchment paper to prevent sticking. Keep in the freezer for up to 2 months.
- Room-Temperature Short-Term
If you plan to finish the pizza within a few hours, store it on the counter under a clean, breathable kitchen towel. This prevents condensation and keeps the crust from getting soggy for up to 4 hours.
- Reheating for Best Texture
Pop refrigerated or thawed frozen slices onto a preheated skillet or baking sheet. Heat over medium-low flame or in a 375°F (190°C) oven, uncovered, until the cheese is soft and the edges are crisp—about 5–8 minutes.
CONCLUSION
This school cafeteria pizza recipe brings back the warmth of those midday trays, blending nostalgia with the freshness of homemade ingredients. From the first gentle bubble of proofed yeast to the moment you pull that bubbling, golden pie from the oven, every step is a celebration of simplicity and comfort. You’ve learned how to mix and knead the dough, layer on tangy sauce and creamy cheeses, and customize with your go-to toppings. The preparation details—30 minutes of active work, 20 minutes in the oven, and an hour of rest—make planning dinner straightforward, and the eight hearty slices at roughly 300 calories each mean you can share generously or enjoy leftovers the next day.
Feel free to print this article and add it to your recipe collection, saving it for future pizza nights or informal lunches with friends. Below, you’ll find a FAQ section to answer any lingering questions, from dough troubleshooting to topping ideas. If you give this recipe a try, let me know how your pizza turns out—did you channel the pepperoni-passion of your school days or create a veggie masterpiece? Drop a comment with your personal tweaks, questions, or feedback. I’m here to help with any dough dilemmas or oven mysteries, and I can’t wait to hear your cafeteria pizza stories!
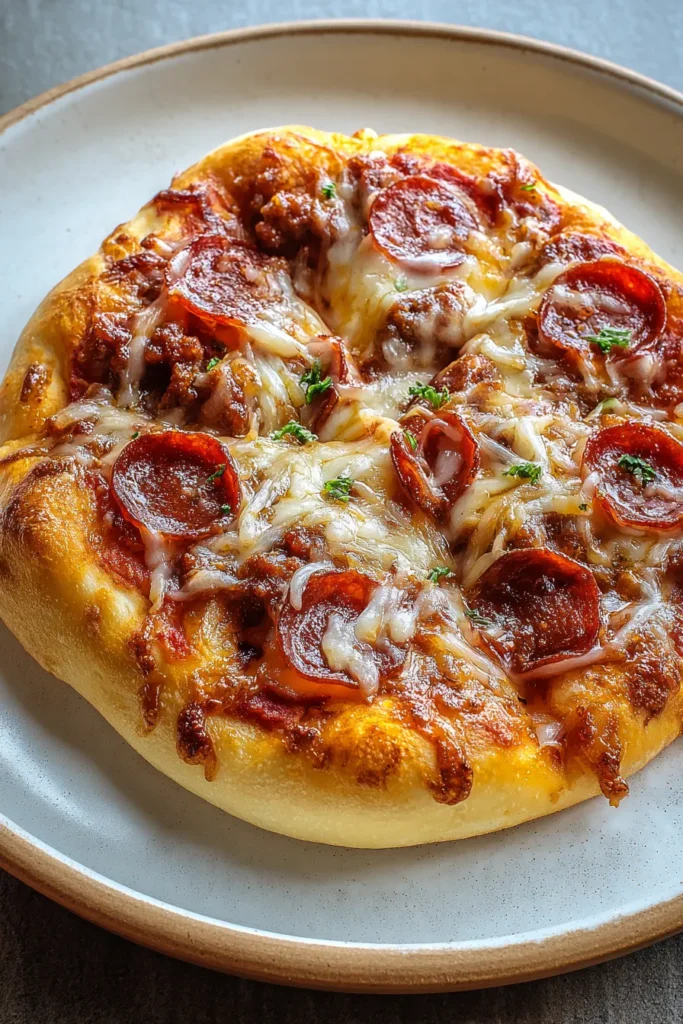

School Cafeteria Pizza
Description
Recreate the beloved flavor of school days with this easy pizza recipe, topped with stretchy cheese and your choice of favorite toppings. Perfect for any pizza lover!
Ingredients
Instructions
-
In a large mixing bowl, combine the warm water and sugar. Stir until the sugar is dissolved.
-
Sprinkle the yeast over the water and let it sit until the yeast gets bubbly, about 5 minutes.
-
Add the flour, salt, and vegetable oil to the yeast mixture. Mix until a dough forms.
-
Knead the dough on a floured surface for about 8-10 minutes or until smooth and elastic.
-
Place the dough in a lightly oiled bowl, cover it with a damp cloth, and let it rise in a warm place until it doubles in size, about 1 hour.
-
Preheat your oven to 475°F (245°C). Grease a large baking sheet.
-
Punch down the dough and roll it out to fit the baking sheet.
-
Spread the pizza sauce evenly over the dough.
-
Sprinkle the mozzarella and cheddar cheeses over the sauce.
-
Add your choice of toppings evenly across the pizza.
-
Bake in the preheated oven for 15 to 20 minutes or until the crust is golden and the cheese is bubbly.
-
Allow the pizza to cool for a few minutes before slicing and serving.
Note
- This recipe mimics the classic school cafeteria pizza slice, bringing a taste of nostalgia.
- Feel free to customize the toppings to suit your taste preferences.
- For a different flavor profile, try mixing herbs like oregano or basil into the pizza sauce.
- Double the recipe for a larger crowd or for leftovers to enjoy later.

