

There’s something so comforting about pulling a tray of perfectly golden mini loaf desserts from the oven, each slice promising a little moment of pure joy. These petite loaves are like the best of both worlds: they bake up quickly, develop a beautifully soft crumb, and bring that “just-baked” charm into any kitchen. Whip Up Fun and Flavorful Mini Loaf Pan Desserts That Slice Up Perfectly! Whether you’re new to baking or a seasoned home cook, this beginner-friendly treat lets you customize every bite. From the first swirl of batter to the final dash of glaze, you’ll feel like a pastry pro, even if all you have on hand is a humble mini loaf pan.
These delightful mini loaf desserts are easy to bake and full of flavor! Customize with chocolate chips or nuts for a treat everyone will love. Perfect for sharing! In just 15 minutes of prep, 30 minutes in the oven, and a brief 10-minute rest, you’ll have multiple loaves, each about 150 calories per serving, ready to impress guests or uplift an ordinary afternoon. As you slice through that warm, tender interior, you’ll discover the magic that homemade treats bring to any gathering. With versatile mix-in options and simple steps, you can create a variety of flavor profiles—think classic vanilla, rich chocolate chip bursts, or a crunchy nut twist. Gather your ingredients, preheat your oven to 350°F, and let’s dive into a baking adventure that feels like chatting with your best friend over a cup of coffee.
KEY INGREDIENTS IN MINI LOAF PAN DESSERTS
Before we dive into the fun of mixing and baking, let’s take a moment to appreciate the simple ingredients that come together to create these adorable sweet loaves. Each one plays its own part, building flavor, texture, and that irresistible crumb we all crave.
- All-purpose flour
This pantry staple forms the backbone of our mini loaves. Its moderate protein content gives just the right structure, creating a tender yet sturdy crumb that slices neatly without crumbling apart.
- Granulated sugar
Beyond sweetness, sugar contributes to tenderness by inhibiting gluten development and promoting a soft interior. It also helps with browning, giving your loaves that rich, golden top.
- Unsalted butter
Adds luxurious richness and moisture. Softened but still cool, it emulsifies beautifully with sugar, trapping air that helps your loaves rise light and fluffy.
- Milk
Provides moisture and helps dissolve sugar and salt. The liquid also activates the baking powder for lift, ensuring a uniform, tender texture in every bite.
- Egg
Acts as a binder, holding the ingredients together, while also contributing to the loaf’s structure and a slight richness in flavor.
- Vanilla extract
Infuses the batter with warm, aromatic notes that enhance the other ingredients, adding a classic, comforting flavor.
- Baking powder
That little scoop of leavening magic helps your loaves rise to perfection. It creates tiny air pockets that transform the dense batter into a light, airy treat.
- Salt
Balances sweetness and enhances overall flavor. Even a pinch ensures the other ingredients shine without being overly saccharine.
- Mini chocolate chips (optional)
Tiny pockets of melty chocolate scattered through the loaf for sweet surprises in every slice.
- Chopped nuts (optional)
Adds a delightful crunch and a nutty dimension, perfect for contrast against the soft crumb.

HOW TO MAKE MINI LOAF PAN DESSERTS
Baking these mini loaf pan desserts is a breeze, and once you get the hang of the simple steps below, you’ll be whipping up batches on repeat. Follow along and you’ll end up with perfectly uniform loaves that slice up like a dream.
1. Preheat your oven to 350°F (175°C). Grease and flour a mini loaf pan or line it with parchment paper to prevent sticking and ensure easy removal once baked.
2. In a medium-sized bowl, cream together the softened butter and sugar until light and fluffy. Use a hand mixer or stand mixer on medium speed; this incorporates air and sets the stage for a tender crumb.
3. Add the egg and vanilla extract to the butter mixture, and continue to beat until everything is well combined and the batter appears smooth and glossy.
4. In a separate bowl, whisk together the flour, baking powder, and salt. This step ensures the leavening agent and salt are evenly distributed throughout the flour.
5. Gradually add the dry ingredients to the wet ingredients, alternating with the milk. Start and finish with the flour mixture, mixing on low speed until just combined. Overmixing can lead to a dense loaf, so stop when you see no streaks of flour.
6. Gently fold in the mini chocolate chips and/or chopped nuts using a spatula, keeping the batter light and airy while distributing the mix-ins evenly.
7. Spoon the batter evenly into the prepared mini loaf pan, using a spatula to smooth the tops for an even bake and attractive appearance.
8. Bake in the preheated oven for 25–30 minutes or until a toothpick inserted into the center comes out clean or with a few moist crumbs attached.
9. Remove the loaves from the oven and allow them to cool in the pan for about 10 minutes. Carefully transfer to a wire rack to cool completely before slicing or glazing.
SERVING SUGGESTIONS FOR MINI LOAF PAN DESSERTS
Serving these mini loaves is almost as delightful as baking them. Whether you’re hosting an afternoon tea, packing lunchbox treats, or simply craving a quick sweet bite, these versatile loaves can be dressed up in countless ways to suit any occasion. The tender crumb and compact size make them perfect for single-serve indulgence, while the charming presentation adds a homemade touch that’s sure to impress friends and family alike. Experiment with accompaniments like fresh berries, a swirl of whipped cream, or a vibrant fruit compote. For cooler mornings, try warming a slice and adding a pat of butter for extra comfort. If you’re gifting these loaves, wrap them in clear cellophane with a decorative ribbon or tuck them into a festive box to make someone’s day. No matter how you serve, each bite delivers that satisfying combination of sweetness and texture, making these mini loaves your new go-to dessert for every gathering.
- Berry Compote Pairing: Top each slice with a spoonful of warm berry compote for a fruity contrast. Gently simmer mixed berries with a touch of sugar until they burst, then cool slightly and spoon over the loaf.
- Warm and Gooey: Serve a slice straight from the oven, still warm, alongside a scoop of vanilla ice cream. The melting ice cream creates a decadent sauce that seeps into the loaf’s nooks.
- Festive Glaze Drizzle: Whisk powdered sugar with a splash of milk to make a simple glaze. Drizzle over cooled loaves in a zigzag pattern for an elegant finish ideal for parties.
- Gifting Presentation: Wrap individual loaves in parchment and tie with twine or ribbon. Include a handwritten tag with “Enjoy!” for a charming, homemade gift that shows you care.
HOW TO STORE MINI LOAF PAN DESSERTS
Keeping your mini loaf desserts fresh and flavorful is key to enjoying every last bite. Whether you plan to savor them over the next few days or save a batch for friends, proper storage ensures they retain their soft crumb and delicious taste. Start by letting your loaves cool completely on a wire rack—any residual heat can create moisture inside the container, leading to sogginess. Once cooled, choose the storage method that fits your timeline and needs: room-temperature for quick snacking, refrigeration for slightly longer life, or freezing for batch-baking success. Whenever possible, wrap individual portions in plastic wrap or parchment paper to minimize exposure to air, then place them in an airtight container or resealable bag. Label the container with the date, so you always know how fresh your treats are. When you’re ready to serve from the freezer, thaw at room temperature or gently reheat in the microwave for a few seconds to revive that freshly baked feeling. With just a bit of foresight, you can enjoy homemade mini loaves any time the craving strikes.
- Room-Temperature Storage
Store cooled loaves in an airtight container or resealable bag at room temperature for up to 2 days. Keep away from direct sunlight and heat sources to maintain their tender crumb.
- Refrigeration
For up to 5 days of freshness, wrap each loaf in plastic wrap or parchment paper and place in a sealed container. Chill in the fridge to slow down staling without drying them out.
- Freezing
To enjoy later, wrap individual loaves tightly in plastic wrap, then place them in a freezer-safe bag. Freeze for up to 3 months. Thaw at room temperature or microwave briefly before serving.
- Revival Technique
Reheat slightly by placing a slice on a microwave-safe plate and warming for 5–10 seconds. This restores the softness and brings back that fresh-baked warmth.
CONCLUSION
Baking these Mini Loaf Pan Desserts is like giving yourself—and anyone lucky enough to try them—a warm hug in the form of cake. We started with basic home-kitchen staples like all-purpose flour, sugar, softened butter, milk, and an egg, then added a splash of vanilla extract and a lift from baking powder to create a batter that bakes up into perfectly portioned loaves. With optional mix-ins like mini chocolate chips or chopped nuts, you can customize each batch to suit your mood or the season. Whether you stick to the classic vanilla loaf, go all in on chocolatey goodness, or add a nutty crunch, the process remains straightforward and beginner-friendly: cream, whisk, fold, and bake. From preheating your oven at 350°F to that final cooling period on a wire rack, every step invites you to experience the joy of home baking. These loaves make fantastic shareable treats, and thanks to simple storage tips, you can relish your creations throughout the week or gift them to friends wrapped in parchment and tied with ribbon.
Feel free to print this article and save it in your recipe binder for easy reference. If you love having organized cooking guides at your fingertips, you’ll appreciate having all the details—from prep and cooking times to calorie counts—laid out for you. Don’t forget, there’s a helpful FAQ section below where you can find answers to common questions like ingredient substitutions or troubleshooting tips for denser loaves. I’d love to hear your baking stories, so drop a comment if you try this recipe or if you have any questions along the way. Your feedback helps me refine these guides and ensure your mini loaf adventures are a delicious success. Happy baking, and may your kitchen always be filled with the sweet satisfaction of a perfect homemade treat!
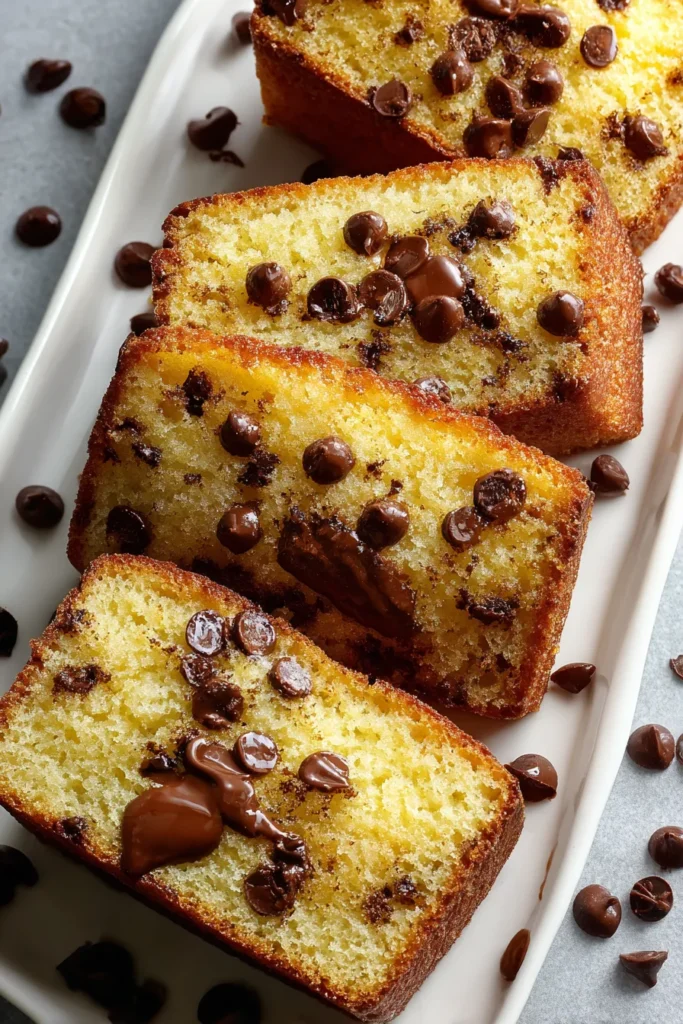

Mini Loaf Pan Desserts
Description
These delightful mini loaf desserts are easy to bake and full of flavor! Customize with chocolate chips or nuts for a treat everyone will love. Perfect for sharing!
Ingredients
Instructions
-
Preheat your oven to 350°F (175°C). Grease and flour a mini loaf pan or line it with parchment paper.
-
In a medium-sized bowl, cream together the softened butter and sugar until light and fluffy using a hand mixer or stand mixer.
-
Add the egg and vanilla extract to the butter mixture, and continue to beat until well combined.
-
In a separate bowl, whisk together the flour, baking powder, and salt.
-
Gradually add the dry ingredients to the wet ingredients, alternating with the milk. Begin and end with the flour mixture. Mix until just combined.
-
Gently fold in the mini chocolate chips and/or chopped nuts if using.
-
Spoon the batter evenly into the prepared mini loaf pan, smoothing the tops with a spatula.
-
Bake in the preheated oven for 25-30 minutes or until a toothpick inserted into the center comes out clean.
-
Remove from the oven and allow the loaves to cool in the pan for about 10 minutes before transferring to a wire rack to cool completely.
Note
- These mini loaf desserts are perfect for gifting or a quick treat.
- You can experiment with different add-ins such as dried fruits or coconut.
- For a festive look, drizzle with a simple glaze made of powdered sugar and milk after cooling.
- Store in an airtight container to retain freshness for up to 3 days.
- This recipe can be doubled for larger batches.

