

There's nothing quite like the satisfying crunch that greets your teeth when you sink a fork into a freshly made dill pickle. Those vibrant green beauties, glistening in their briny bath, are more than just a snack—they're a celebration of freshness, flavor, and simple kitchen alchemy. Homemade pickles have a way of elevating any spread, whether you're setting out an appetizer tray for guests or simply snacking solo on a quiet afternoon. With every bite, you'll experience that perfect balance of tangy vinegar, aromatic garlic, and bright dill, all playing together in a zesty symphony that dances across your taste buds. Not to mention, the slight heat from the optional red pepper flakes adds just the right amount of kick for those who love a turn-up-the-heat moment.
In this beginner-friendly recipe, you won’t need years of canning experience to achieve that professional deli-style crunch. It’s amazing how a handful of basic pantry staples—water, vinegar, pickling salt, sugar, spices, and fresh herbs—can transform crisp cucumbers into a snack that demands attention. Ready in about 20 minutes of active prep and 10 minutes of gentle simmering, then giving your pickles 12 hours of rest in the jars, you’ll find yourself diving into crunchy bites in just a couple of days. Each dill pickle clocks in around 30 calories, making it an ideal guilt-free nibble. Whether you’re hosting a backyard barbecue or assembling a picnic basket for a lazy afternoon in the sun, these homemade gems bring that extra pop of flavor and color. Pull out your jars, tie on an apron, and embrace the fun of creating a tangy, crispy snack that will quickly become your go-to.
KEY INGREDIENTS IN CRISPY DILL PICKLE
Every great pickle starts with high-quality, straightforward ingredients that work together to deliver that iconic crisp and tangy flavor. Let’s break down what you need and why each element is essential for crafting the perfect homemade dill pickle.
- Cucumbers
These small, pickling varieties bring the all-important crunch. Their firm flesh holds up beautifully in brine, ensuring each bite stays crisp rather than turning mushy.
- Water
Acts as the foundation of your brine solution, diluting the vinegar slightly so that the acidity is balanced and the pickles don’t become overly sour.
- White Vinegar
Provides the sharp, tangy backbone of the pickle flavor. Its high acidity also acts as a preservative, helping inhibit unwanted bacteria.
- Pickling Salt
Dissolves easily in water and enhances the pickles’ flavor without adding any off-tastes that iodized salt might introduce.
- Sugar
A small amount softens the sharpness of the vinegar and rounds out the overall taste, creating a more complex and pleasant bite.
- Garlic
Smashed cloves introduce a mellow, earthy aroma and a subtle pungent undertone that complements the dill and spices.
- Dill Sprigs
The star herb that lends those distinctive floral, herbaceous notes that make these pickles unmistakably “dill.”
- Mustard Seeds
Add a gentle heat and slight textural pop, infusing the brine with a warm, spicy dimension.
- Black Peppercorns
Give a background of warm, peppery spice, elevating the overall flavor profile without overwhelming the palate.
- Red Pepper Flakes (optional)
Introduce a touch of heat and visual appeal for anyone craving a spicier pickle adventure.
- Crushed Coriander Seeds
Delivers a citrusy, slightly sweet undertone that brightens the brine and harmonizes with the dill.

HOW TO MAKE CRISPY DILL PICKLE
Getting down to business is half the fun—this section walks you through each step in detail so you can be confident your pickles will turn out crisp, tangy, and delicious.
1. Begin by thoroughly washing the cucumbers under cold water to remove any dirt or debris. Pat them completely dry with a clean kitchen towel to ensure the brine adheres properly.
2. Slice off the blossom end of each cucumber, as that end contains enzymes which can soften pickles. Removing it helps maintain a firm texture over time.
3. In a large saucepan, combine water, vinegar, pickling salt, and sugar. Gently stir until the salt and sugar fully dissolve, then bring the mixture to a boil. As soon as it bubbles, remove from heat and let it cool to room temperature.
4. Sterilize your canning jars and lids by submerging them in boiling water for 10 minutes. Carefully lift them out and allow them to air dry on a clean surface.
5. In each jar, place one fresh dill sprig, one clove of smashed garlic, a few mustard seeds, five black peppercorns, a pinch of red pepper flakes (if you want heat), and a pinch of crushed coriander seeds.
6. Pack the cucumbers vertically into the jars, keeping about ½ inch of headspace at the top so the brine can circulate fully.
7. Fill each jar with the cooled brine, ensuring every cucumber slice is completely submerged while still preserving that ½ inch of headspace.
8. Seal the jars with the sterilized lids. Let them rest at room temperature for approximately 12 hours to kickstart the pickling process.
9. Transfer the jars to the refrigerator. Allow the pickles to develop flavor for at least 48 hours, though waiting up to a week will deepen their tang and crunch.
10. Before serving, make sure the pickles are thoroughly chilled. This final chill step guarantees the crispiest texture and most refreshing bite.
SERVING SUGGESTIONS FOR CRISPY DILL PICKLE
Crackers or sandwiches enjoy a new level of personality when paired with these zesty, crunchy pickles. Here are some fun ways to showcase your homemade dill pickles and make every snack or meal a conversation starter:
- Classic Deli Side
Nestle a few pickles on the side of your favorite deli sandwich—think corned beef, pastrami, or turkey. The vinegary snap cuts through rich, fatty flavors, making each mouthful brighter and more balanced.
- Charcuterie Board Highlight
Scatter pickle spears among cured meats, cheeses, and olives. Their vivid green color and crisp texture contrast beautifully with soft cheeses and hearty salamis, adding a palate-cleansing tang between bites.
- Tartar Sauce Twist
Chop pickles finely and mix into mayonnaise, lemon juice, and a pinch of black pepper to create a quick homemade tartar sauce. Serve with crispy fish tacos or golden fried shrimp for an unexpected burst of flavor.
- Snack Attack Platter
Serve chilled spears alongside an assortment of nuts, pretzels, and cheese cubes for an at-home movie night or casual gathering. The satisfying crunch and tangy bite will keep everyone reaching for more.
HOW TO STORE CRISPY DILL PICKLE
Proper storage ensures your crunchy dill pickles stay fresh, flavorful, and safe to enjoy for weeks or months. Follow these simple tips to maintain texture and taste every time you reach for a jar:
- Refrigerator Storage
Keep sealed jars in the coldest section of the fridge. This method preserves that signature crunch and bright flavor for up to two months. Always use a clean utensil to remove pickles—avoiding contamination.
- Water Bath Canning
If you’d like shelf-stable pickles, process filled jars in a low-temperature pasteurization water bath for about 10 minutes. This technique seals jars airtight and extends the shelf life to a year when stored in a cool, dark pantry.
- Brine Top-Up
Over time, pickles may rise above the brine. Simply add a little extra cooled vinegar-water solution to keep cucumbers fully submerged and prevent oxidation or soft spots.
- Label and Date
Write the date of pickling on each jar with a permanent marker. This helps you track freshness and ensures you enjoy your pickles within their optimal flavor window.
CONCLUSION
This Crispy Dill Pickle recipe brings together simple ingredients and straightforward techniques to yield a tangy, crunchy sensation that brightens any snack or meal. From the zing of white vinegar to the warm pop of mustard seeds, each component harmonizes to create that perfect bite. You’ve learned how to prep fresh cucumbers, craft a balanced brine, and master the art of sterilizing jars so your pickles stay crisp for weeks. Serving suggestions—from deli-sided classics to inventive tartar sauces—offer endless ways to enjoy these homemade gems. Plus, detailed storage tips, whether you refrigerate or use water bath canning, guarantee long-lasting flavor and snap.
Feel free to print this article and tuck it into your cooking binder for easy reference. Save it on your device, share it with friends, or revisit it whenever that craving for tangy, crunchy pickles strikes. You’ll also find a FAQ section below to address common questions and troubleshooting tips. I’d love to hear how your pickling adventure turns out! Drop a comment, share feedback, or ask any questions if you need help along the way. Your kitchen success stories and pickle triumphs make all the effort worthwhile—let’s chat and make every bite unforgettable.
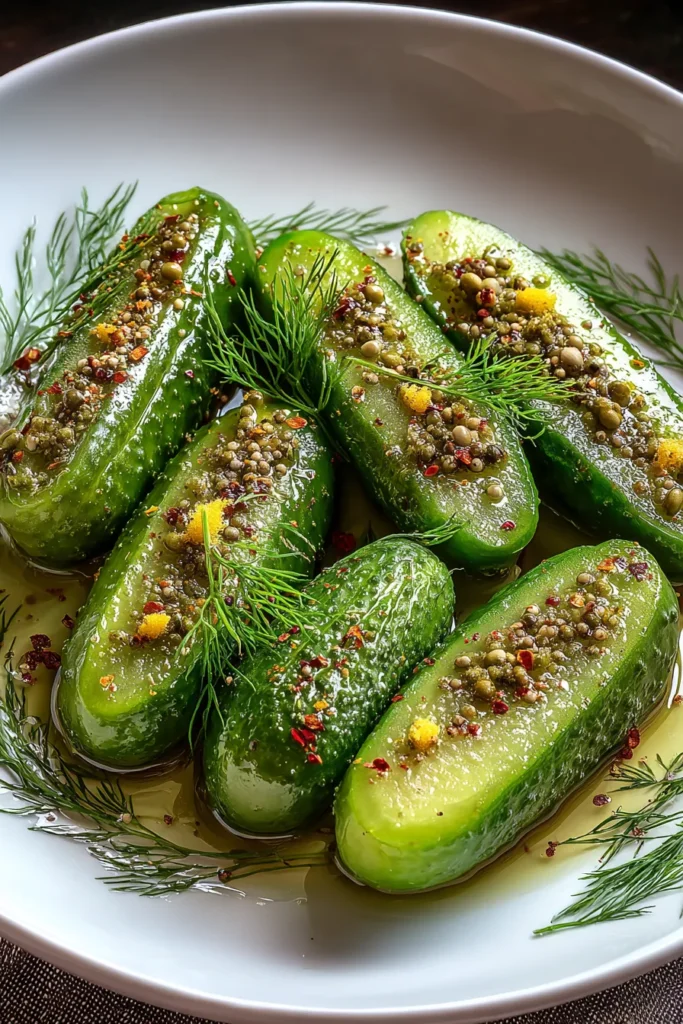

Crispy Dill Pickle
Description
Get ready to crunch into these delightful, tangy, and crisp dill pickles made fresh at home. Perfect as a snack or a savory side for any meal!
Ingredients
Instructions
-
Begin by thoroughly washing the cucumbers under cold water to remove any dirt. Pat them dry with a clean kitchen towel.
-
Slice off the blossom end of each cucumber, as it can contain enzymes that might soften the pickles.
-
In a large saucepan, combine water, vinegar, pickling salt, and sugar. Stir the mixture and bring it to a boil. Once boiling, remove from heat and let it cool to room temperature.
-
Sterilize your canning jars and lids by boiling them in water for 10 minutes, then remove and let them air dry.
-
In each jar, place one sprig of dill, one clove of smashed garlic, a few mustard seeds, five peppercorns, a pinch of red pepper flakes (if using), and a pinch of crushed coriander seeds.
-
Pack the cucumbers vertically into the jars, leaving about 1/2 inch of headspace at the top.
-
Fill the jars with the cooled brine solution, ensuring all cucumbers are fully submerged, maintaining the 1/2 inch headspace.
-
Seal the jars with the sterilized lids. Let them sit at room temperature for about 12 hours to begin the pickling process.
-
Transfer the jars to the refrigerator. Allow the pickles to sit for at least 48 hours, although waiting a week will yield a more deeply developed flavor.
-
Before serving, make sure the pickles are chilled for that perfect crispy bite.
Note
- Cucumbers should be firm and as fresh as possible to ensure a crunchier pickle.
- Letting the pickles brine in the refrigerator for an extended period improves taste and texture.
- Experiment with extra spices like dill seeds or allspice for a personalized flavor.
- Use low-temperature pasteurization if you are canning to extend the shelf life while maintaining crispiness.