

When the crispness of fall begins to whisper through the air, there’s nothing more satisfying than turning those plump, golden pumpkin blossoms into a plateful of crunchy, healthy goodness. These Healthy Pumpkin Blossoms are the perfect way to celebrate the season’s bounty without sacrificing flavor—or your well-being. With a light batter made from whole wheat or gluten-free flour and sparkling water, each blossom takes on a golden hue and an irresistible crunch, just begging to be dipped in a tangy sauce or savored all on its own. I’ve always loved how simple ingredients can transform into something so special, and this recipe is no exception: it’s vegetarian, beginner-friendly, and ready in under 30 minutes. Whether you’re hosting a cozy gathering or simply craving a seasonal snack, these blossoms are bound to impress.
The delicate petals of the pumpkin blossoms hide a world of flavor inside, and I can’t help but smile when I see them dancing in the hot pan, sizzling gently as they crisp to perfection. Tossed with a pinch of garlic powder, onion powder, and a hint of cayenne (for those who like a little kick), each bite is bursting with a subtle warmth that pairs beautifully with your favorite dipping sauce. And because we’re using extra-virgin olive oil and an olive oil spray, these snacks stay light and guilt-free at just around 180 calories per serving. Trust me, once you try this seasonal food, you’ll be hooked on how effortlessly they elevate any fall spread. Plus, with gluten-free options and vegetarian-friendly ingredients, they cater to a wide range of diets. Let’s dive in and turn these joyful blossoms into the crunchy appetizers of our dreams!
KEY INGREDIENTS IN HEALTHY PUMPKIN BLOSSOMS
Before we get our hands messy with batter and blossoms, let’s take a closer look at the heart of this recipe. Each ingredient plays a crucial role—some add structure, others deliver flavor, and a few ensure that satisfying crunch we crave in healthy recipes.
- Fresh pumpkin blossoms
These delicate flowers are the star of the show. Their tender petals hold a subtle sweetness and floral aroma, making them ideal for a light, crispy coating. Gently handling them preserves their shape and ensures an even cook.
- Whole wheat or gluten-free flour
Acting as the base for our batter, this flour choice adds a wholesome texture and boosts fiber. The gluten-free option guarantees that everyone at the table can relish these blossoms without worry.
- Sparkling water
This secret weapon makes the batter wonderfully light and airy, resulting in an irresistibly crispy exterior. The carbonation creates tiny bubbles that expand in the hot oil, giving each blossom a perfect crunch.
- Extra-virgin olive oil
Adding a silky mouthfeel and nuanced fruitiness, this oil enriches the batter and enhances the blossoms’ natural flavors.
- Salt and pepper
Simple seasonings that awaken every other ingredient: salt highlights the delicate sweetness of the blossoms, and pepper provides a gentle heat that ties it all together.
- Garlic powder and onion powder
These pantry staples infuse depth and savory notes, ensuring each bite is bursting with flavor—even if you’re short on time.
- Cayenne pepper (optional)
If you love a hint of spice, this dash of cayenne will bring a warm, lively kick to your blossoms.
- Olive oil spray
To keep things light, a quick mist of spray in the pan prevents sticking and uses far less oil than traditional frying.
HOW TO MAKE HEALTHY PUMPKIN BLOSSOMS
Ready to bring these crispy appetizers to life? Below is a step-by-step guide that walks you through the magic of turning fresh blossoms into a golden, crunchy delight.
1. Carefully inspect and clean the pumpkin blossoms. Gently peel back the petals to remove the stamens and any tough stem sections. Place them under cold running water, ensuring you rinse away any small bugs or debris. After cleaning, pat dry each blossom using a paper towel—this helps the batter adhere properly.
2. In a medium mixing bowl, combine the whole wheat or gluten-free flour, sparkling water, extra-virgin olive oil, salt, pepper, garlic powder, onion powder, and cayenne pepper. Use a whisk to blend everything into a smooth, slightly thick batter. You want it fluid enough to coat but thick enough to cling to the petals.
3. Preheat a non-stick frying pan over medium heat. Once hot, give it a light spray of olive oil to create a non-stick surface that keeps your batter crisp rather than oily.
4. Dip each pumpkin blossom into the batter, turning gently to ensure even coating. Allow any excess batter to drip off—this prevents big clumps and delivers a consistent, golden finish.
5. Carefully place the coated blossoms into the hot pan in a single layer. Let them cook undisturbed for about 2–3 minutes. You’ll know they’re ready to flip when the edges turn a deep golden color.
6. Using tongs or a gentle spatula, flip each blossom and cook the other side for another 2–3 minutes, until both sides are equally crispy and aromatic.
7. Transfer the cooked blossoms to a plate lined with paper towels to absorb any excess oil. Serve them immediately, while warm and at their peak crunchiness.
SERVING SUGGESTIONS FOR HEALTHY PUMPKIN BLOSSOMS
When your golden pumpkin blossoms come off the pan, you’ll want to showcase them in all their crispy glory. This is where your creativity can shine, so I’ve jotted down a few ways to elevate the presentation and taste. Whether you’re aiming for an elegant appetizer or a casual snack platter, these ideas will help you serve up something memorable.
- Dipping Sauce Trio
Offer a selection of three dips—think tangy yogurt-herb sauce, smoky chipotle aioli, and a bright citrus tzatziki. Plating them in small bowls around a mound of blossoms turns your snack into a colorful, interactive feast.
- Herb Garnish Scatter
Sprinkle freshly chopped parsley, cilantro, or chives over the warm blossoms. The vibrant green herbs add freshness and a beautiful contrast to the golden batter.
- Cheese-Plated Delight
Arrange the blossoms around a creamy cheese platter. Soft goat cheese or ricotta pairs wonderfully with the light spice. Guests can spread cheese on each blossom before enjoying their first bite.
- Seasonal Salad Sidekick
Serve alongside a crisp autumn salad of arugula, roasted butternut squash, pomegranate seeds, and toasted walnuts. The blossoms add a crunchy element, making the salad a more substantial vegetarian dish.
HOW TO STORE HEALTHY PUMPKIN BLOSSOMS
Storing crispy delights can be a little tricky, but with the right approach, you can preserve both freshness and crunch. Whether you’re prepping for a gathering or saving leftovers for the next day, these tips will ensure your pumpkin blossoms stay as delicious as when they first came out of the pan.
- Airtight Container in the Refrigerator
After cooling completely, place the blossoms in a single layer inside an airtight container. Separate layers with parchment or paper towels to prevent moisture buildup. They’ll keep well for up to 2 days.
- Re-Crisp in the Oven
If they lose some crispness, preheat your oven to 350°F (175°C). Arrange the blossoms on a baking sheet and warm them for 5–7 minutes. This method helps revive the crunchy exterior without drying them out.
- Avoid the Freezer
Freezing tends to diminish the crispy texture. If you must freeze, flash freeze in a single layer on a tray, then transfer to a freezer bag. Thaw briefly and re-crisp in the oven, though results may vary.
- Room-Temperature Serving
If you plan to enjoy within a few hours, keep the blossoms at room temperature on a wire rack (not stacked). This allows any steam to escape, maintaining crispness. Cover loosely with a clean kitchen towel to shield from dust.
CONCLUSION
Thank you for journeying through this delightful recipe for Healthy Pumpkin Blossoms. From the vibrant, fresh flowers to the light, crisp batter, we’ve explored every detail—from ingredient selection to serving suggestions and storage tips. These blossoms shine as a vegetarian, gluten-free-friendly appetizer that’s as stunning on a holiday table as it is comforting on a quiet autumn evening. With a total prep time of just 15 minutes and cooking time of 10 minutes, this beginner-friendly dish proves that seasonal food needn’t be fussy to be fantastic. Remember, the spark of life in these appetizers lies in the sparkling water batter, the gentle heat of the cayenne, and the golden kiss of olive oil spray. Whether you choose to drape them in herb garnishes or pair them with creamy cheeses, they’ll always deliver a perfect balance of flavors and textures.
Feel free to print this article and save it for later—having it on hand means you can whip up a crispy batch whenever those pumpkin blossoms appear at the farmers’ market. You’ll also find a helpful FAQ below to guide you through any questions that pop up. If you give this recipe a try, I would absolutely love to hear from you. Share your thoughts, tips, or even your own twists on the batter or dips. Your comments, questions, and feedback help us all learn and savor these seasonal delights together. Happy cooking, and enjoy every crunchy, savory bite!
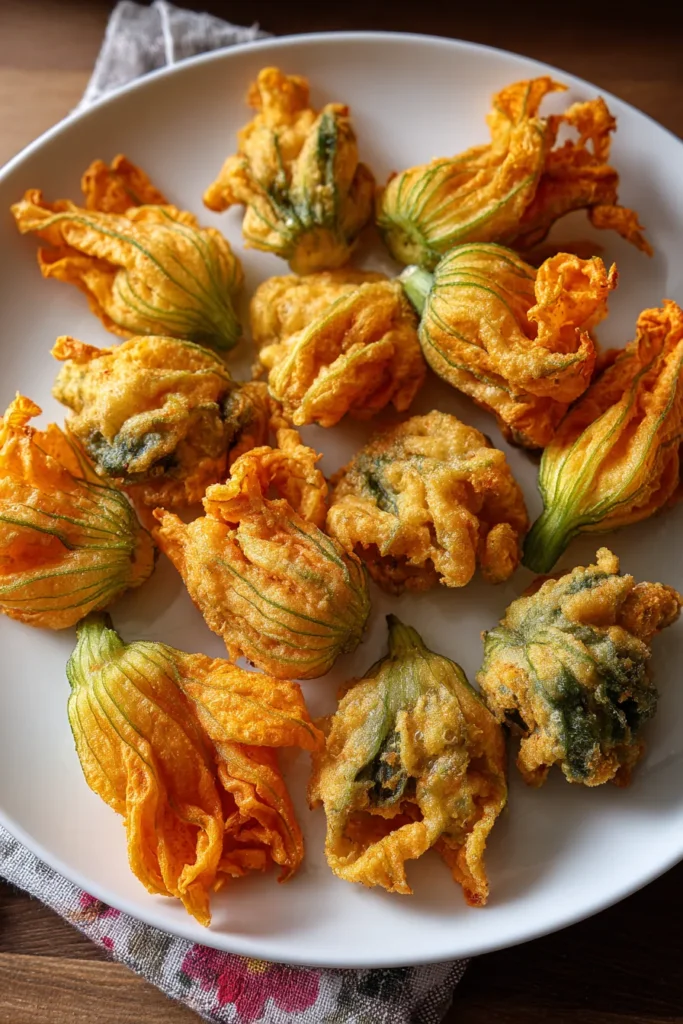

Healthy Pumpkin Blossoms
Description
These crispy pumpkin blossoms make for a delightful appetizer, offering a perfect balance of flavors with a crunchy exterior and delicate filling. They're a seasonal treat you can't resist!
Ingredients
Instructions
-
Carefully inspect and clean the pumpkin blossoms. Gently remove the stamens and any tough stems. Rinse them under cold water and pat dry with a paper towel.
-
In a mixing bowl, combine the whole wheat or gluten-free flour, sparkling water, extra-virgin olive oil, salt, pepper, garlic powder, onion powder, and cayenne pepper. Whisk until you have a smooth and slightly thick batter.
-
Heat a non-stick frying pan over medium heat and lightly coat it with olive oil spray.
-
Dip each pumpkin blossom into the batter, ensuring it's evenly coated, and let the excess batter drip off.
-
Place the coated blossoms gently into the hot pan. Cook them on each side for about 2-3 minutes until they are golden and crispy.
-
Transfer the cooked blossoms onto a plate lined with paper towels to absorb any excess oil.
-
Serve warm as a delightful appetizer or side dish.
Note
- Pumpkin blossoms are delicate, so handle them gently to maintain their structure.
- Sparkling water in the batter helps make the blossoms light and crisp.
- Adjust the seasoning to your taste preferences.
- This dish is a great seasonal recipe, especially during the pumpkin harvest.
- These blossoms can also be stuffed with a mixture of cheeses before dipping in batter for a creamy surprise.

