

There’s something truly magical about bringing the campfire classic indoors and turning it into a cookie that’s soft, chewy, and brimming with sticky, toasted marshmallows and rich chocolate. These Soft & Chewy S’mores Cookies are exactly that—a dreamy cross between a gourmet dessert and a nostalgic treat from childhood. S’mores cookies that are irresistibly soft, chewy, and packed with gooey marshmallows and rich chocolate! I still remember the first time I tasted one fresh from the oven: my kitchen filled with hints of buttery graham crackers, molten chocolate, and marshmallow puffs just beginning to turn golden. Every bite is like a warm hug for your taste buds, melting together the perfect balance of textures and flavors. They’re the kind of treat that instantly transports you to starry nights by the firepit, yet they’re easy enough to whip up on a Wednesday afternoon when you need a little pick-me-up.
These cookies shine as a beginner-friendly dessert that anyone can master, even if you’ve never baked a crumb before. With just 15 minutes of prep, 10 minutes of baking, and a brief 5-minute rest, you’ll have about a dozen calorie-conscious delights (around 180 calories per cookie) ready to share—or keep all to yourself! This recipe lives at the intersection of simplicity and indulgence. I love how it takes pantry staples—like graham cracker crumbs and chocolate chips—and elevates them with that final flourish of mini marshmallows and Hershey’s bar pieces pressed on top. Whether you’re planning a cozy movie night, a weekend brunch with friends, or seeking a hands-on baking project with curious kids, these cookies deliver big smiles and even bigger flavors. And if you need a little creativity boost, the optional chopped nuts or milk chocolate chip swap will keep things exciting every time you bake.
KEY INGREDIENTS IN SOFT & CHEWY S'MORES COOKIES
Before we dive into the baking magic, let’s talk about what makes these cookies so sensational. Each component plays a special role in building that signature soft texture, chewy consistency, and campfire-inspired taste. Here’s a glance at the stars of the show:
- Unsalted butter
This creamy foundation adds richness and helps develop that irresistible soft-and-tender crumb. By using unsalted butter, you control the exact level of saltiness in every bite.
- Granulated sugar
Provides the sweet backbone and encourages light caramelization along the edges, giving a subtle crispness.
- Dark brown sugar
Packed with molasses, it deepens the flavor profile and enhances moisture, ensuring every cookie stays chewy.
- Large eggs
The binding agent that holds everything together, also contributing to structure and a slight lift.
- Vanilla extract
Infuses warm vanilla notes that round out the sweetness and tie all the flavors together harmoniously.
- All-purpose flour
The cake’s sturdy base, balancing soft chewiness with enough structure to support mix-ins without collapsing.
- Graham cracker crumbs
The hero of the s’mores theme, offering that signature toasty, honey-like flavor and a hint of rustic texture.
- Baking soda
Our gentle leavening agent, which helps the cookies spread just enough and develop a tender bite.
- Salt
A pinch heightens all the flavors—sweet and savory—and prevents the dough from tasting flat.
- Semi-sweet chocolate chips
Pockets of gooey, bittersweet chocolate that complement the sweetness of the marshmallows.
- Mini marshmallows
When lightly toasted in the oven, they puff up to create that classic gooey s’mores experience.
- Hershey’s chocolate bars
Broken into small rectangles, these add chunky ribbons of creamy milk chocolate that melt into blissful pockets.
HOW TO MAKE SOFT & CHEWY S'MORES COOKIES
Let’s roll up our sleeves and transform these ingredients into dreamy, nostalgic cookies. Follow the steps below, and you’ll soon have a warm tray of s’mores-inspired delights.
1. Preheat your oven to 350°F (175°C) and line two baking sheets with parchment paper. This ensures even baking and makes cleanup a breeze.
2. In a large bowl, use an electric mixer to cream together the softened butter, granulated sugar, and dark brown sugar. Beat until the mixture is smooth, fluffy, and pale in color—about 2 to 3 minutes.
3. Crack in the eggs one at a time, beating thoroughly after each addition to ensure they’re fully incorporated. Stir in the vanilla extract and scrape down the sides of the bowl.
4. In a separate bowl, whisk together the all-purpose flour, graham cracker crumbs, baking soda, and salt. This dry mix provides the structure and that signature s’mores flavor.
5. Gradually add the dry ingredients to the wet ingredients, mixing on low speed just until combined. Avoid overmixing to keep your cookies tender.
6. Gently fold in the semi-sweet chocolate chips with a spatula or wooden spoon, distributing them evenly without deflating the dough.
7. Using a tablespoon or cookie scoop, drop rounded dough balls onto the prepared sheets, spacing them about 2 inches apart to allow for expansion.
8. Bake in the preheated oven for about 8 minutes, or until the edges are set but the centers still look slightly underbaked.
9. Remove the baking sheets from the oven and immediately press a few mini marshmallows and one piece of Hershey’s chocolate onto each cookie. This final touch ensures a gooey, melty topping.
10. Return the cookies to the oven and bake for an additional 2–3 minutes, or until the marshmallows are just starting to melt, puff up, and turn lightly golden.
11. Allow the cookies to cool on the baking sheet for a few minutes, then transfer them to a wire rack to cool completely. This resting period helps them set without losing their soft-chewy texture.
SERVING SUGGESTIONS FOR SOFT & CHEWY S'MORES COOKIES
After the baking is done, it’s time to treat yourself and your loved ones to an unforgettable s’mores cookie experience. Presentation and pairing can elevate these treats from “just yummy” to “absolutely swoon-worthy.” Whether you’re hosting a casual get-together or simply indulging in a mid-week pick-me-up, here are some fun and creative ways to serve these warm, melty delights with flair and finesse:
- Dip the edges in melted chocolate, then sprinkle with crushed graham cracker crumbs for an extra layer of crunch and visual appeal.
- Serve alongside a cold milk flight—offer small glasses of whole milk, chocolate milk, and a spiced chai latte so guests can discover their favorite pairing.
- Create a cookie ice cream sandwich by pressing a scoop of vanilla ice cream between two slightly warm cookies; wrap in parchment and freeze for a dreamy frozen treat.
- Arrange on a rustic wooden board with extra mini marshmallows, a dish of melted chocolate, and graham cracker sticks for a DIY s’mores station that doubles as a stunning dessert display.
HOW TO STORE SOFT & CHEWY S'MORES COOKIES
Keeping these cookies fresh and gooey is key to maintaining that perfect s’mores sensation. Whether you’ve baked a big batch for a party or you want to savor a few each day, proper storage will ensure they stay soft and flavorful. Here are some tried-and-true strategies for preserving texture and taste:
- Airtight container at room temperature
Store cooled cookies in a single layer or in layers separated by parchment paper. Seal tightly and keep away from direct sunlight; they should remain soft for up to 4 days.
- Add a slice of bread
Slip a fresh slice of white bread into the container. The cookies will absorb moisture from the bread, helping them stay chewy. Replace the bread every day or two.
- Refrigeration for longer storage
If you want to extend their life up to a week, place cookies in an airtight container in the refrigerator. Bring them back to room temperature before serving, or give them a quick 5-second zap in the microwave.
- Freezing for future cravings
Lay cookies flat on a baking sheet to flash-freeze, then transfer them to a heavy-duty freezer bag with parchment between layers. They’ll keep for up to 3 months. Thaw at room temperature or warm in the oven at 300°F for 5 minutes to revive that freshly-baked feel.
CONCLUSION
Baking these Soft & Chewy S’mores Cookies has been an absolute joy—from mixing the batter and sneaking chocolate chips to pulling that tray of golden gems from the oven and pressing on the final marshmallow kisses. This recipe is more than just dessert; it’s a way to capture the nostalgia of campfire evenings and share it in your own kitchen. As a beginner-friendly treat, it walks you through every step, from creaming butter and sugars to folding in mix-ins and achieving that ideal gooey top. Whether you’re here for a cozy fall afternoon or planning a festive gathering, these cookies bring instant warmth and smiles. You can even jazz them up with your favorite nuts or chocolate varieties. Remember, it only takes 15 minutes of prep, 10 minutes of baking, and 5 minutes to rest before you’re devouring these 180-calorie delights. Feel free to print this article and save it for all your future baking adventures—you’ll want to come back to this crowd-pleaser again and again. Below, you’ll find a handy FAQ section if you need more tips or troubleshooting tricks.
If you give these Soft & Chewy S’mores Cookies a whirl, I would love to hear how they turned out for you! Drop a comment or share your tweaks—did you swap in milk chocolate chips or sprinkle on some sea salt? Maybe you tried the ice cream sandwich hack or set up your own DIY s’mores bar. Share your questions, feedback, or any fun stories about how these treats fit into your day. Baking is all about experimentation and connection, and I’m here to help you every step of the way. Happy baking and may your kitchen always smell like campfire bliss!
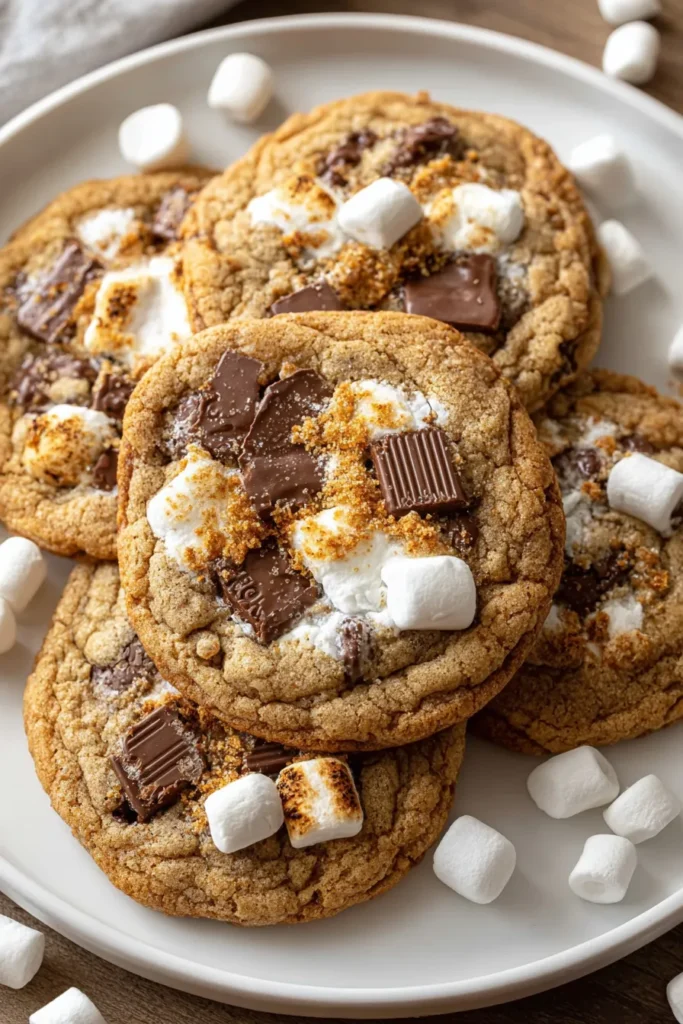

Soft & Chewy S’mores Cookies
Description
These Soft & Chewy S'mores Cookies bring the classic campfire treat to your kitchen. With a delightful blend of chocolate, marshmallows, and graham crackers, every bite is a cozy, nostalgic delight.
Ingredients
Instructions
-
Preheat your oven to 350°F (175°C) and line two baking sheets with parchment paper.
-
In a large bowl, beat together the softened butter, granulated sugar, and brown sugar until the mixture is creamy and smooth.
-
Add the eggs one at a time, beating well after each addition, and then stir in the vanilla extract.
-
In a separate bowl, combine the all-purpose flour, graham cracker crumbs, baking soda, and salt.
-
Gradually add the dry ingredients to the wet ingredients, mixing until just combined.
-
Fold in the chocolate chips gently using a spatula or a wooden spoon.
-
Using a tablespoon or a cookie scoop, drop dough balls onto the prepared baking sheets, spacing them about 2 inches apart.
-
Bake in the preheated oven for about 8 minutes.
-
Remove cookies from the oven and gently press a few mini marshmallows and one piece of Hershey's chocolate onto each cookie.
-
Return the cookies to the oven and bake for an additional 2-3 minutes, or until the marshmallows are just starting to melt and puff.
-
Allow the cookies to cool on the baking sheet for a few minutes, then transfer them to a wire rack to cool completely.
Note
- For a crispier texture, bake the cookies for an extra minute or two.
- You can substitute milk chocolate chips for semi-sweet for a sweeter cookie.
- Store cookies in an airtight container to keep them soft and chewy.
- These cookies are best enjoyed when still warm, as the marshmallows are at their gooey best.
- You can add chopped nuts for a crunchy twist.

