

Nothing beats the feeling of holding a perfectly shaped pie crust in your hands, the ribboned slips of butter gleaming like little treasures tucked into a snowy mound of flour. As you press the dough together, you can almost hear it whisper that flaky, tender promise of every slice to come. This butter pie crust recipe is your ticket to a sublime foundation for any pie, whether you’re honoring the tart brightness of summer berries or the cozy richness of a spiced pumpkin filling. With just five simple ingredients and straightforward steps, you’ll discover how approachable homemade pastry can truly be, even if you’ve shied away from it in the past.
What makes this crust so special is its perfect balance of rich butter flavor and delicate flakiness. In just 15 minutes of hands-on prep time, you’ll mix, blend, and chill your way to pie bliss—then allow the dough to rest for at least 30 minutes to relax the gluten and ensure every bite separates into golden, tender layers. If you need to prebake your crust before filling, pop it into a 375°F (190°C) oven for 15–20 minutes, and watch it turn a beautiful shade of light amber. Packing approximately 600 calories per crust, this buttery canvas will cradle everything from custardy tarts to summery galettes, and trust me, once you taste it, you’ll never go back to boxed pastry again.
KEY INGREDIENTS IN BUTTER PIE CRUST
Before diving into the step-by-step guide, let’s take a moment to appreciate the five humble ingredients that come together to create a buttery, flaky masterpiece. Each component has its part to play—whether it’s building structure, adding tenderness, or creating those coveted pockets of steam that lift the dough into delicate layers.
- All-purpose flour
This versatile flour provides the structure and body of your crust. With just the right protein content, it develops enough gluten to hold the crust together without making it tough. It’s the backbone that holds all the buttery goodness in place.
- Salt
A small pinch of salt works wonders for flavor enhancement. It levels up the sweetness in desserts, balances richness, and helps to strengthen gluten strands just enough for a cohesive dough.
- Granulated sugar
A hint of sugar lends a subtle sweetness and supports the browning process during baking, encouraging a golden hue and a touch of caramelized flavor around the edges.
- Unsalted butter
The star of the show, butter creates layers of steam as it melts during baking, yielding an airy, flaky texture. Using chilled, diced unsalted butter ensures you control the salt level and achieve those signature pockets of flakiness.
- Ice water
Crystal-cold water binds the dry ingredients into dough without warming the butter prematurely. The chill helps maintain distinct layers, resulting in a tender, flaky crust.
HOW TO MAKE BUTTER PIE CRUST
Creating your own pie crust can feel like a rite of passage in the kitchen, but with clear instructions and a sprinkle of patience, you’ll master each step in no time. Here’s how to transform simple pantry staples into the flaky foundation of your next pie.
1. In a large bowl, combine the flour, salt, and sugar. Mix well to ensure an even distribution of the dry ingredients, so every bite has balanced flavor and structure.
2. Add the diced unsalted butter to the flour mixture. Using a pastry blender or your fingertips, cut the butter into the flour until the mixture resembles coarse crumbs, with some larger, visible chunks of butter to help create flaky layers.
3. Slowly drizzle the ice water over the flour-butter mixture, a tablespoon at a time, gently tossing with a fork after each addition. Continue until the dough just holds together without becoming sticky or wet.
4. Gather the dough into a ball, then flatten it into a disk. Wrap it tightly in plastic wrap and refrigerate for at least 30 minutes—this resting period allows the gluten to relax and the butter to firm up.
5. On a lightly floured surface, roll out the chilled dough to fit your pie pan, starting from the center and rolling outward. Be careful not to over-work the dough, or you may develop too much gluten and lose tenderness.
6. Carefully transfer the rolled-out dough onto the pie pan, pressing it gently to fit the shape. Trim any excess dough and create a fluted edge by pinching the dough between your thumb and forefinger or pressing with a fork.
7. If your recipe calls for a prebaked or blind-baked crust, preheat your oven to 375°F (190°C). Line the crust with parchment paper, fill with pie weights or dried beans, and bake for 15 minutes. Remove the weights and paper, then bake for an additional 5–7 minutes until the crust is lightly golden.
8. Use the crust immediately for your favorite pie, or let it cool completely and freeze it for future use.
SERVING SUGGESTIONS FOR BUTTER PIE CRUST
Once you have a buttery, flaky base like this, the sky’s the limit for creative fillings and presentations. Whether you’re aiming for a showstopping centerpiece or bite-sized delights, your homemade crust is the perfect canvas to showcase sweet, tart, or even savory ingredients. Here are four serving ideas to inspire your next baking session:
- Classic Fruit Pie
Fill your prebaked crust with mixed berries or sliced peaches tossed with a touch of sugar and cornstarch. Bake until the juices bubble and the filling thickens, then let it cool for clean slices. Serve with a scoop of vanilla ice cream for a timeless treat.
- Creamy Custard Tart
Pour a rich mixture of eggs, cream, vanilla, and a hint of lemon zest into a blind-baked crust. Bake until the custard is just set and slightly jiggly in the center. Chill before serving to let flavors meld, and garnish with fresh berries or a dusting of powdered sugar.
- Savory Mini Quiches
Cut your crust into small rounds and press into a mini muffin tin. Whisk together eggs, cream, cheese, and chopped vegetables or cooked bacon. Pour into each shell and bake until puffy and golden. These bite-sized quiches make a fantastic brunch or party appetizer.
- Rustic Galette
Roll out the dough into a rough circle, pile fruit or savory fillings in the center, and fold the edges over to create a free-form tart. Brush the crust with an egg wash for a glossy finish, then bake until golden and crispy on the edges.
HOW TO STORE BUTTER PIE CRUST
Proper storage is key to maintaining the incredible texture and flavor of your buttery pie crust, whether you’re stashing raw dough for a future bake or tucking away a leftover prebaked shell. A little foresight will ensure you always have pastry ready when inspiration strikes—no last-minute scrambling required.
- Refrigerate Raw Dough
Wrap the prepared dough disk securely in plastic wrap and place it in the coldest part of your fridge for up to two days. When you’re ready to roll, let it sit at room temperature for 10 minutes to become more pliable.
- Freeze for Long-Term Use
For storage beyond a couple of days, wrap the dough disk in plastic, then seal it inside a freezer-safe bag. Freeze for up to three months. Thaw overnight in the refrigerator before rolling out.
- Store Baked Crust
If you’ve blind-baked a crust but haven’t yet filled it, allow it to cool completely, then wrap it in foil or place it in an airtight container. Store at room temperature for up to two days, or freeze for up to a month.
- Prevent Moisture Loss
When freezing baked or unbaked crusts, press a piece of parchment paper against the surface before wrapping to protect the dough’s layers. Label and date each package so you always know what you have on hand.
CONCLUSION
Baking a homemade butter pie crust is more than just a recipe—it’s a chance to reconnect with simple ingredients and rediscover the joy of creating something flaky, tender, and utterly delicious from scratch. From the first fold of cold butter into flour to that golden, crisp edge emerging from your oven, every step is a small celebration of technique and patience. With just 15 minutes of hands-on time, a 30-minute chill, and a quick 15–20 minute bake, you’ll have a pastry perfect for everything from fruit pies and custard tarts to savory quiches and free-form galettes.
Feel free to print this article and stash it in your recipe binder for quick reference before your next baking adventure. And don’t forget—you can scroll down to find a FAQ section with answers to common crust questions. If you try this recipe, I’d love to hear how it turned out: leave your comments, questions, or feedback below. Whether you need help troubleshooting dough texture or just want to share a photo of your masterpiece, I’m here to chat. Happy baking!
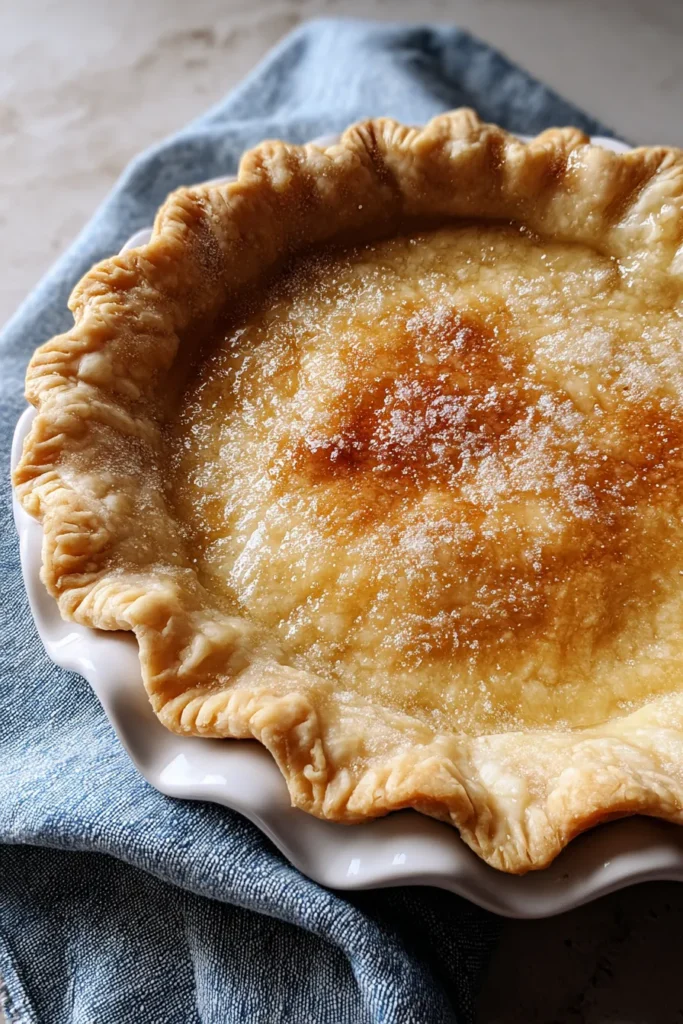

Butter Pie Crust
Description
This buttery pie crust is your perfect base for any pie, boasting a flaky texture and rich flavor that complements your filling beautifully. It's simple to make and utterly delicious!
Ingredients
Instructions
-
In a large bowl, combine the flour, salt, and sugar. Mix well to ensure even distribution of the dry ingredients.
-
Add the diced unsalted butter to the flour mixture. Using a pastry blender or your fingertips, cut the butter into the flour until the mixture resembles coarse crumbs. Some larger chunks of butter can remain visible.
-
Slowly drizzle the ice water over the flour-butter mixture, a tablespoon at a time, gently tossing the mixture with a fork after each addition. Continue until the dough begins to hold together without being sticky.
-
Gather the dough into a ball. Flatten it into a disk and wrap it tightly in plastic wrap. Refrigerate for at least 30 minutes to allow the gluten to relax and the butter to solidify.
-
On a lightly floured surface, roll out the chilled dough to fit your pie pan, starting from the center and rolling outward. Be careful not to over-work the dough.
-
Carefully transfer the rolled-out dough onto the pie pan, pressing it gently to fit. Trim any overhanging edges and flute the edges as desired.
-
If prebaking or blind baking the crust is needed, preheat your oven to 375°F (190°C). Line the crust with parchment paper, fill with pie weights or dried beans, and bake for 15 minutes. Remove weights and parchment, then bake for an additional 5-7 minutes until golden.
-
Use the pie crust as desired for your favorite pie recipes or freeze for future use.
Note
- Chilling the butter is crucial for a flaky crust, as it creates air pockets when it melts during baking.
- For added flavor, you can substitute a small portion of the flour with almond or whole wheat flour.
- If the dough feels too dry and crumbly, add a little more ice water, a teaspoon at a time.
- This recipe can be doubled to make a top and bottom crust for double-crust pies.

