

Get ready to dive into a dreamy blend of creamy peanut butter and crisp, light-as-air cereal that will make snack time come alive like never before. These Peanut Butter Rice Krispie Treats with Chocolate Swirl are the ultimate no-bake dessert for beginners and seasoned home cooks alike. Every square offers a nostalgic crunch that harks back to childhood kitchen experiments, but with a grown-up twist: a gorgeous marbled ribbon of semisweet chocolate weaving through each bite. The initial snap of the Rice Krispies gives way to a silky peanut butter center, and then a whisper of vanilla rounds out the sweetness so it never feels cloying. You’ll find yourself reaching for one—and then another—satisfied by the perfect harmony of salty, sweet, and subtly decadent flavors.
These treats aren’t just about taste; they’re about ease and joy in the kitchen. With only a handful of pantry-friendly ingredients and just over 25 minutes of active prep and cooking time (plus a quick 30-minute rest), you can whip up a 12-serving batch that clocks in at about 200 calories per square. Whether you’re chasing a midday pick-me-up, preparing school snacks, or hosting a casual gathering, these bars make an irresistible addition to any menu. The best part? You don’t even need to turn on the oven—just a couple of saucepans and a baking dish, and you’re on your way to snack nirvana. Keep a stash at room temperature in an airtight container, and you’ll have a sweet treat ready whenever cravings strike.
KEY INGREDIENTS IN PEANUT BUTTER RICE KRISPIE TREATS WITH CHOCOLATE SWIRL
Before you embark on this delicious journey, let’s meet the cast of characters that will make these treats shine. Each ingredient plays a special role in crafting that classic texture and unforgettable flavor, from crunchy foundation to that indulgent drizzle on top.
- Rice Krispies cereal
Provides the signature light, crispy texture that snaps perfectly when you bite in. These little puffs absorb just enough of the peanut butter mixture to stick together without going soggy.
- Creamy peanut butter
Delivers rich, nutty flavor and a silky binding agent that holds the cereal together. Its natural oils contribute to the treat’s tender bite and deep taste.
- Light corn syrup
Acts as a sweet, glossy binder that prevents crystallization and keeps the treats pliable. It works alongside sugar to create that classic chewiness.
- Granulated sugar
Adds sweetness and structure by melding with the corn syrup before being tamed by the peanut butter. It’s essential for achieving that golden hue.
- Vanilla extract
Infuses a warm, aromatic note that brightens the sweet and nutty elements, making the overall flavor profile more complex and rounded.
- Semisweet chocolate chips
Bring a luxurious chocolate layer that contrasts with the peanut butter base. When melted, they create the beautiful swirl that makes these treats eye-catching.
- Butter
Smooths and enriches the chocolate drizzle, giving it a silky sheen and helping it set with just the right density.
HOW TO MAKE PEANUT BUTTER RICE KRISPIE TREATS WITH CHOCOLATE SWIRL
Follow these simple steps for a foolproof bake-free dessert that tastes like you spent ages in the kitchen:
1. Start by greasing a 9×13-inch baking dish with cooking spray or butter to prevent the treats from sticking. This ensures clean edges and easy removal once they’ve set.
2. In a medium saucepan over medium heat, combine the corn syrup and granulated sugar. Stir constantly until the mixture comes to a gentle boil and the sugar has dissolved completely—this usually takes 3–4 minutes.
3. Once boiling, remove the saucepan from heat and immediately add the creamy peanut butter and vanilla extract. Stir until the peanut butter is fully melted and perfectly combined with the syrup mixture, creating a smooth and creamy emulsion.
4. In a large mixing bowl, pour the Rice Krispies cereal. Then, pour the peanut butter mixture over the cereal. Gently fold the mixture together with a spatula or wooden spoon until all the cereal is evenly coated in that rich, nutty goodness.
5. Press the mixture into the prepared baking dish using a spatula or your hands (moistened with water or butter to avoid sticking) to spread it out evenly. Aim for a uniform thickness so the bars set at the same rate.
6. In a small saucepan, melt the semisweet chocolate chips and butter together over low heat, stirring continuously until the mixture is smooth and fully combined—avoid high heat to prevent scorching.
7. Drizzle the melted chocolate over the top of the Rice Krispie mixture in the baking dish. Use a knife or toothpick to swirl the chocolate into the treats, creating a beautiful marbled effect that dazzles the eyes.
8. Allow the Peanut Butter Rice Krispie Treats to cool completely at room temperature. This usually takes about 30 minutes and ensures the chocolate swirl firms up perfectly. Once cooled, cut into squares or rectangles for serving.
9. Store any leftover treats in an airtight container at room temperature to maintain that fresh-tasting crispiness and gooey peanut butter center.
SERVING SUGGESTIONS FOR PEANUT BUTTER RICE KRISPIE TREATS WITH CHOCOLATE SWIRL
When it comes to presenting these bars, the sky’s the limit—so let your creativity run wild! You can keep things classic or jazz them up for special occasions. Whether you’re hosting an after-school snack session, setting out appetizers at a party, or simply indulging solo, these versatile treats adapt beautifully to different serving styles and pairings.
- Warm with a Glass of Milk
Reheat a bar for 10 seconds in the microwave, then serve alongside a cold glass of milk. The contrast of warm, gooey peanut butter and crisp cereal against the cool milk is an absolute treat for any time of day.
- Lunchbox Upgrade
Wrap each square in parchment paper and pack them in your kids’ lunchboxes or your commute bag. The airtight wrap keeps them fresh, and they arrive looking as neat as they taste.
- Ice Cream Sandwich Twist
Sandwich a scoop of vanilla or salted caramel ice cream between two treats for a decadent frozen dessert. Press gently, then wrap tightly and freeze for 10 minutes to set.
- Decorative Party Bites
Cut the bars into bite-sized cubes and place them on a tray lined with doilies or festive napkins. Add a sprinkle of sea salt or mini rainbow sprinkles on top of the chocolate swirl to impress guests.
HOW TO STORE PEANUT BUTTER RICE KRISPIE TREATS WITH CHOCOLATE SWIRL
Proper storage is key to preserving that perfect balance of crispiness and chewiness. Whether you’re savoring them over a few days or stashing extras for later, here are the best methods to keep your treats tasting fresh and looking irresistible.
- Airtight Container at Room Temperature
Store the cooled bars in a sealed container at room temperature. This method preserves the ideal texture, preventing them from drying out while keeping the peanut butter center soft.
- Refrigeration for Firmer Treats
If you prefer a firmer bite or live in a warm climate, pop the sealed container into the refrigerator. The cooler temperature helps the chocolate swirl set more firmly, though it may slightly reduce the cereal’s crunch.
- Freezing for Long-Term Storage
For the longest life, freeze individual squares in layers separated by parchment paper inside an airtight, freezer-safe bag. They’ll keep for up to 3 months—just thaw at room temperature for 15–20 minutes before serving.
- Layering with Parchment Paper
If stacking multiple layers, place parchment paper between each layer of bars to prevent them from sticking. This is especially helpful in warmer kitchens or when refrigerating.
CONCLUSION
There you have it: a complete guide to crafting the most irresistible Peanut Butter Rice Krispie Treats with Chocolate Swirl you’ll ever taste. From gathering the key ingredients to following our step-by-step instructions, you’re now equipped to create this crowd-pleasing, beginner-friendly dessert. We’ve covered everything from smart serving suggestions to foolproof storage methods, ensuring your treats stay fresh and delightful whether you’re enjoying them immediately or saving them for later. This article is formatted for easy printing, so feel free to pin it to your kitchen bulletin board or stash a copy in your recipe binder. And don’t forget, you can scroll down to find a handy FAQ section that addresses common questions and troubleshooting tips.
If you give this recipe a whirl, we’d love to hear how it went! Drop a comment below to share your experience or any creative twists you tried—maybe you swapped in almond butter, added chopped nuts, or experimented with a white chocolate drizzle. Have questions about ingredient substitutions, resting times, or getting that perfect swirl? Let us know! Your feedback not only helps fellow home cooks but also inspires us to refine and expand our flavor-packed adventures. Happy baking (and swirling!), and don’t hesitate to reach out if you need a hand turning these simple pantry staples into a show-stopping treat.
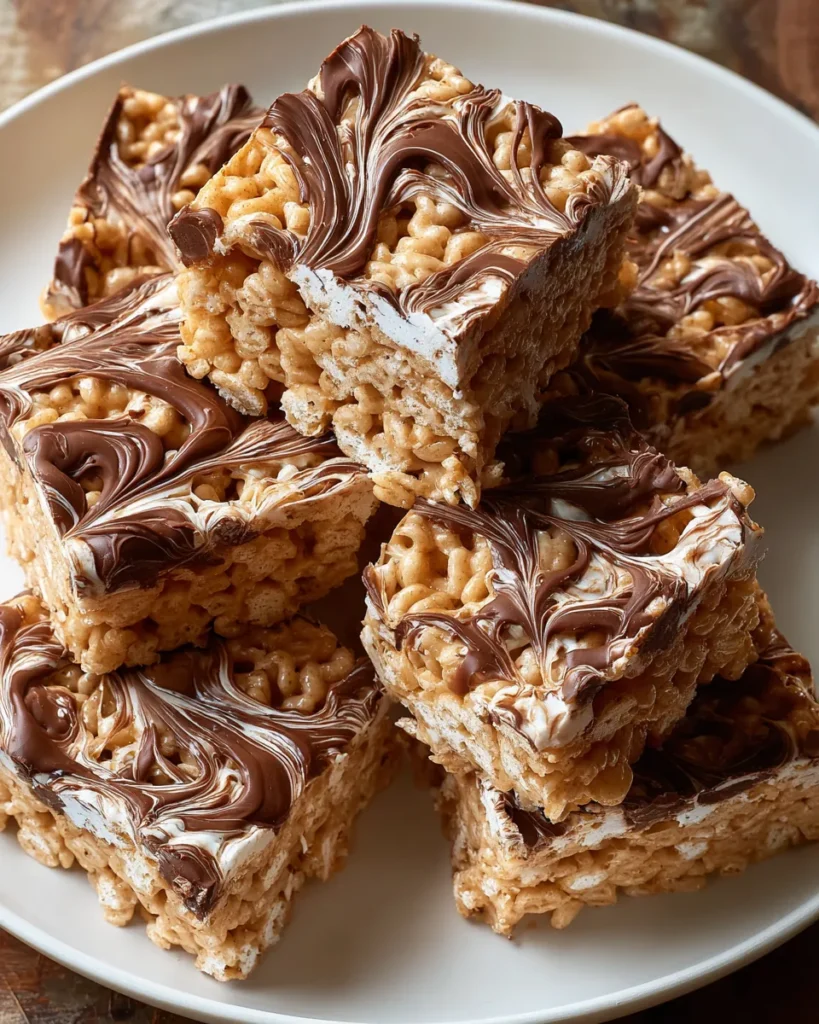

Peanut Butter Rice Krispie Treats with Chocolate Swirl
Description
These delightful treats blend creamy peanut butter and crunchy Rice Krispies with a luxurious dark chocolate swirl, creating an irresistible flavor combination that everyone will love.
Ingredients
Instructions
-
Start by greasing a 9x13-inch baking dish with cooking spray or butter to prevent the treats from sticking.
-
In a medium saucepan over medium heat, combine the corn syrup and granulated sugar. Stir until the mixture comes to a gentle boil and the sugar has dissolved completely.
-
Once boiling, remove the saucepan from heat and immediately add the creamy peanut butter and vanilla extract. Stir until the peanut butter is fully melted and combined with the syrup mixture, creating a smooth and creamy consistency.
-
In a large mixing bowl, pour the Rice Krispies cereal. Then, pour the peanut butter mixture over the cereal. Gently fold the mixture together with a spatula or wooden spoon until all the cereal is evenly coated.
-
Press the mixture into the prepared baking dish using a spatula or your hands (moistened with water or butter to avoid sticking) to spread it out evenly.
-
In a small saucepan, melt the semisweet chocolate chips and butter together over low heat, stirring continuously until smooth and fully combined.
-
Drizzle the melted chocolate over the top of the Rice Krispie mixture in the baking dish. Use a knife or toothpick to swirl the chocolate into the treats, creating a marbled effect.
-
Allow the Peanut Butter Rice Krispie Treats to cool completely at room temperature. Once cooled, cut into squares or rectangles for serving.
-
Store any leftover treats in an airtight container at room temperature.
Note
- Feel free to substitute almond butter or any nut butter of your choice for a different flavor.
- Add mini marshmallows or chopped nuts for extra texture and flavor variations.
- These treats can be kept for about a week, but they’re best enjoyed fresh.
- Try drizzling white chocolate on top for a contrasting color and flavor combination.

