

Love the crisp sweetness of peppermint and melty pockets of chocolate? These Mint Chocolate Chip Snowball Cookies bring a burst of refreshing mint that pairs perfectly with rich chocolate chips, all rolled in a snowy layer of powdered sugar. Simple enough for beginners and packed with festive flair, these cookies will disappear before you know it. Stick around for a complete guide to bake these tender, buttery delights your friends and family will adore.
Key Ingredients
Here’s what you’ll need to whip up these cool, peppermint-kissed snowball cookies:
- 1 cup unsalted butter, softened: Provides a rich, tender base that keeps cookies moist and buttery.
- 1/2 cup powdered sugar, plus extra for rolling: Sweetens and tenderizes the dough, with extra sugar for the snowy coating.
- 1 teaspoon vanilla extract: Adds warm, aromatic sweetness to balance the mint.
- 1 teaspoon mint extract: Infuses a bright, refreshing mint flavor into every bite.
- 2 cups all-purpose flour: Builds the cookie’s structure and ensures a tender crumb.
- 1/4 teaspoon salt: Enhances flavor and balances sweetness.
- 1 cup mini chocolate chips: Creates melty pockets of chocolate throughout the cookie.
- 1/4 cup crushed peppermint candies (optional): Brings extra crunch and festive candy cane flavor.
How To Make Mint Chocolate Chip Snowball Cookie
Baking these snowball cookies is straightforward but rewarding—perfect for beginners and seasoned bakers alike. You’ll start by creaming butter and sugar, then infuse the dough with mint and vanilla, fold in chocolate chips (and optional peppermint candies), shape into neat balls, and bake to tender perfection. Finally, a generous coating of powdered sugar transforms each cookie into a snowy treat. Follow these detailed steps to ensure every bite is buttery, minty, and melt-in-your-mouth delicious.
1. Preheat your oven to 350°F (175°C) and line a baking sheet with parchment paper to prevent sticking.
2. In a large mixing bowl, cream together the softened butter and powdered sugar until the mixture is light and fluffy, about 3–4 minutes, scraping the bowl as needed.
3. Add the vanilla and mint extracts to the butter-sugar mixture, mixing until the flavors are fully blended and the dough is smooth.
4. In a separate bowl, whisk together the flour and salt. Gradually add the dry ingredients to the wet mixture on low speed, mixing just until combined.
5. Gently fold in the mini chocolate chips and crushed peppermint candies, if using, so they are evenly distributed in the dough without overmixing.
6. Using a tablespoon or cookie scoop, portion the dough into 1-inch balls and place them 2 inches apart on the prepared baking sheet.
7. Bake for 12–15 minutes until the edges are light golden. The centers may look slightly underbaked but will firm up during cooling.
8. Remove the cookies from the oven and let them cool on the baking sheet for about 5 minutes to set.
9. While still warm, roll each cookie in powdered sugar to coat, creating that signature snowy look.
10. Cool completely on a wire rack, then roll in powdered sugar again if you want an extra dusting of snow.
Serving Suggestions
These Mint Chocolate Chip Snowball Cookies shine on their own, but you can elevate the experience with creative presentation and pairing ideas. Whether you’re hosting a holiday party, gifting a homemade treat, or adding a minty twist to your dessert table, these serving suggestions will help you impress.
- Holiday cookie platter: Arrange a mix of snowball cookies with gingerbread and sugar cookies on a festive tray for a colorful dessert spread.
- Hot drink pairing: Serve warm cocoa, peppermint mocha, or a steaming mug of tea alongside these cookies to complement the mint and chocolate.
- Gift-ready packaging: Stack cookies between parchment paper in a decorative tin or cellophane bag, tied with a ribbon for a thoughtful edible gift.
- Ice cream topper: Crumble cookies over vanilla or mint ice cream for added crunch and a burst of mint-chocolate flavor.
Tips For Perfect Mint Chocolate Chip Snowball Cookie
Baking the perfect snowball cookie is all about balance: tender butter, just enough mint, and a light dusting of sugar. Follow these friendly pointers to make sure your cookies come out flawlessly every time.
- These cookies are perfect for the holiday season or any festive occasion.
- Experiment with different types of chocolate chips, such as dark chocolate or white chocolate, for varying flavor profiles.
- The mint flavor can be adjusted by adding more or less mint extract according to personal preference.
- For an added crunch, consider adding finely chopped nuts to the dough.
- Store the cookies in an airtight container at room temperature for up to a week.
How To Store It
Keeping your cookies fresh and flavorful is easy when you follow proper storage methods. Whether you want to enjoy them all week or prep dough in advance, these tips will ensure your Mint Chocolate Chip Snowball Cookies stay just as delightful as the day you baked them.
- Airtight container at room temperature: Once completely cooled, layer cookies between sheets of parchment paper inside a sealed container to keep them tender and prevent sticking.
- Refrigerator storage: For extended freshness up to two weeks, place cookies in an airtight container, then chill. Bring to room temperature before serving and re-dust with powdered sugar.
- Freezing unbaked dough: Freeze shaped dough balls on a tray until solid, then transfer to a freezer bag for up to three months. Bake from frozen, adding 2–3 minutes to the baking time.
- Freezing baked cookies: Store fully baked and cooled cookies in a freezer-safe container for up to three months. Thaw at room temperature and roll in powdered sugar before serving.
Frequently Asked Questions
Got questions? Here are answers to the most common ones:
- Q: How long does it take to prepare and bake these Mint Chocolate Chip Snowball Cookies?
A: The total time is about 30–35 minutes. You’ll spend 10–15 minutes creaming the butter with powdered sugar, adding extracts, combining dry ingredients, and folding in chips and candies. Portioning the dough takes another 5 minutes, and baking is 12–15 minutes. Cooling and the first powdered sugar roll add about 10 minutes more, with an optional extra roll once the cookies are completely cool.
- Q: Why do my cookies look slightly underbaked in the center when I take them out of the oven?
A: These snowball cookies are meant to have a delicate, tender interior. They may appear soft or pale in the center when you remove them, but they continue to set as they cool on the baking sheet. Be careful not to overbake—once the edges begin to turn light golden, they’re ready.
- Q: Can I make the dough ahead of time or freeze the unbaked cookies?
A: Yes. After shaping the dough balls, you can freeze them on a tray until solid, then transfer to a freezer bag for up to 3 months. Bake from frozen, adding a couple of extra minutes to the baking time. You can also freeze baked cookies in an airtight container; when ready to serve, re-roll in powdered sugar for a fresh snowy appearance.
- Q: How can I adjust the mint flavor intensity?
A: Start with the recipe’s 1 teaspoon of mint extract. Taste the dough (a small pinch) if you want more intensity and add by ¼-teaspoon increments, mixing well each time. Remember that too much extract can make the taste medicinal, so add gradually until you reach your ideal minty balance.
- Q: What variations can I try with the chocolate chips and peppermint candies?
A: You can swap mini semi-sweet chips for dark, milk, or white chocolate chips to change the sweetness and richness. If you prefer a smoother texture or a different crunch, omit the crushed peppermint candies or replace them with finely chopped nuts such as pecans or walnuts. You can even swirl in white chocolate drizzle after baking for an extra festive touch.
- Q: How do I achieve the perfect snowy coating on these cookies?
A: Roll the cookies in powdered sugar while they’re still warm so the first layer sticks well. Let them cool completely on a wire rack, then give them a second roll in powdered sugar for an extra “snowy” finish. This double coating ensures a generous, even dusting and a festive presentation.
- Q: What’s the best way to store these cookies so they stay fresh?
A: Store completely cooled cookies in an airtight container at room temperature for up to one week. If you live in a humid climate, place a piece of parchment paper between layers to prevent sticking. You can also refrigerate them for up to two weeks—just let them come to room temperature before serving and refresh with a light sprinkle of powdered sugar if desired.
What Makes This Special
What makes these Mint Chocolate Chip Snowball Cookies so special is the delightful contrast between the tender, buttery dough and the bright, refreshing zing of mint paired with gooey chocolate chips—and of course, that dreamy snowy coating of powdered sugar. They’re easy enough for a beginner yet impressive enough to serve at any festive gathering. Feel free to print or bookmark this guide for later, and don’t hesitate to leave a comment or ask questions if you try the recipe or need a hand. Your feedback and baking stories always make my day!
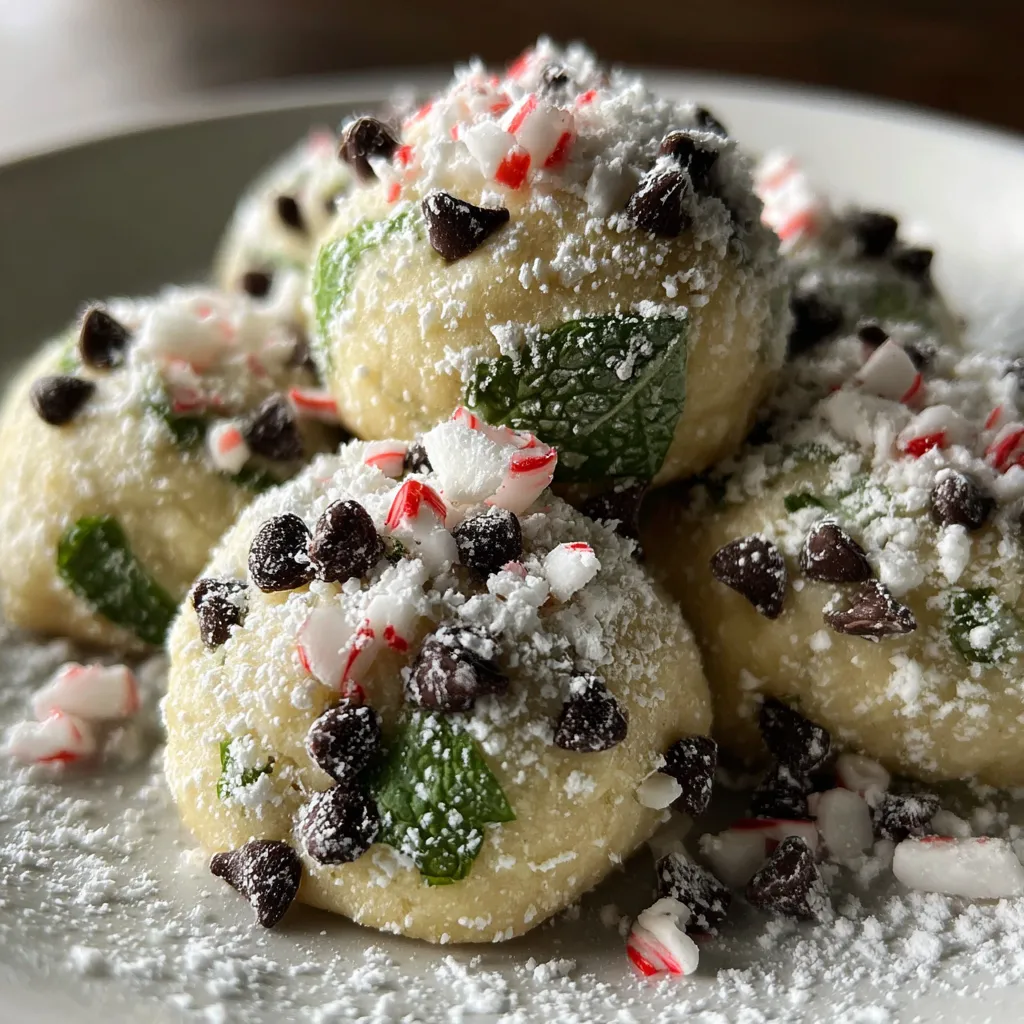

Mint Chocolate Chip Snowball Cookie
Description
A tender, buttery cookie melts on your tongue, releasing a bright mint zing and pockets of gooey chocolate, finished with a snowy dusting of sugar.
Ingredients
Instructions
-
Preheat your oven to 350°F (175°C) and line a baking sheet with parchment paper.
-
In a large mixing bowl, cream the softened butter and powdered sugar together until the mixture is light and fluffy, about 3-4 minutes.
-
Add the vanilla extract and mint extract to the butter-sugar mixture, and mix until well combined.
-
In a separate bowl, whisk together the all-purpose flour and salt. Gradually add the dry ingredients to the wet ingredients, mixing on low speed just until incorporated.
-
Gently fold in the mini chocolate chips and crushed peppermint candies, if using, until evenly distributed in the dough.
-
Using a tablespoon or cookie scoop, portion the dough into small balls (about 1 inch in diameter) and place them on the prepared baking sheet, spacing them about 2 inches apart.
-
Bake the cookies in the preheated oven for 12-15 minutes, or until the edges are lightly golden. The centers may look slightly underbaked but will firm up as they cool.
-
Remove the cookies from the oven and allow them to cool on the baking sheet for about 5 minutes.
-
While the cookies are still warm, roll them in powdered sugar to coat. Allow them to cool completely on a wire rack.
-
Once cooled, give them another roll in powdered sugar if desired for an extra snowy look.
Note
- These cookies are perfect for the holiday season or any festive occasion.
- Experiment with different types of chocolate chips, such as dark chocolate or white chocolate, for varying flavor profiles.
- The mint flavor can be adjusted by adding more or less mint extract according to personal preference.
- For an added crunch, consider adding finely chopped nuts to the dough.
- Store the cookies in an airtight container at room temperature for up to a week.

