

Get ready to level up your snack game with these Garlic Parmesan Cheeseburger Bombs—juicy beef and melty cheddar-Parmesan cheese sealed in golden garlic butter biscuits. Whether you’re hosting a game day party or craving a fun weeknight dinner, these pop-ready bites are easy to prep, bake, and devour. Let’s roll up some serious flavor!
Key Ingredients
Before we start rolling and baking, here’s what you’ll need to build these irresistible bombs:
- 1 pound ground beef: Provides the savory, juicy base for each cheese-stuffed bomb.
- 1 teaspoon garlic powder: Infuses the beef with rich garlic flavor.
- 1 teaspoon onion powder: Adds subtle sweetness and depth.
- 1 teaspoon salt: Enhances all the flavors in the meat mixture.
- 1/2 teaspoon black pepper: Gives a gentle spicy kick.
- 1 cup shredded cheddar cheese: Offers that gooey, melty cheddar goodness inside.
- 1/2 cup grated Parmesan cheese: Brings a nutty, sharp bite to the filling and topping.
- 1 can (8 oz) refrigerated biscuit dough: Acts as the golden, buttery wrapper for the beef and cheese.
- 3 tablespoons unsalted butter, melted: Forms the base of the garlic butter glaze.
- 2 tablespoons fresh parsley, chopped (optional): Adds a bright, herby finish.
- 1 teaspoon garlic, minced: Pairs with melted butter for that irresistible garlic butter brush.
- 1/4 teaspoon salt (for garlic butter mixture): Balances the garlic butter glaze.
- Cooking spray: Prevents sticking and ensures perfectly golden bottoms.
How To Make Garlic Parmesan Cheeseburger Bombs
Ready to assemble these cheesy delights? Follow these step-by-step instructions to transform simple ingredients into bite-sized flavor bombs that are perfect for snacking, sharing, or enjoying as a main course.
1. Preheat and prep: Heat your oven to 375°F (190°C) to ensure an even bake. Lightly grease a baking sheet with cooking spray so the bombs release easily once golden.
2. Season the beef: In a large mixing bowl, combine the ground beef with garlic powder, onion powder, salt, and black pepper. Use clean hands or a spatula to mix until the seasonings are evenly distributed.
3. Form the cheese-stuffed balls: Scoop out about 1–2 tablespoons of the meat mixture and flatten it in your palm into a small patty. Place 1 teaspoon of shredded cheddar and a sprinkle of Parmesan in the center. Fold the meat completely around the cheese, rolling into a smooth ball with no gaps. Repeat with the remaining beef mixture.
4. Prepare the biscuit dough: Open the refrigerated biscuit dough and pull apart the individual biscuits. Press or roll each biscuit into a roughly 4-inch circle for easy wrapping.
5. Wrap the beef balls: Center a meat-and-cheese ball on each dough circle. Draw the edges of the biscuit dough up and around the filling, pinching tightly to seal any openings and prevent leaks during baking.
6. Mix the garlic butter: In a small bowl, whisk together the melted butter, minced garlic, and 1/4 teaspoon salt until well combined.
7. Butter the bombs: Place each wrapped cheeseburger bomb seam-side down on the prepared baking sheet. Generously brush the tops and sides with the garlic butter mixture.
8. Bake to golden perfection: Slide the sheet into your preheated oven and bake for 15–20 minutes, or until the biscuits are puffed and golden brown and the beef is cooked through.
9. Finish and serve: Remove the bombs from the oven, then immediately sprinkle extra Parmesan cheese and chopped parsley over the tops. Let them cool for a few minutes before digging in.
Serving Suggestions
These Garlic Parmesan Cheeseburger Bombs shine on their own, but pairing them thoughtfully makes the experience next-level. Here are a few ideas to elevate your snack spread:
- Serve with creamy ranch dressing for a cool, tangy dip that pairs perfectly with the garlic butter notes.
- Offer warm marinara sauce on the side to echo classic cheese-and-tomato flavors.
- Arrange alongside crispy sweet potato fries for a satisfying mix of textures and sweet-savory contrast.
- Wrap bombs in fresh lettuce leaves for a lighter, lettuce-wrapped “slider” experience that still delivers on crunch.
Tips For Perfect Garlic Parmesan Cheeseburger Bombs
Nailing these bombs is all about sealing in the cheese and getting that perfect golden-brown crust. Keep your hands slightly wet when sealing the dough to avoid sticking, and don’t overfill each bomb. A gentle press into the oven about five minutes in helps keep them uniform. Here are a few more friendly pointers:
- These bombs can be made ahead of time and frozen; just bake them from frozen, adding a few extra minutes to the baking time.
- Experiment with different cheeses or add diced jalapeños for a spicy kick.
- Serve with your favorite dipping sauces, such as ranch or marinara, for added flavor.
- Perfect for game day or as a fun and delicious snack at parties!
How To Store It
Whether you’ve got leftovers or want to prep ahead, proper storage keeps your cheeseburger bombs tasting fresh and delicious. Follow these methods to maintain their texture and flavor:
- Refrigerate cooled, baked bombs in an airtight container for up to 3 days—just reheat in a 350°F (175°C) oven for 8–10 minutes.
- Freeze fully assembled bombs by flash-freezing on a baking sheet, then transferring to a freezer-safe bag for up to 2 months. Bake from frozen at 375°F, adding 5–7 minutes.
- Reheat in the oven at 350°F for the crispiest result, placing bombs on a rack over a baking sheet to avoid sogginess.
- Microwave individual bombs on high for 30–45 seconds if you’re short on time, though the biscuit won’t stay as crisp.
Frequently Asked Questions
Got a quick question? Check out these FAQs for instant answers:
- How long does it take to prepare and bake the Garlic Parmesan Cheeseburger Bombs?
You’ll spend about 15 minutes assembling the beef balls and wrapping them in biscuit dough, plus 5 minutes mixing the garlic butter and preheating the oven. Baking takes 15–20 minutes, so plan for roughly 35–40 minutes total from start to finish.
- Can I make these ahead of time and freeze them?
Absolutely. Prepare the cheeseburger bombs through step 7, then arrange them on a baking sheet and flash-freeze for about an hour. Transfer them to a freezer-safe bag or container. When ready to bake, brush with garlic butter and add a few extra minutes (about 5–7 minutes) to the baking time, baking them straight from frozen at 375°F until golden and cooked through.
- How do I prevent cheese from leaking out during baking?
Make sure each beef patty is fully sealed around the cheese, with no gaps or thin areas. When wrapping the biscuit dough, pinch the edges tightly and smooth them to avoid openings. Baking seam-side down on the sheet also helps keep the filling contained.
- Can I customize the cheeses or add extra ingredients?
Yes. Swap the shredded cheddar for pepper jack, mozzarella, or smoked gouda for varied flavors. You can also stir finely diced onions, bell peppers, or jalapeños into the beef mixture for crunch or heat. Just keep added ingredients finely chopped to ensure the bombs seal properly.
- What are the best dipping sauces to serve with these cheeseburger bombs?
Classic choices include ranch dressing, marinara sauce, or ketchup. For a spicy twist, try chipotle mayo, sriracha aioli, or a tangy barbecue sauce. A creamy garlic dip also complements the buttery, cheesy flavors nicely.
- How should I store leftover bombs, and how do I reheat them?
Store cooled, baked bombs in an airtight container in the refrigerator for up to 3 days. To reheat, place them on a baking sheet in a 350°F oven for 8–10 minutes until heated through and crisp. You can also microwave one on a microwave-safe plate for 30–45 seconds, though the biscuit won’t be as crispy.
- What can I do if my biscuit dough puffs up too much or browns too quickly?
If the dough puffs unevenly, gently press down each bomb about 5 minutes into baking. To prevent over-browning, tent the tray loosely with foil halfway through baking. This will allow the meat to finish cooking without the tops becoming too dark.
What Makes This Special
These Garlic Parmesan Cheeseburger Bombs hit all the right notes—rich beef, melty cheese, and a buttery garlic crust that’s impossible to resist. What makes them stand out is their simplicity: just a handful of pantry staples come together to create a playful, shareable bite that’s perfect for any occasion. Feel free to print and stash this guide in your recipe binder for future snack victories. Have questions, comments, or wild flavor ideas? Drop them below—I love hearing how you customize these tasty treats!
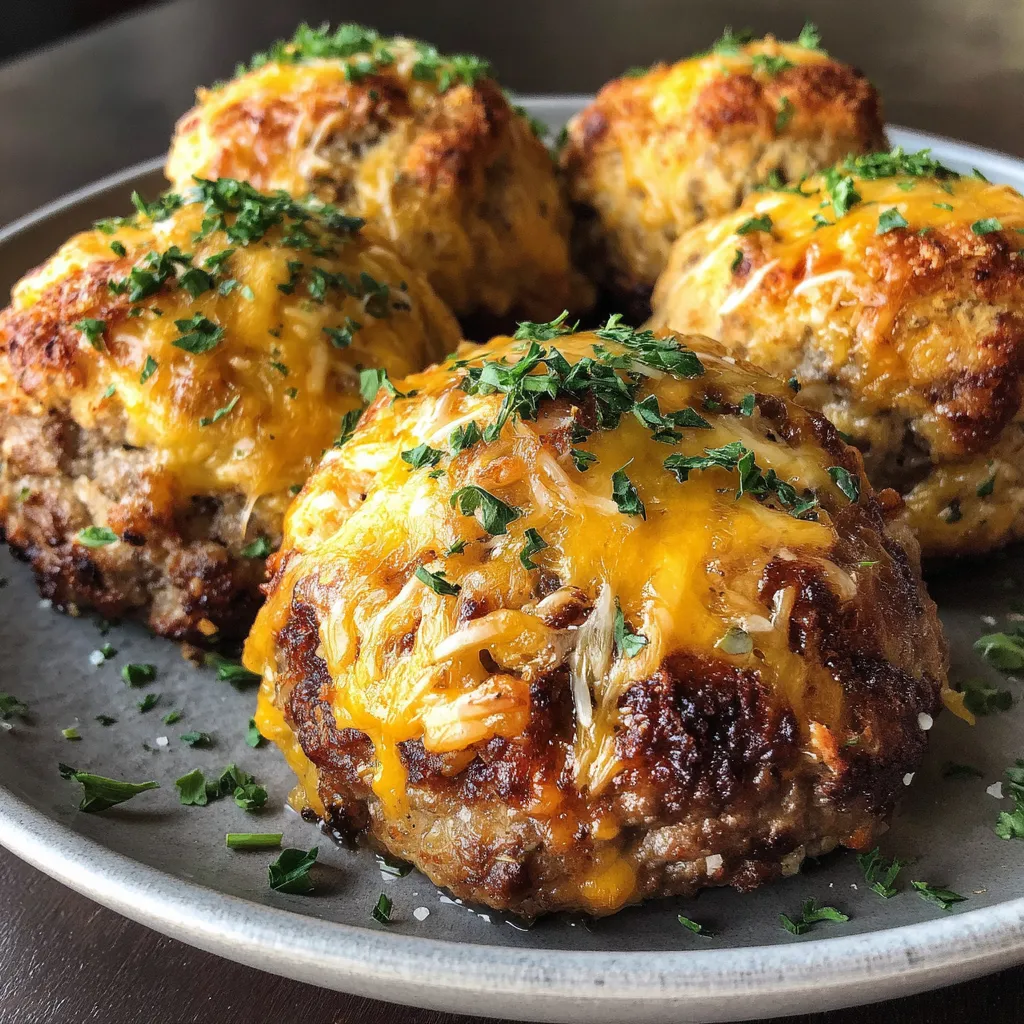

Garlic Parmesan Cheeseburger Bombs
Description
Each bite bursts with seasoned beef, melted cheddar and Parmesan, all sealed in crisp, buttery biscuits brushed with garlic butter. Pop-ready and easy to prep ahead, these bombs jazz up any game day or snack spread.
Ingredients
Instructions
-
Preheat your oven to 375°F (190°C) and lightly grease a baking sheet with cooking spray.
-
In a mixing bowl, combine the ground beef, garlic powder, onion powder, salt, and black pepper. Mix until the seasonings are evenly incorporated into the meat.
-
Take a small portion of the beef mixture (about 1-2 tablespoons) and flatten it in your hand to form a small patty. Place a teaspoon of cheddar cheese and a sprinkle of Parmesan cheese in the center of the patty. Fold the beef around the cheese to form a ball, ensuring the cheese is completely sealed inside. Repeat until all the beef mixture is used.
-
Open the can of refrigerated biscuit dough and separate the biscuits. Flatten each biscuit into a circle about 4 inches in diameter.
-
Place a beef ball in the center of each biscuit circle. Gather the edges of the biscuit dough and pinch them together to seal the beef ball inside. Make sure it is well-sealed to prevent leaks during baking.
-
In a small bowl, combine the melted butter, minced garlic, and 1/4 teaspoon of salt. Mix well.
-
Place the wrapped cheeseburger bombs seam-side down on the prepared baking sheet. Brush the tops with the garlic butter mixture, ensuring they're well-coated.
-
Bake in the preheated oven for 15-20 minutes, or until the biscuit dough is golden brown and the meat is cooked through.
-
Once baked, remove from the oven and sprinkle additional Parmesan cheese and chopped parsley on top, if desired. Allow to cool slightly before serving.
Note
- These bombs can be made ahead of time and frozen; just bake them from frozen, adding a few extra minutes to the baking time.
- Experiment with different cheeses or add diced jalapenos for a spicy kick.
- Serve with your favorite dipping sauces, such as ranch or marinara, for added flavor.
- Perfect for game day or as a fun and delicious snack at parties!

