

Sweet, buttery, and bright—this Honey Glazed Carrots & Green Beans recipe brings together tender-crisp vegetables coated in a shimmering honey-butter glaze, kissed by fresh thyme and a splash of lemon. It’s an easy, beginner-friendly side that transforms humble produce into something special, perfect for weeknight dinners or holiday spreads. Ready to add a pop of color and a burst of flavor to your table? Let’s dive in!
Key Ingredients
Gathering the freshest produce and pantry staples is the first step toward this shimmering side dish. Here’s what you’ll need:
- 1 pound fresh carrots, peeled and cut into 1-inch pieces: Sweet, earthy crunch that soaks up the honey-butter glaze beautifully.
- 1 pound fresh green beans, trimmed: Bright, crisp greenery that adds color and freshness to the dish.
- 3 tablespoons unsalted butter: Rich base for the glaze, bringing smoothness and depth.
- 1/4 cup honey: Natural sweetener that caramelizes into a shiny, syrupy coating.
- 1/4 teaspoon salt: Balances sweetness and enhances the vegetables’ natural flavors.
- 1/4 teaspoon black pepper: Adds a gentle warmth and contrast to the honey glaze.
- 1 teaspoon fresh lemon juice: Lifts the glaze with a zesty, tangy note.
- 1 teaspoon fresh thyme leaves (or 1/2 teaspoon dried thyme): Herbaceous aroma that pairs beautifully with honey.
- Optional garnish: toasted sesame seeds or chopped nuts: Nutty crunch and visual interest for the perfect finishing touch.
How To Make Honey Glazed Carrots & Green Beans
Grab your pot and skillet, and get ready to transform humble veggies into a glistening side dish everyone will ask about. We’ll start by blanching to lock in that perfect tender-crisp bite, then swirl the vegetables through a buttery-honey bath, finishing with fresh thyme and lemon for brightness. Follow these steps carefully to achieve glossy, caramelized goodness in just a few simple moves.
1. Prepare the vegetables: Peel the carrots and chop them into 1-inch pieces, then trim the green beans. Keep the pieces uniform so they cook evenly.
2. Boil the water: Fill a large pot with water, add a pinch of salt, and bring it to a rolling boil.
3. Blanch: Carefully add the carrots and green beans to the boiling water for 4–5 minutes until they’re tender yet still crisp.
4. Shock in ice water: Drain immediately and transfer the veggies into a bowl of ice water to halt the cooking and preserve their bright color; drain well.
5. Make the glaze: In a large skillet over medium heat, melt the butter, then stir in the honey until the mixture bubbles gently.
6. Coat the vegetables: Add the blanched carrots and green beans to the skillet, tossing to cover every piece in the honey-butter glaze.
7. Season and finish: Sprinkle on the salt, black pepper, and thyme, pour in the lemon juice, and toss again to blend the flavors.
8. Caramelize and serve: Cook for another 3–4 minutes, stirring occasionally until the glaze clings and caramelizes. Remove from heat, transfer to a platter, and garnish if desired.
Serving Suggestions
These honey-glazed wonders shine on their own, but pairing them with the right mains and garnishes can elevate your meal to another level. Whether you're feeding a hungry family or hosting friends, these versatile veggies adapt to lots of flavors and presentation styles. Here are four simple yet inspiring ways to serve them:
- Alongside roasted chicken: Nestle the glazed carrots and beans next to golden, herb-roasted chicken breasts for a classic, comforting combo.
- Paired with grilled fish: The sweet glaze and lemon notes complement flaky grilled fish like salmon or cod.
- On a festive platter: Scatter the vegetables around slices of glazed ham or turkey for a holiday-worthy spread.
- Garnished for crunch: Top with toasted sesame seeds or chopped nuts just before serving to add texture and a gourmet touch.
Tips For Perfect Honey Glazed Carrots & Green Beans
Ready to nail every glorious shine on these veggies? A few smart moves can take you from “meh” to “wow!” When you master blanching, glazing, and seasoning, this dish becomes foolproof—no special skills required. Keep these extra pointers in mind as you cook, tweak, and enjoy:
- This dish makes an excellent side for any protein, especially roasted chicken or grilled fish.
- You can add a splash of balsamic vinegar for an additional layer of flavor and tang.
- Experiment by adding other vegetables like bell peppers or snap peas for a colorful medley.
- Leftovers can be stored in an airtight container in the refrigerator for up to three days and reheated gently.
How To Store It
If you happen to have leftovers (though they’re so good, that’s unlikely!), storing this glazed veggie medley properly will keep its flavor and texture intact. A few simple steps will ensure every mouthful stays as delicious as day one, whether you’re meal-prepping for the week or saving extra for tomorrow’s lunch.
- Cool completely: Let the honey-glazed carrots and green beans return to room temperature before packing.
- Use an airtight container: Transfer the cooled veggies into a sealed container to prevent moisture loss.
- Refrigerate up to 3 days: Store in the coldest part of your fridge to maintain freshness.
- Reheat gently: Warm in a skillet over low heat with a teaspoon of butter or splash of water to revive the glaze without drying.
Frequently Asked Questions
Got questions? Here are the answers to common hiccups so you can cook with confidence.
- Q: How do I know when the carrots and green beans are properly blanched?
You’ll know they’re done blanching when the vegetables are tender yet still crisp—usually after 4–5 minutes in boiling water. The carrots should pierce easily with a fork but not be mushy, and the beans should have a bright color and a slight snap when bitten. Immediately transferring them to ice water stops the cooking and preserves that perfect texture.
- Q: Can I use dried thyme instead of fresh thyme, and how much should I use?
Yes, you can substitute dried thyme for fresh. Since dried herbs are more concentrated, use half the amount: about ½ teaspoon dried thyme in place of 1 teaspoon fresh thyme. Add it along with the salt and pepper so it has time to rehydrate and release its flavor in the glaze.
- Q: What can I do to prevent the honey from burning during cooking?
To avoid burning, keep the heat at medium rather than high. Stir the honey and butter continuously as it begins to bubble, and add the vegetables as soon as the mixture is hot enough to coat. If the glaze thickens too quickly or starts to darken excessively, lower the heat and add a splash of water or lemon juice to loosen it.
- Q: How can I customize the flavor profile of this dish?
You can experiment in several ways: add a tablespoon of balsamic vinegar with the lemon juice for tangy depth, sprinkle in a pinch of red pepper flakes at step 6 for heat, or stir in minced garlic or grated ginger with the butter at the start. Tossing in colorful bell pepper strips or snap peas during the last few minutes of cooking also makes a vibrant medley.
- Q: What’s the best way to garnish and serve the honey-glazed vegetables?
For both texture and visual appeal, sprinkle toasted sesame seeds, chopped nuts (like almonds or pistachios), or a few fresh thyme leaves over the finished dish just before serving. Serve hot on a platter alongside roasted chicken, grilled fish, or your favorite protein to complement the sweet and savory glaze.
- Q: How should I store and reheat any leftovers?
Transfer cooled leftovers into an airtight container and refrigerate for up to three days. To reheat, gently warm the vegetables in a skillet over low heat, adding a teaspoon of butter or a splash of water to revive the glaze. Stir occasionally until heated through to avoid drying them out.
- Q: Can I prep any parts of the recipe ahead of time?
Absolutely. You can peel and cut the carrots, trim the green beans, and even blanch them a day ahead—then drain, ice-bath, and store them in the refrigerator. When you’re ready to serve, simply melt the butter, add honey, and proceed with tossing in the prepped vegetables. This trims active cooking time down to under 10 minutes.
What Makes This Special
What’s not to love about these glossy carrots and green beans? They bring together sweet honey, creamy butter, herby thyme, and bright lemon in a single bite—basically a flavor party on your plate. The blanch-and-shock technique locks in that perfect tender-crisp texture, while the simple glaze transforms everyday veggies into something dazzling. Print out this article, stick it on your fridge, and bring this side dish to every gathering. Drop a comment below with your favorite garnish or any questions—I'm here for feedback, high-fives, and recipe tweaks to make your kitchen shine.
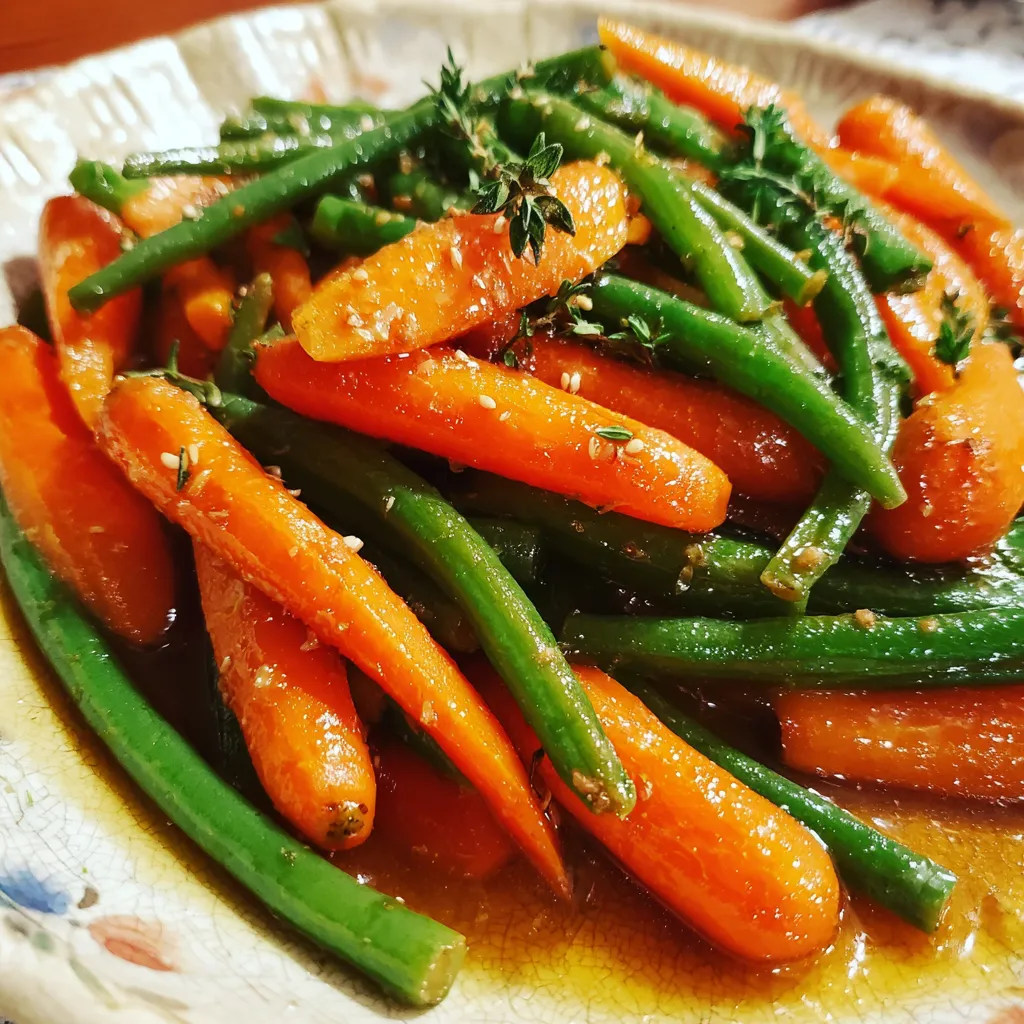

Honey Glazed Carrots & Green Beans
Description
Tender-crisp carrots and green beans glisten with a sweet butter-honey sauce, kissed by fresh thyme and a bright hint of lemon. A sprinkle of toasted sesame seeds adds a nutty crunch to each bite.
Ingredients
Instructions
-
Begin by preparing the vegetables. Peel and cut the carrots into 1-inch pieces, then trim the ends of the green beans. Set both aside.
-
In a large pot, bring water to a boil and add a pinch of salt. Once boiling, add the carrots and green beans to the pot.
-
Blanch the carrots and green beans in the boiling water for about 4-5 minutes, or until they are tender yet still crisp. Drain the vegetables and immediately transfer them to a bowl of ice water to stop the cooking process. After a few minutes, drain the vegetables again and set aside.
-
In a large skillet, melt the unsalted butter over medium heat. Once melted, add the honey to the skillet and stir to combine.
-
After the honey and butter mixture starts to bubble gently, add the blanched carrots and green beans. Toss the vegetables in the glaze until well coated.
-
Sprinkle the salt, black pepper, and fresh thyme over the vegetables. Add the fresh lemon juice and toss again to thoroughly combine all ingredients.
-
Cook for an additional 3-4 minutes, stirring occasionally, until the vegetables are heated through and slightly caramelized.
-
Remove the skillet from heat and transfer the honey-glazed carrots and green beans to a serving platter. If desired, garnish with toasted sesame seeds or chopped nuts for added texture and flavor.
Note
- This dish makes an excellent side for any protein, especially roasted chicken or grilled fish.
- You can add a splash of balsamic vinegar for an additional layer of flavor.
- Experiment by adding other vegetables like bell peppers or snap peas for a colorful medley.
- Leftovers can be stored in an airtight container in the refrigerator for up to three days and reheated gently.

