

Salted Caramel Truffles are the ultimate indulgence for anyone craving a sweet-and-salty pick-me-up. These hand-rolled truffles feature molten salted caramel centers cloaked in rich chocolate and finished with a pinch of sea salt, striking the perfect balance between creamy caramel and glossy shells. Glossy chocolate shells give way to buttery caramel that oozes with a whisper of sea salt, creating a silky explosion in every bite. Whether you’re gifting them or savoring one alongside your afternoon coffee, each bite feels like a tiny piece of dessert heaven.
Key Ingredients
Before you dive into rolling and dipping, make sure you have these simple components on hand for flawless results:
- 1 cup heavy cream: Rich, velvety dairy that helps create a smooth, creamy caramel center.
- 1 cup granulated sugar: Caramelizes into a deep, amber base to sweeten and flavor each truffle.
- 1/4 cup unsalted butter: Adds lush, buttery richness and helps the caramel achieve a silky texture.
- 1/2 teaspoon sea salt (plus extra for garnish): Balances sweetness with a delicate briny note and adds crunch when sprinkled on top.
- 1 teaspoon pure vanilla extract: Infuses warm, aromatic flavor that enhances the caramel’s depth.
- 2 cups semi-sweet chocolate chips: Forms the glossy, sturdy shell that encases the caramel center.
- 1 cup cocoa powder (for coating): Dusts the finished truffles for a rustic, chocolatey finish.
- 2 tablespoons water: Dissolves the sugar and helps control the caramelization process for a smooth syrup.
How To Make Salted Caramel Truffles
Crafting these decadent truffles is a rewarding process that brings together the beautiful alchemy of caramel and chocolate. You’ll begin by creating a perfectly smooth salted caramel, chilling it to the right consistency, and then coating each hand-rolled sphere in melted chocolate before finishing with a dusting of cocoa. With just a bit of patience and attention, you’ll transform pantry staples into elegant treats.
1. In a medium saucepan, combine the granulated sugar and water over medium heat. Stir gently until the sugar fully dissolves, then let it simmer without stirring until it turns a deep amber color, about 10-15 minutes—watch closely to prevent burning.
2. Once the caramel reaches the desired color, carefully add the unsalted butter and heavy cream. It will bubble up vigorously, so be cautious. Stir constantly with a heatproof spatula until the mixture becomes smooth and uniform.
3. Remove the saucepan from the heat and stir in the sea salt and vanilla extract using a whisk. Allow the caramel to cool slightly, then pour it into a bowl and refrigerate for 1-2 hours, or until it firms up but remains pliable.
4. While the caramel chills, melt the semi-sweet chocolate chips in a microwave-safe bowl in 30-second intervals, stirring between each session until the chocolate is completely smooth and glossy.
5. When the caramel is firm, use a small cookie scoop or spoon to form it into bite-sized balls. Place these on a parchment-lined baking sheet and freeze for 15-20 minutes to make dipping easier.
6. Remove the caramel balls from the freezer and dip each one into the melted chocolate, using a fork to help coat them evenly. Gently tap off any excess chocolate and return them to the parchment-lined sheet.
7. While the chocolate is still wet, sprinkle a small pinch of sea salt onto each truffle so it adheres.
8. Allow the truffles to set at room temperature or refrigerate for 10-15 minutes to speed up the process.
9. Once set, roll each truffle in cocoa powder for a final coating, if desired. Store the truffles in an airtight container in the refrigerator until serving.
Serving Suggestions
These Salted Caramel Truffles shine as a luxurious dessert or special treat. Here are a few fun ways to present and enjoy them:
- Simple Dessert Platter: Arrange truffles on a clean white plate or slate board, and add fresh berries or mint sprigs for vibrant contrast.
- Coffee Companion: Pair with a strong espresso or creamy cappuccino—its bitterness cuts through the sweetness beautifully.
- Gift Presentation: Pack truffles in decorative boxes lined with parchment paper for a thoughtful homemade gift.
- Party Favor: Place each truffle in colorful mini cupcake liners and top with an extra pinch of sea salt for festive flair.
Tips For Perfect Salted Caramel Truffles
A few friendly pointers can help you achieve truffle mastery every time. Follow these notes to customize flavors, ensure silky textures, and add your own creative spin:
- Experiment with different flavored extracts such as orange or mint to the caramel.
- Use high-quality chocolate for the best flavor and texture in the truffles.
- Experiment with different coatings like crushed nuts or coconut flakes for a unique touch.
- Salted caramel truffles make an excellent gift when packaged in decorative boxes.
How To Store It
Proper storage ensures your truffles stay fresh, firm, and flavorful. These tips will help you maintain their perfect texture and taste:
- Refrigerate: Place truffles in an airtight container lined with parchment or wax paper to prevent sticking; store for up to two weeks.
- Freeze: Layer truffles between parchment sheets in a sealed container; freeze for up to three months. Thaw in the refrigerator before serving.
- Room Temperature Serving: Remove chilled truffles 10–15 minutes before eating so they soften slightly for an ideal melt-in-your-mouth texture.
- Layer Separation: If stacking truffles, place parchment or wax paper between layers to keep them from merging.
Frequently Asked Questions
Here are answers to the questions readers often have when making these truffles:
- Q: How long does it take to prepare and set the salted caramel truffles?
From start to finish, expect about 2½ to 3 hours. Caramel cooking takes 10–15 minutes, cooling and firming in the refrigerator takes 1–2 hours, freezing the shaped caramel balls takes 15–20 minutes, and dipping plus final setting takes an additional 10–15 minutes.
- Q: How can I tell when the caramel has reached the right stage before adding butter and cream?
The sugar-water mixture should simmer without stirring until it turns a deep amber color, usually in 10–15 minutes. Watch the edges carefully: when the center darkens evenly and gives off a toffee aroma, it’s ready. Avoid stirring to prevent crystallization; gently swirl the pan if needed.
- Q: Why is freezing the caramel balls before dipping important?
Freezing firms up the caramel so it holds its shape when dipped. Cold centers prevent the chocolate coating from sliding off or melting the caramel, ensuring a clean, uniform shell.
- Q: Can I customize the flavor profile or coatings of these truffles?
Absolutely. Stir in ½ teaspoon of orange, mint, or almond extract along with the vanilla in step 3. Instead of cocoa powder, roll the set truffles in crushed nuts, shredded coconut, or colored sprinkles for variety. High-quality chocolate chips yield the best flavor and texture.
- Q: How do I prevent my caramel from crystallizing during cooking?
Begin by dissolving sugar completely in water over medium heat, then avoid stirring once it boils. If you see sugar crystals on the pan sides, brush them down with a wet pastry brush. Gentle swirling distributes heat without promoting crystallization.
- Q: How should I store the finished truffles, and how long will they stay fresh?
Store truffles in an airtight container in the refrigerator for up to two weeks. If you need longer storage, freeze them in a sealed container for up to three months. Before serving, let refrigerated truffles sit at room temperature for 10–15 minutes to soften slightly.
- Q: What can I do if my melted chocolate seizes or becomes grainy during dipping?
Seizing often results from moisture or overheating. Warm the chocolate gently in short microwave intervals, stirring well. If it seizes, stir in a teaspoon of neutral-flavored oil (like vegetable or coconut) to restore a smooth consistency before proceeding with dipping.
What Makes This Special
What elevates these Salted Caramel Truffles from simple sweets to show-stopping treats is that harmonious dance between creamy, buttery caramel and glossy chocolate, all brought together with a playful sprinkle of sea salt. It’s a recipe that works because you’re combining classic techniques—caramelization and tempering chocolate—in a fun, hands-on way. Go ahead and print this article to save for your next kitchen adventure, then let me know in the comments how they turned out or if you have any questions. I can’t wait to hear about your truffle triumphs!
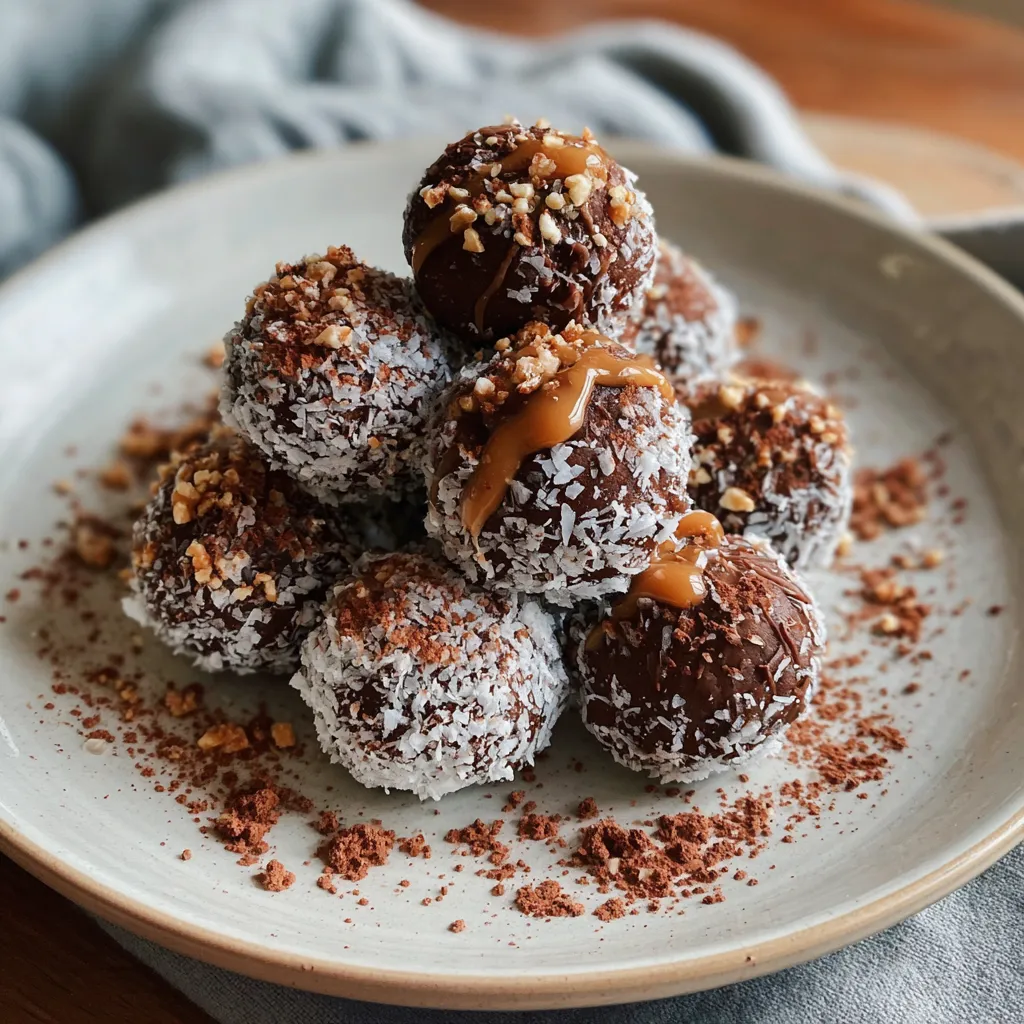

Salted Caramel Truffles
Description
Glossy chocolate shells give way to buttery caramel that oozes with a whisper of sea salt, creating a silky, sweet-and-salty explosion in every bite.
Ingredients
Instructions
-
In a medium saucepan, combine the granulated sugar and water over medium heat. Stir gently until the sugar dissolves, then let it simmer without stirring until it turns a deep amber color, about 10-15 minutes, watching closely to prevent burning.
-
Once the caramel reaches the desired color, carefully add the unsalted butter and heavy cream. It will bubble up, so be cautious. Stir constantly until the mixture is smooth.
-
Remove the saucepan from the heat and stir in the sea salt and vanilla extract. Allow the caramel to cool slightly, then pour it into a bowl. Refrigerate for about 1-2 hours, or until it firms up but is still pliable.
-
While the caramel is chilling, melt the semi-sweet chocolate chips in a microwave-safe bowl in 30-second intervals, stirring in between until smooth.
-
Once the caramel is firm, use a small cookie scoop or spoon to form it into small balls. Place the caramel balls on a parchment-lined baking sheet and freeze for about 15-20 minutes for easier handling.
-
Remove the caramel balls from the freezer and dip each one in the melted chocolate, using a fork to help coat them evenly. Tap off the excess chocolate and place them back on the parchment-lined baking sheet.
-
While the chocolate is still wet, sprinkle a small pinch of sea salt onto each truffle for garnish.
-
Allow the truffles to set at room temperature or refrigerate them for quicker setting, around 10-15 minutes.
-
Once set, roll each truffle in cocoa powder to coat, if desired. Store the truffles in an airtight container in the refrigerator until serving.
Note
- These truffles can be customized by adding different flavored extracts such as orange or mint to the caramel.
- Use high-quality chocolate for the best flavor and texture in the truffles.
- Experiment with different coatings like crushed nuts or coconut flakes for a unique touch.
- Salted caramel truffles make an excellent gift when packaged in decorative boxes.

