

Start your morning with tall, soft pancakes that hold a pillowy texture and golden crust, perfect for syrup-soaked bites. Fluffy Old Fashioned Pancakes mix a warm vanilla-spiked batter into thick, lumpy goodness that yields golden disks, soft centers, and crisp edges. A brief rest puffs them up into airy cakes that melt on the tongue—this beginner-friendly breakfast is bound to become your go-to weekend treat.
Key Ingredients
Before you dive into flipping these beauties, here’s what you’ll need:
- 1 1/2 cups (190 g) all-purpose flour: The base that gives structure to your pancakes and holds all the light, fluffy texture.
- 3 tbsp (40 g) granulated sugar: Adds just the right hint of sweetness and helps browning.
- 1 tbsp baking powder: The main leavening agent that makes your pancakes rise tall and airy.
- 1/2 tsp baking soda: Works with the baking powder to give extra lift and tenderness.
- 1/2 tsp fine salt: Balances sweetness and enhances overall flavor.
- 1 1/4 cups (300 ml) whole milk, at room temperature (plus 1–2 tbsp more if needed): Hydrates the dry ingredients and keeps the batter tender; extra milk adjusts consistency.
- 1 large egg, at room temperature: Binds ingredients together and contributes to a rich, golden color.
- 3 tbsp (45 g) unsalted butter, melted and slightly cooled (plus more for the pan): Adds flavor and moisture; melted butter ensures a smooth, cohesive batter.
- 1 tsp pure vanilla extract: Infuses the batter with a warm, aromatic note.
- Neutral oil or additional butter for greasing the pan: Prevents sticking and creates those beautiful golden edges.
- Maple syrup: Classic topping that seeps into every fluffy layer.
- Fresh berries: Bright, juicy contrast that adds color and freshness.
- Sliced bananas: A creamy, natural sweetness that pairs perfectly with vanilla.
- Whipped cream: Light, airy finish for an extra-special brunch.
- Extra butter: Melts on top for a dreamy, rich mouthfeel.
- Powdered sugar: A dusting of snow-white sweetness to finish your stack.
How To Make Fluffy Old Fashioned Pancakes
With just a few bowls and a hot griddle, you’ll whip up fluffy pancakes in no time. The process is straightforward: combine wet ingredients, mix dry ingredients, fold them together gently, and then let the batter rest to maximize fluffiness. Once your skillet is hot, cooking these pancakes is all about temperature control and timing—bubble formation, a quick flip, and a final golden brown finish.
1. Prepare the wet ingredients: In a medium bowl or large measuring jug, whisk together the room-temperature milk, egg, melted butter, and vanilla extract until smooth and fully combined. Make sure the melted butter is warm—not hot—to avoid cooking the egg.
2. Combine the dry ingredients: In a large mixing bowl, add the flour, sugar, baking powder, baking soda, and salt. Whisk thoroughly so the leavening agents and sugar distribute evenly, preventing clumps and ensuring a uniform rise.
3. Make the batter: Create a well in the center of the dry ingredients, then pour in the wet mixture. Using a spatula or wooden spoon, gently stir just until the flour is mostly incorporated—your batter should be thick and slightly lumpy. If it’s too stiff to pour, fold in 1–2 tablespoons of additional milk until it’s thick but pourable.
4. Rest the batter: Let the mixture sit at room temperature for 5–10 minutes. This rest allows the flour to hydrate and the baking powder to activate, giving you extra-fluffy results.
5. Preheat the pan: Place a large nonstick skillet or griddle over medium heat for 3–5 minutes until evenly hot. Lightly grease with butter or neutral oil, spreading a thin, even layer with a paper towel.
6. Cook the pancakes: Reduce heat to medium-low or medium. Pour about 1/4 cup of batter per pancake onto the skillet, leaving space between each mound. Cook until bubbles form across the surface and edges look set, about 2–3 minutes, then check for a golden-brown underside.
7. Flip and finish cooking: Slide a spatula underneath each pancake and flip quickly but gently. Cook for another 1½–3 minutes, until golden brown on the second side and the center springs back when pressed. Adjust heat if needed to prevent over-browning.
8. Keep pancakes warm: Transfer cooked pancakes to a plate or baking sheet and place in a 200°F (95°C) oven for up to 20 minutes, loosely covered with foil to retain moisture.
9. Repeat with remaining batter: Lightly re-grease the skillet between batches, adjusting heat as necessary for consistent coloring.
10. Serve: Stack warm pancakes on plates, add a pat of butter, and drizzle generously with maple syrup. Top with berries, sliced bananas, whipped cream, or a dusting of powdered sugar, and enjoy immediately.
Serving Suggestions
These Fluffy Old Fashioned Pancakes shine on their own but can be elevated with a few extras. Here are some fun ways to plate and serve them for brunch or a cozy breakfast:
- Layer your pancakes into a tall stack and let syrup cascade down the sides for a classic diner-style presentation.
- Add a handful of fresh berries between each pancake layer for bursts of color and tangy freshness.
- Top the stack with a swirl of whipped cream and a sprinkle of powdered sugar for a café-worthy finish.
- Create a banana foster twist by caramelizing sliced bananas in butter and brown sugar, then spooning them over your warm pancakes.
Tips For Perfect Fluffy Old Fashioned Pancakes
These pancakes are pretty foolproof, but a few insider tricks will take them from great to absolutely irresistible. Below are friendly, practical pointers to boost fluffiness, texture, and flavor—easy tweaks you’ll wish you’d known sooner!
- For extra fluffiness, separate the egg, whip the egg white to soft peaks, and gently fold it into the finished batter just before cooking.
- Buttermilk can replace the milk for a tangier, classic diner-style flavor; if using buttermilk, reduce the baking powder to 2½ teaspoons.
- Avoid pressing down on pancakes with a spatula while cooking; this forces out air and makes them less fluffy.
- Letting the batter rest is key; it helps gluten relax and allows the leavening to start working, producing higher pancakes.
- Batter that is too runny will produce thin pancakes; aim for a thick but pourable consistency that slowly spreads on the pan.
- Leftover pancakes freeze well; cool completely, layer with parchment, and freeze in a bag, then reheat in a toaster or oven.
How To Store It
Keeping your pancake stash fresh and ready for reheating is simple. Whether you’re planning to enjoy leftovers for tomorrow’s breakfast or stocking up for weekend guests, these storage tips will preserve flavor, texture, and that pillow-soft interior.
- Refrigerate: Place cooled pancakes in an airtight container or zip-top bag and store in the fridge for up to 3 days. Reheat gently in a toaster or low oven to refresh the edges.
- Freeze: Lay cooled pancakes flat on a baking sheet, freeze until firm, then stack with parchment between each and seal in a freezer bag. Keep for up to 2 months.
- Reheat from frozen: Pop directly into a toaster, toaster oven, or 350°F (175°C) oven until warmed through—no thawing needed.
- Avoid sogginess: Always let pancakes cool completely before storing and separate layers with parchment to maintain texture.
Frequently Asked Questions
Got questions? Here are quick answers to the most common pancake puzzles:
- How do I know when my pancake batter is the right consistency?
The batter should be thick and slightly lumpy, just thick enough to pour slowly but not so stiff that it holds shape completely. If it feels too dense and doesn’t spread slightly when you pour, fold in 1–2 tablespoons of extra room-temperature milk until it reaches a thick but pourable consistency.
- Why should I let the batter rest before cooking?
Resting the batter for 5–10 minutes at room temperature allows the flour to fully hydrate and gives the baking powder time to activate. This relaxation of gluten and early leavening reaction produces taller, more tender pancakes.
- My pancakes brown too quickly on the outside while the centers remain undercooked. What should I do?
Reduce the heat to medium-low or medium, and allow the pan to reheat evenly. Make sure your skillet has been preheated 3–5 minutes and lightly greased. Cooking on slightly lower heat lets the centers cook through without overbrowning the exterior.
- Can I swap the whole milk for buttermilk or another dairy alternative?
Yes. Using buttermilk adds a tangy flavor and extra tenderness; if you do, reduce baking powder from 1 tablespoon to 2½ teaspoons. For non-dairy alternatives, choose unsweetened almond or oat milk at room temperature and expect a minor change in flavor and rise.
- How can I make these pancakes even fluffier?
Separate the egg, whisk the white to soft peaks, and fold it gently into the finished batter just before cooking. Also, be careful not to overmix the batter—small lumps are fine—and allow the 5–10 minute rest.
- What’s the best way to keep cooked pancakes warm while I finish the batch?
Place cooked pancakes on a baking sheet in a 200°F (95°C) oven for up to 20 minutes. Lightly tent with foil to retain moisture without steaming too much, and adjust the oven rack so the pancakes stay evenly warm.
- How should I store and reheat any leftover pancakes?
Cool completely, then layer with parchment paper in a freezer-safe bag and freeze. To reheat, pop them in a toaster or warm in a 350°F (175°C) oven until hot. Avoid microwaving directly from frozen, as this can make them soggy.
What Makes This Special
Fluffy Old Fashioned Pancakes stand out thanks to their pillowy centers, crisp edges, and that warm vanilla infusion—plus a resting step that truly puffs them up sky-high. This beginner-friendly recipe works every time, whether you’re serving a casual family breakfast or hosting friends for brunch. Feel free to print this guide and save it for later, then come back and let me know how your stacks turned out. Questions, tweaks, or epic topping combos? Drop a comment or reach out—I’d love to hear your pancake triumphs!
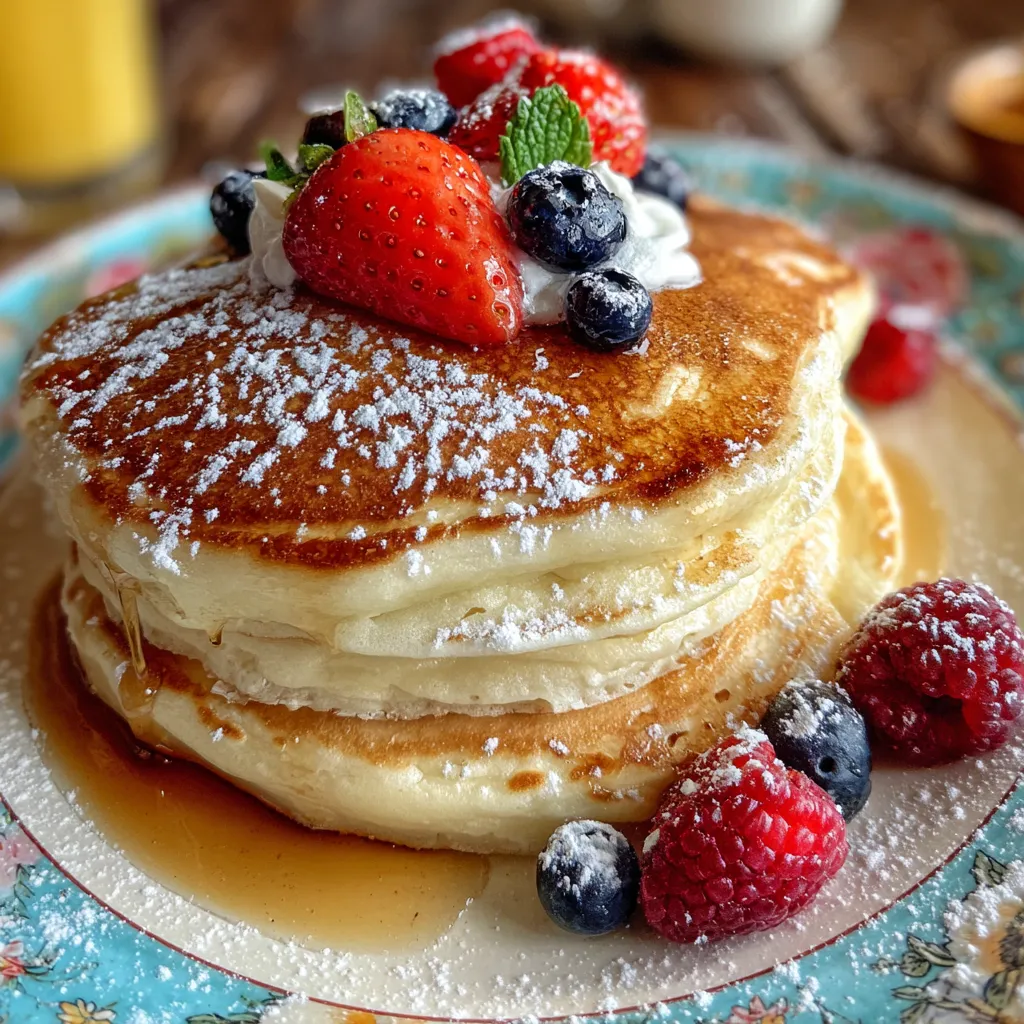

Fluffy Old Fashioned Pancakes
Description
Fluffy Old Fashioned Pancakes mix a warm vanilla-spiked batter into thick, lumpy goodness that yields golden disks, soft centers, and crisp edges. Rested batter puffs up, creating airy cakes that soak up maple syrup and melt on the tongue.
Ingredients
Instructions
-
Prepare the wet ingredients:
-
- In a medium bowl or large measuring jug, whisk together the milk, egg, melted butter, and vanilla extract until smooth and fully combined.
-
- Make sure the melted butter is warm, not hot, so it does not cook the egg.
-
Combine the dry ingredients:
-
- In a large mixing bowl, add the flour, sugar, baking powder, baking soda, and salt.
-
- Whisk thoroughly to evenly distribute the leavening agents and sugar throughout the flour. This helps the pancakes rise evenly and prevents clumps.
-
Make the batter:
-
- Create a well in the center of the dry ingredients.
-
- Pour the wet mixture into the well.
-
- Using a spatula or wooden spoon, gently stir just until the flour is mostly incorporated. The batter should be thick and slightly lumpy; avoid overmixing, as this can make the pancakes tough.
-
- If the batter seems extremely thick (not pourable), add 1–2 tablespoons of additional milk, folding gently until just combined.
-
Rest the batter:
-
- Let the batter rest at room temperature for about 5–10 minutes.
-
- During this time, the flour hydrates and the baking powder begins to activate, which helps create extra fluffy pancakes.
-
Preheat the pan:
-
- Place a large nonstick skillet or griddle over medium heat.
-
- Allow it to heat for about 3–5 minutes until evenly hot.
-
- Lightly grease the surface with a small amount of butter or neutral oil, spreading it with a paper towel so only a thin, even layer remains.
-
Cook the pancakes:
-
- Once the pan is hot, reduce the heat slightly to medium-low or medium, depending on your stove.
-
- For each pancake, pour about 1/4 cup of batter onto the skillet, leaving space between pancakes for spreading.
-
- Do not spread the batter too much; letting it sit in a small mound helps keep the pancakes thick and fluffy.
-
- Cook until bubbles form across the surface and the edges look set and slightly dry, about 2–3 minutes. The underside should be golden brown.
-
Flip and finish cooking:
-
- Carefully slide a spatula under each pancake and flip quickly but gently.
-
- Cook for another 1 1/2–3 minutes, or until the second side is golden brown and the center feels springy when lightly pressed.
-
- If the pancakes are browning too quickly before the center cooks, reduce the heat slightly.
-
Keep pancakes warm:
-
- Transfer cooked pancakes to a plate or a baking sheet.
-
- To keep them warm while you cook the rest, place them in a low oven (around 200°F / 95°C) for up to 20 minutes.
-
- Lightly cover with foil if you want to prevent them from drying out.
-
Repeat with remaining batter:
-
- Lightly regrease the skillet between batches if needed.
-
- Continue cooking pancakes in batches, adjusting the heat as necessary to maintain even browning.
-
Serve:
-
- Stack the warm pancakes on plates.
-
- Top with a pat of butter and drizzle generously with maple syrup.
-
- Add fresh berries, sliced bananas, or whipped cream if desired.
-
- Serve immediately for the best texture and flavor.
Note
- For extra fluffiness, separate the egg, whip the egg white to soft peaks, and gently fold it into the finished batter just before cooking.
- Buttermilk can replace the milk for a tangier, classic diner-style flavor; if using buttermilk, you can slightly reduce the baking powder to 2 1/2 tsp.
- Avoid pressing down on pancakes with a spatula while cooking; this forces out air and makes them less fluffy.
- Letting the batter rest is key; it helps gluten relax and allows the leavening to start working, producing higher pancakes.
- Batter that is too runny will produce thin pancakes; aim for a thick but pourable consistency that slowly spreads on the pan.
- Leftover pancakes freeze well; cool completely, layer with parchment, and freeze in a bag, then reheat in a toaster or oven.

