

Valentine’s Day Blondies are the ultimate sweet treat for sharing love in every bite. These fudgy blondies blend creamy melted butter with brown and granulated sugars, studded with white chocolate chips, then drizzled in vibrant red candy melts and sprinkled with pink sanding sugar. Whether you’re celebrating with someone special or indulging in some solo self-care, these festive bars are incredibly easy to whip up and impossible to resist.
Key Ingredients
Gather these staples before you begin baking:
- 1 cup unsalted butter: Rich, melted base that adds moisture and creates a fudgy texture.
- 1 cup packed brown sugar: Provides deep caramel notes and keeps the blondies chewy.
- 1/2 cup granulated sugar: Balances sweetness and helps achieve a tender crumb.
- 2 large eggs: Binds ingredients together and adds structure to the blondies.
- 2 teaspoons vanilla extract: Infuses warm, aromatic flavor for a classic vanilla undertone.
- 2 cups all-purpose flour: Builds the foundation for structure and ensures the right density.
- 1 teaspoon baking powder: Gives a subtle lift, creating a light, tender interior.
- 1/2 teaspoon salt: Enhances sweetness and balances the overall flavor.
- 1 cup white chocolate chips: Melts into pockets of creamy sweetness throughout each bite.
- 1/2 cup red candy melts: Drizzled on top for a festive pop of color and playful sweetness.
- 2 tablespoons pink sanding sugar (or heart-shaped sprinkles): Adds a romantic sparkle and light crunch.
How To Make Valentine’s Day Blondies
Baking these Valentine’s Day Blondies is a joyful, straightforward adventure that even beginners can rock. You’ll combine melted butter with sugars, whip in eggs and vanilla, then carefully fold in your dry mix for a tender, fudgy batter. White chocolate chips bring creamy pockets throughout, and a final drizzle of candy melts plus a sprinkle of pink sugar transforms each bar into a festive pink delight. Let’s dive into each simple step to achieve perfect results.
1. Preheat the oven to 350°F and line an 8×8-inch baking pan with parchment paper. Position a rack in the center to ensure even heat distribution, and press the paper into the corners for easy removal.
2. Melt the butter in a small saucepan over low heat or in 30-second bursts in the microwave. Stir until fully liquefied, then set aside to cool slightly so it doesn’t cook the eggs.
3. Whisk together the melted butter, brown sugar, and granulated sugar in a large bowl until the mixture is smooth and no sugar granules remain.
4. Beat in the eggs one at a time, mixing well after each addition. Pour in the vanilla extract and stir until fully incorporated, creating a glossy batter.
5. In a separate bowl, combine the all-purpose flour, baking powder, and salt. Whisk to evenly distribute the leavening and salt throughout the flour.
6. Gradually fold the dry ingredients into the wet mixture using a spatula. Mix just until you no longer see streaks of flour—overmixing can make the blondies tough.
7. Stir in the white chocolate chips, ensuring they are evenly dispersed for pockets of creamy sweetness in every bite.
8. Transfer the batter to the prepared pan and use an offset spatula to spread it into an even layer, reaching all corners.
9. Melt the red candy melts slowly in a microwave-safe bowl or over a double boiler, stirring until completely smooth. Drizzle over the batter in a zigzag pattern, then immediately sprinkle the pink sanding sugar or heart-shaped sprinkles on top.
10. Bake for 25 to 30 minutes, or until the edges are golden and a toothpick inserted into the center comes out clean. Rotate the pan halfway through baking for an even golden hue.
11. Cool the blondies completely in the pan on a wire rack. Once set, lift the parchment paper to remove the slab and cut into squares with a sharp knife.
Serving Suggestions
These Valentine’s Day Blondies are delightful on their own, but you can elevate the experience with a few simple touches:
- Warm and gooey: Microwave individual blondies for 10 seconds to revive that fresh-from-the-oven texture.
- With a scoop of vanilla ice cream: The cold creaminess pairs perfectly with the warm, fudgy center.
- Drizzled with extra chocolate: Melt dark or white chocolate and lightly zigzag over each square for an extra layer of indulgence.
- Gift-ready boxes: Stack a few blondies in a small box lined with parchment and tie with a ribbon for a charming edible gift.
Tips For Perfect Valentine’s Day Blondies
Nailing the ideal Blondie is all about simple tricks and careful timing. These tips will keep your bars tender, festive, and absolutely irresistible:
- Use parchment paper for easy removal and clean-up.
- Avoid overmixing the batter to keep the blondies tender.
- Store leftovers in an airtight container at room temperature for up to 3 days.
- Warm individual blondie pieces in the microwave for about 10 seconds before serving for a gooey texture.
How To Store It
Keeping your Valentine’s Day Blondies fresh and delicious is a breeze when you follow these storage tips. Proper storage preserves that fudgy texture and ensures every square tastes as good as the first:
- Room temperature: Once cooled, place blondies in a single layer in an airtight container. They’ll stay fresh for up to 3 days.
- Refrigeration: For extra longevity, seal them in a container and refrigerate for up to 5 days—just let them come to room temperature before serving.
- Freezing: Freeze individual squares on a baking sheet until solid, then transfer to a freezer-safe bag for up to 1 month. Thaw at room temperature or microwave briefly.
- Layering: If stacking blondies, place parchment sheets between layers to prevent sticking and preserve the candy drizzle’s appearance.
Frequently Asked Questions
Here are some quick answers to common questions:
- How long does it take to prepare and bake these Valentine’s Day Blondies?
You’ll need about 10–15 minutes to prep—this includes melting butter, whisking sugars, beating eggs, and folding in flour and chips. Baking takes 25–30 minutes until the edges are golden and a toothpick comes out clean. Allow at least 30 minutes of cooling in the pan on a wire rack before lifting out and cutting. In total, plan for about 1 hour to go from start to finish.
- Can I substitute any ingredients if I don’t have red candy melts or pink sanding sugar?
Yes. If you don’t have red candy melts, melt any color candy wafers or white chocolate tinted with red food coloring. For pink sanding sugar, use heart-shaped sprinkles, colored sugar crystals, or finely chopped freeze-dried raspberries for a natural pink hue. Just sprinkle immediately after drizzling to ensure they stick.
- How do I prevent the blondies from becoming tough or dry?
Avoid overmixing once you add the flour; stir until the dry ingredients are just incorporated. Use room-temperature eggs so they blend smoothly. Don’t exceed the recommended baking time—start checking at 25 minutes. Overbaking draws out moisture and yields dry blondies, so remove them when the center still looks slightly underdone.
- What’s the best way to get an even drizzle of candy melts over the batter?
Melt the candy melts slowly in short bursts in the microwave or over a double boiler, stirring until completely smooth. Transfer the melted candy to a small resealable plastic bag, snip a tiny corner, and pipe a controlled, even drizzle across the surface. Work quickly before the melts begin to set.
- How should I store leftover blondies, and how long do they stay fresh?
Once completely cooled, transfer the blondies to an airtight container and keep them at room temperature for up to 3 days. If you want to extend their life, layer them between sheets of parchment in a freezer-safe container and freeze for up to 1 month. Thaw at room temperature for about 30 minutes before serving.
- Can I bake these in a different size pan, and how will that affect baking time?
You can use a 9×9-inch pan, but your blondies will be thinner and will bake more quickly—start checking at 20 minutes. If you choose a 9×13-inch pan, the blondies will be thicker and need closer to 30–35 minutes. Adjust bake time to keep the edges golden and the center just set.
- How can I cut perfect squares without cracking the blondies or smudging the topping?
After cooling completely, lift the parchment out of the pan and place on a cutting board. Use a sharp chef’s knife and wipe the blade clean between cuts. For cleaner lines, chill the slab in the refrigerator for 15–20 minutes before cutting; the candy drizzle will firm up and reduce smearing.
What Makes This Special
What really sets these Valentine’s Day Blondies apart is their effortless balance of fudgy richness and playful decoration. The tender crumb studded with white chocolate chips melts in your mouth, while the red candy melt swirl and pink sanding sugar give every square a festive pop. They’re wonderfully simple to bake, beginner-friendly, and perfect for gifting or indulging yourself. Print this article, stash it in your recipe binder, and let the love flow—then swing back here to share your thoughts or ask any burning questions. Enjoy the sweetest Valentine’s celebration yet!
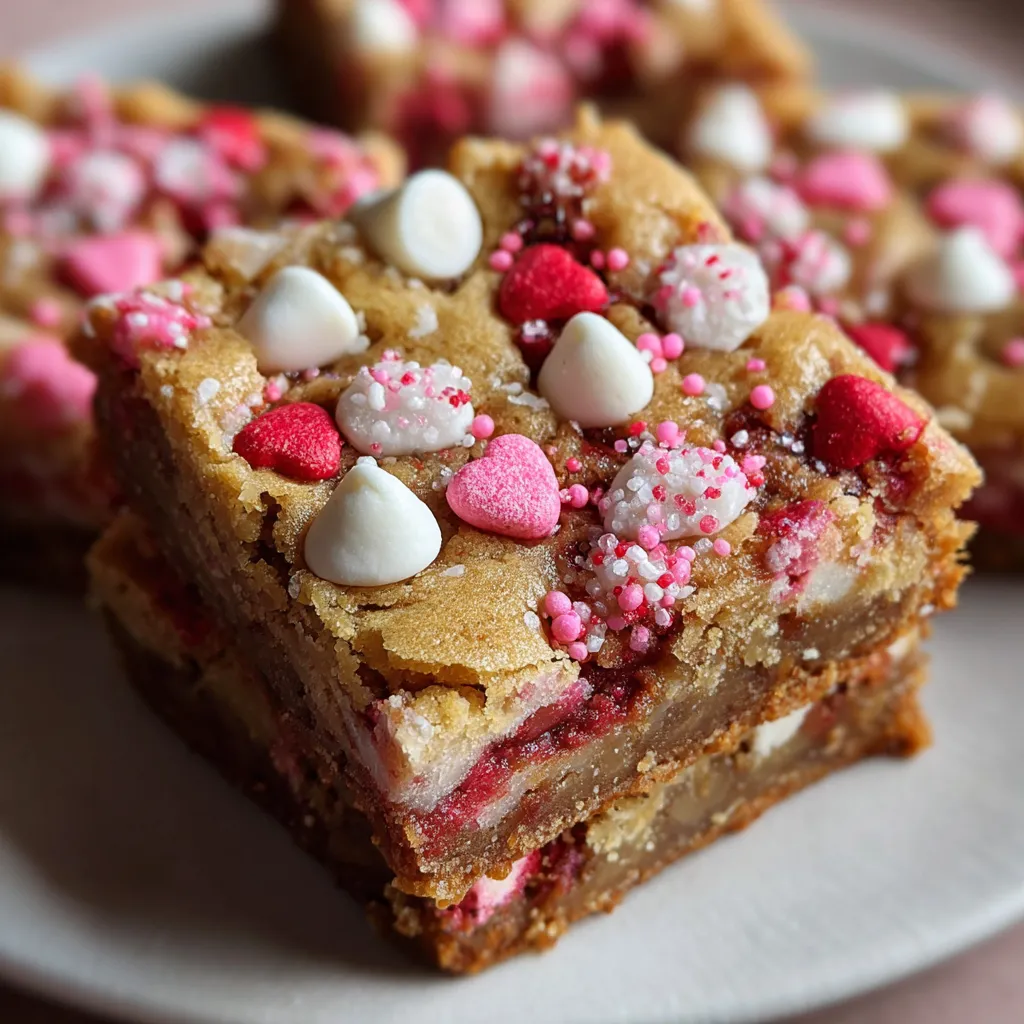

Valentine’s Day Blondies
Description
These blondies blend creamy melted butter with brown and granulated sugars for a tender, fudgy crumb studded with white chocolate chips. A swirl of red candy melts and a sprinkle of pink sugar add a playful Valentine’s twist.
Ingredients
Instructions
-
Preheat the oven to 350°F and line an 8x8-inch baking pan with parchment paper.
-
Melt the butter in a saucepan or microwave-safe bowl and let it cool slightly.
-
Whisk together the melted butter, brown sugar, and granulated sugar until smooth.
-
Beat in the eggs one at a time, followed by the vanilla extract.
-
In a separate bowl, combine the flour, baking powder, and salt.
-
Gradually fold the dry ingredients into the wet mixture until just combined.
-
Stir in the white chocolate chips.
-
Transfer the batter to the prepared pan and spread it evenly.
-
Melt the red candy melts and drizzle them over the batter; sprinkle with pink sanding sugar or heart-shaped sprinkles.
-
Bake for 25 to 30 minutes, or until the edges are golden and a toothpick inserted into the center comes out clean.
-
Cool the blondies completely in the pan on a wire rack before lifting out and cutting into squares.
Note
- Use parchment paper for easy removal and clean-up.
- Avoid overmixing the batter to keep the blondies tender.
- Store leftovers in an airtight container at room temperature for up to 3 days.
- Warm individual blondie pieces in the microwave for about 10 seconds before serving for a gooey texture.

