

Valentine’s Heart Cakes are mini heart-shaped delights bathed in pink glaze and sprinkled with red hearts—perfect for sharing love one sweet bite at a time. Soft, fluffy cakes tinted rosy pink, each crowned with a silky vanilla glaze and playful sprinkles. As you bite in, you’ll taste a tender crumb, a hint of buttermilk tang, and a sweet pop of color—love at first bite. This beginner-friendly dessert is guaranteed to sweeten any celebration with minimal fuss.
Key Ingredients
Before we get baking, let’s look at the simple pantry staples that turn into these adorable Valentine’s Heart Cakes:
- 1 1/2 cups all-purpose flour: Provides the base structure for tender, fluffy cakes by forming the gluten framework.
- 1 teaspoon baking powder: Adds lift to each heart cake, creating a light crumb.
- 1/2 teaspoon baking soda: Works with the buttermilk’s acidity to ensure extra rise and tenderness.
- 1/4 teaspoon salt: Balances sweetness and enhances overall flavor.
- 1/2 cup unsalted butter, softened: Creams with sugar to create air pockets for a light texture.
- 3/4 cup granulated sugar: Sweetens the batter and helps produce a soft, moist cake.
- 2 large eggs: Bind ingredients and add richness to the crumb.
- 1 teaspoon vanilla extract: Infuses warm, fragrant notes in every bite.
- 1/2 cup buttermilk: Contributes tangy moisture and reacts with leaveners for fluffiness.
- 5 drops red food coloring: Tints cakes a romantic pink-red hue.
- 1 cup powdered sugar: Forms the sweet base of the vanilla glaze.
- 2 tablespoons milk: Thins the glaze to the perfect pouring consistency.
- 1/2 teaspoon vanilla extract: Enhances the glaze with smooth, aromatic flavor.
- Red heart sprinkles for decoration: Adds a playful, festive finish to each cake.
How To Make Valentine’s Heart Cakes
Baking these Valentine’s Heart Cakes is a breeze, even for beginners. We’ll walk you through each step—from preheating the oven to glazing and decorating—so you end up with perfectly pink mini hearts bursting with flavor.
1. Preheat the oven to 350°F and grease a heart-shaped mini cake pan. Be sure to coat every nook so the cakes pop out easily.
2. In a medium bowl, whisk together flour, baking powder, baking soda, and salt. Sifting ensures an even mix for consistent rise.
3. In a separate bowl, cream the butter and sugar until light and fluffy. This creaming step traps air for a soft texture.
4. Beat in the eggs one at a time, then stir in the vanilla extract and red food coloring. Ensure each egg is fully incorporated before adding the next.
5. Alternate adding the dry ingredients and buttermilk to the butter mixture, beginning and ending with the dry ingredients. Use gentle folding motions to keep the batter airy.
6. Spoon the batter into the prepared pan, filling each heart shape about two-thirds full. This allows room for the cakes to expand without overflowing.
7. Bake for 12–15 minutes or until a toothpick inserted into the center comes out clean. The edges should be lightly golden.
8. Allow the cakes to cool in the pan for 5 minutes, then transfer to a wire rack to cool completely. Cooling fully prevents the glaze from sliding off.
9. In a small bowl, whisk together powdered sugar, milk, and vanilla extract until smooth. Adjust thickness by adding more milk if needed.
10. Spread or pipe the glaze over the cooled heart cakes and sprinkle with red heart sprinkles. Get creative with piping patterns for extra flair.
Serving Suggestions
These Valentine’s Heart Cakes aren’t just adorable—they’re the perfect little treats to share with someone special. Whether you’re planning a romantic brunch or a Galentine’s gathering, here are some fun ways to serve them up and wow your friends or sweetheart:
- Breakfast treat: Serve alongside a fresh fruit salad and a warm latte for a heartwarming morning surprise.
- Party platter: Arrange on a tiered cake stand with other mini desserts to create a colorful dessert display.
- Gifting idea: Box a few in cellophane bags tied with ribbon for a homemade Valentine’s gift.
- Romantic dessert: Plate with a dollop of whipped cream and a sprinkle of fresh berries for an elegant end to a date-night meal.
Tips For Perfect Valentine’s Heart Cakes
I’ve baked these mini cakes countless times, and a few simple tweaks can make your Valentine’s Heart Cakes shine every time. Keep these friendly tips in mind for the fluffiest crumb, richest color, and a glaze that clings just right.
- Make sure the cakes are completely cool before glazing to prevent the frosting from melting.
- You can substitute buttermilk with regular milk mixed with 1/2 teaspoon of lemon juice.
- Adjust the food coloring amount for deeper or lighter shades of pink or red.
- Store leftover cakes in an airtight container at room temperature for up to 2 days.
How To Store It
After all that baking and decorating, you’ll want these little hearts to last as long as possible without losing their charm. Proper storage keeps the crumb soft, the glaze intact, and the sprinkles in place. Here’s how to keep your Valentine’s Heart Cakes fresh and ready for sweet moments over the next couple of days:
- Room temperature in an airtight container: Store fully cooled and glazed cakes to maintain moisture and prevent the glaze from sweating.
- Avoid refrigeration: Cold air can dry out the crumb and cause the glaze to crack.
- Consume within 2 days: For the best texture and flavor, enjoy these cakes within 48 hours of baking.
- Layer with parchment paper: If stacking cakes, place parchment between layers to protect the glaze and sprinkles.
Frequently Asked Questions
Got questions? Here are answers to the most common queries about Valentine’s Heart Cakes.
- How long does it take to prepare and bake Valentine’s Heart Cakes?
It takes about 10 minutes to mix and assemble the batter, 12–15 minutes to bake, 5 minutes to cool in the pan, and another 10–15 minutes on a wire rack before glazing, for a total of roughly 40–45 minutes.
- How can I tell when the cakes are fully baked?
Insert a toothpick into the center of a heart cake—if it comes out clean or with just a few moist crumbs, the cakes are done. The edges should be lightly golden and the tops should spring back when gently pressed.
- Can I substitute the buttermilk with something else?
Yes. Combine 1/2 cup of regular milk with 1/2 teaspoon of lemon juice or white vinegar, stir gently, and let sit for 5 minutes. This mixture mimics buttermilk’s acidity and will work perfectly in the recipe.
- What’s the best way to achieve a deeper red or pink color?
Add food coloring a drop at a time, mixing thoroughly after each addition until you reach the desired shade. For a deeper red, increase to 8–10 drops of red food coloring; for a softer pink, use just 3–4 drops.
- Do I need to wait for the cakes to cool completely before glazing?
Yes. If the cakes are even slightly warm, the glaze will melt and run off. Allow them to cool completely on the wire rack—about 10–15 minutes—before spreading or piping the glaze.
- How should I store leftover cakes, and how long will they stay fresh?
Place completely cooled and glazed cakes in an airtight container at room temperature. They will stay moist and fresh for up to 2 days. Avoid refrigerating, as this can dry out the cakes.
- Can I prepare the batter or glaze ahead of time?
You can mix the dry ingredients and store them in an airtight bag for a day, and you can prepare the glaze up to 4 hours in advance, covering it tightly to prevent skinning. Combine wet and dry ingredients just before baking for best texture.
What Makes This Special
What makes these Valentine’s Heart Cakes truly magic is how effortlessly they transform simple pantry staples into a pink-hued, tender treat that feels festive and fun. Whether you’re a baking novice or a seasoned pro, the beginner-friendly steps and customizable glaze color let you tailor each mini cake to your heart’s desire. Print this article, save it for your next celebration, and don’t be shy—drop a comment or question below if you try the recipe or need a hand. Love (and cake) awaits!
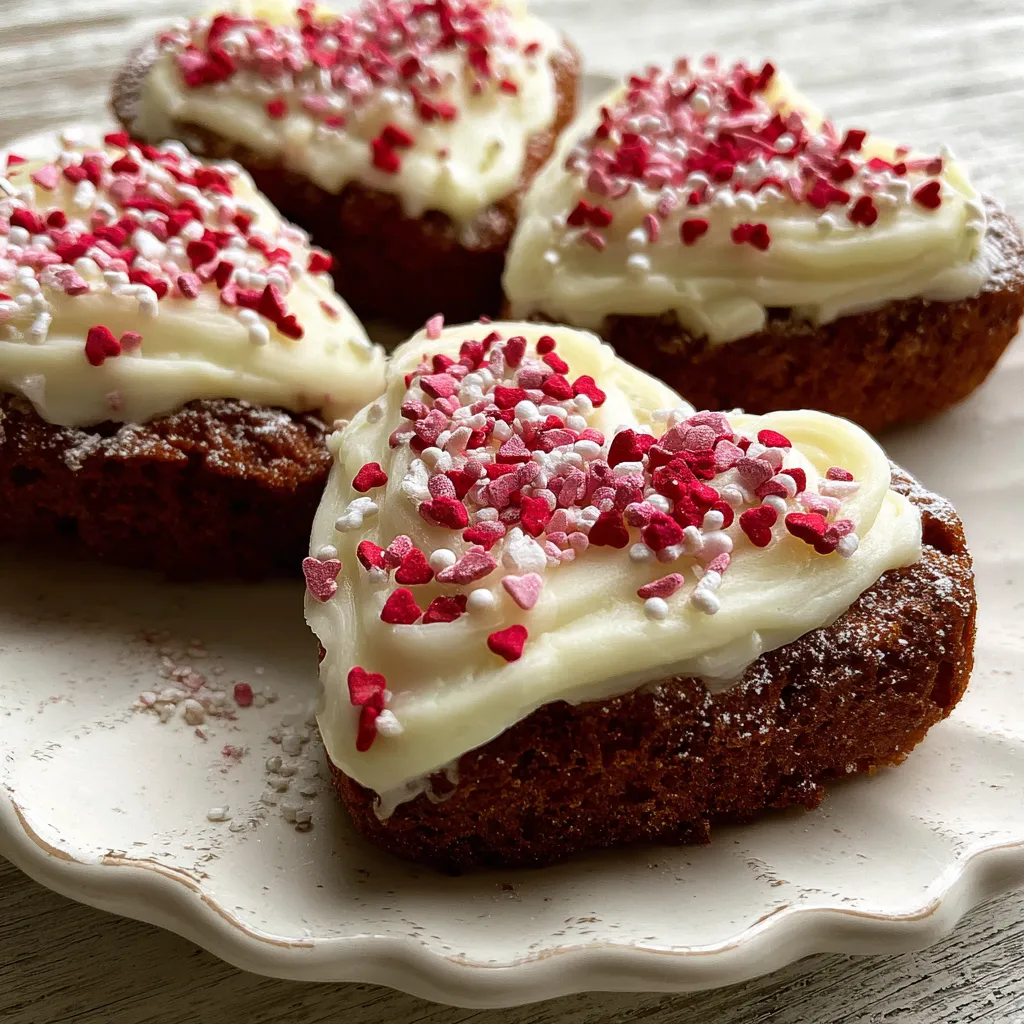

Valentine’s Heart Cakes
Description
Soft, fluffy mini cakes tinted rosy pink, each crowned with a silky vanilla glaze and playful heart sprinkles. As you bite in, you’ll taste tender crumb, a hint of buttermilk tang, and a sweet pop of color—love at first bite.
Ingredients
Instructions
-
Preheat the oven to 350°F and grease a heart-shaped mini cake pan.
-
In a medium bowl, whisk together flour, baking powder, baking soda, and salt.
-
In a separate bowl, cream the butter and sugar until light and fluffy.
-
Beat in the eggs one at a time, then stir in the vanilla extract and red food coloring.
-
Alternate adding the dry ingredients and buttermilk to the butter mixture, beginning and ending with the dry ingredients.
-
Spoon the batter into the prepared pan, filling each heart shape about two-thirds full.
-
Bake for 12–15 minutes or until a toothpick inserted into the center comes out clean.
-
Allow the cakes to cool in the pan for 5 minutes, then transfer to a wire rack to cool completely.
-
In a small bowl, whisk together powdered sugar, milk, and vanilla extract until smooth.
-
Spread or pipe the glaze over the cooled heart cakes and sprinkle with red heart sprinkles.
Note
- Make sure the cakes are completely cool before glazing to prevent the frosting from melting.
- You can substitute buttermilk with regular milk mixed with 1/2 teaspoon of lemon juice.
- Adjust the food coloring amount for deeper or lighter shades of pink or red.
- Store leftover cakes in an airtight container at room temperature for up to 2 days.

