

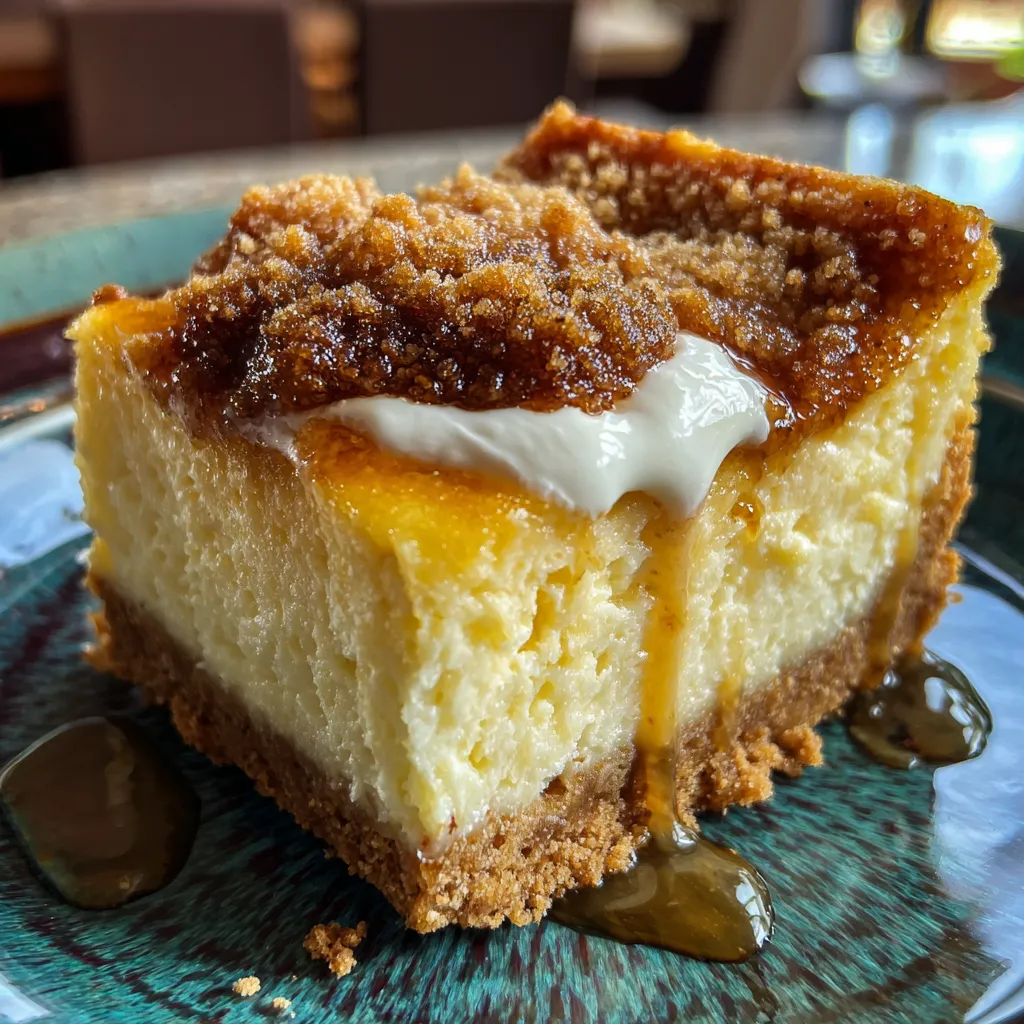
These Gluten-Free Cheesecake Bars deliver a velvety lemon-laced cheesecake filling nestled on a crisp, buttery gluten-free graham crust, offering creamy, tangy bites with every forkful. Whether you’re gluten-free by necessity or just craving a lighter dessert, these bars bring all the indulgence without the gluten. With simple pantry staples and straightforward steps, you’ll be treated to rich cream cheese sweetness and a bright zing of lemon in each bite. It’s an approachable, fun bake that’s perfect for a cozy night in or a cheerful gathering—no fancy equipment required!
Key Ingredients
Pull together the flavors and textures needed to build these bars, starting with a supportive gluten-free crust and culminating in a lush, tangy filling. Here’s everything you’ll need:
- 1 1/2 cups gluten-free graham cracker crumbs: Forms a sturdy, crunchy base that complements the creamy topping.
- 1/4 cup granulated sugar: Balances sweetness in the crust and helps bind the crumbs.
- 1/4 teaspoon salt: Enhances overall flavor and keeps sweetness in check.
- 5 tablespoons unsalted butter melted: Binds crumbs together and adds rich, buttery depth.
- 16 ounces cream cheese softened: Creates a smooth, luscious cheesecake layer.
- 2/3 cup granulated sugar: Sweetens the filling without overpowering the lemon.
- 2 large eggs room temperature: Provides structure and velvety texture when beaten in.
- 1 teaspoon vanilla extract: Adds warm, aromatic notes to the filling.
- 1/2 cup sour cream: Contributes tanginess and extra creaminess.
- 1 tablespoon lemon juice: Infuses the filling with bright, citrusy freshness.
How To Make Gluten-Free Cheesecake Bars
Baking these bars is a straightforward process that involves preparing a crisp crust, whipping up a silky smooth filling, and carefully monitoring your oven to achieve that perfect set with a slight jiggle in the center. With attention to temperature and timing, you’ll end up with cheesecake bars that slice cleanly and deliver balanced texture. Follow each step closely, using room-temperature ingredients for the smoothest batter and letting the bars chill completely before slicing.
1. Preheat the oven to 325°F and line an 8-inch square baking pan with parchment paper, leaving a slight overhang to lift the bars out easily.
2. In a medium bowl, combine the gluten-free graham cracker crumbs, 1/4 cup granulated sugar, 1/4 teaspoon salt, and melted butter until evenly moistened and resembling wet sand.
3. Press the crumb mixture firmly into the bottom of the prepared pan using the bottom of a measuring cup and bake for 10 minutes; remove and let cool slightly to prevent the filling from sliding.
4. In a large bowl, beat the softened cream cheese and 2/3 cup granulated sugar on medium speed until smooth, creamy, and free of lumps.
5. Add the eggs one at a time, mixing well after each addition to ensure a homogeneous batter without overbeating.
6. Gently fold in the vanilla extract, sour cream, and lemon juice until fully incorporated and the mixture is silky.
7. Pour the cheesecake filling over the cooled crust and spread into an even layer with a spatula to promote uniform baking.
8. Bake for 30 to 35 minutes or until the edges appear set and the center jiggles slightly when you gently shake the pan—this ensures a creamy interior.
9. Allow the bars to cool to room temperature on a wire rack, then refrigerate for at least 3 hours before slicing to achieve clean edges.
Serving Suggestions
These cheesecake bars shine on their own but can be dressed up in countless ways to delight any crowd. Here are four tasty ideas to make each serving feel extra special:
- Top with fresh berries like strawberries or blueberries for a pop of color and a sweet-tart counterpoint.
- Add a dollop of whipped cream and a sprinkle of lemon zest to enhance the creamy, citrus flavors.
- Drizzle with a simple lemon glaze (powdered sugar mixed with lemon juice) for added brightness and shine.
- Pair with a cup of espresso or herbal tea to balance the richness and cleanse the palate.
Tips For Perfect Gluten-Free Cheesecake Bars
Achieving flawless, creamy, and delicious cheesecake bars is all about attention to detail—and I’ve got your back with these insider pointers based on my own kitchen experiments. Keep things relaxed, prep your ingredients in advance, and watch the clock, not your stress levels.
- Use full-fat cream cheese for the creamiest texture.
- Ensure all ingredients are at room temperature to prevent lumps and achieve a glossy batter.
- Chill the bars completely to achieve clean, even slices every time.
- Store leftovers in an airtight container in the refrigerator for up to 4 days to preserve freshness and flavor.
How To Store It
Once you’ve enjoyed a slice or two of these cheesecake bars, proper storage is key to preserving their creamy texture and bright flavor. Whether you’re saving them for later or prepping ahead for a party, these methods will keep them at their best:
- Airtight container in the refrigerator: Place fully cooled bars in a single layer, cover tightly, and enjoy within 4 days.
- Parchment paper separators: If stacking slices, layer with strips of parchment paper to prevent sticking.
- Freezing single layers: Arrange bars on a baking sheet, freeze until firm, then transfer to a freezer-safe bag for up to 1 month.
- Thaw slowly: Move frozen bars to the fridge overnight to prevent condensation and maintain that silky consistency.
Frequently Asked Questions
Curious about the secrets behind these cheesecake bars? Here are answers to the most common queries:
- How can I ensure my crust is compact and holds together well?
After combining the gluten-free graham cracker crumbs, sugar, salt, and melted butter until evenly moistened, press the mixture firmly and evenly into the bottom of the lined 8-inch square pan using the flat bottom of a measuring cup or glass. Baking it for ten minutes helps the crust set, and letting it cool slightly prevents the filling from disturbing the compact layer.
- How can I tell when the cheesecake filling is perfectly baked without overbaking?
The edges should look set and the center should still have a slight jiggle when you gently shake the pan. That wobble means the filling will finish cooking as it cools. Start checking around thirty minutes to avoid overbaking, which can lead to cracks and a dry texture.
- Why is it important to have all ingredients at room temperature, and how do I bring them to the correct temperature?
Room-temperature cream cheese, eggs, and sour cream blend into a smooth, lump-free batter. Let cream cheese sit at room temperature for about thirty to sixty minutes, and place eggs in a bowl of warm water for five minutes before using. This ensures even mixing without overheating any ingredient in the microwave.
- Why should I refrigerate the bars for at least three hours before slicing, and what happens if I skip this step?
Chilling allows the filling to firm up completely and yields clean, even slices. If you cut the bars too early, they will be soft, may crumble or stick to the knife, and you’ll get uneven portions.
- How should I store leftovers to maintain freshness, and how long will they keep?
Transfer completely cooled and sliced bars to an airtight container and refrigerate. They will stay fresh for up to four days. To prevent sticking, place parchment paper between layers if you need to stack slices.
- What common causes lead to cracks on top of cheesecake bars, and how can I prevent them?
Cracks often result from overmixing, baking at too high a temperature, or cooling too quickly. Mix the batter just until smooth, bake at the recommended temperature, and allow the bars to cool gradually—first in the turned-off oven with the door slightly ajar before transferring to the refrigerator.
- Can I use a different size pan if I don’t have an 8-inch square pan?
You can use a 9-inch square or similar pan, but the bars will be thinner and bake slightly faster—start checking for doneness about five minutes early. If you choose a smaller pan, expect thicker bars and add extra baking time. Maintain the same depth of crust and filling for best results.
What Makes This Special
These Gluten-Free Cheesecake Bars hit the sweet spot between tangy lemon brightness and rich, creamy cheesiness, all on a satisfying crisp crust—no gluten needed! The balance of textures, from the buttery base to the velvety filling, is what makes these bars shine at parties or quiet weeknight treats. Plus, they’re straightforward enough for intermediate bakers looking to impress without stress. Feel free to print and stash this recipe for later so you can whip up a batch whenever the craving strikes. Let me know how they turn out, share your tweaks, or drop any questions below!

Gluten-Free Cheesecake Bars
Description
Picture sinking your fork into a cool, creamy cheesecake layer spiked with bright lemon, set atop a golden gluten-free graham base that crumbles perfectly with each bite.
Ingredients
Instructions
-
Preheat the oven to 325°F and line an 8-inch square baking pan with parchment paper.
-
In a bowl combine the graham cracker crumbs sugar salt and melted butter until the mixture is evenly moistened.
-
Press the crumb mixture firmly into the bottom of the prepared pan and bake for 10 minutes then remove and let cool slightly.
-
In a large bowl beat the softened cream cheese and 2/3 cup granulated sugar until smooth and creamy.
-
Add the eggs one at a time beating well after each addition to ensure a smooth batter.
-
Mix in the vanilla extract sour cream and lemon juice until fully incorporated.
-
Pour the cheesecake filling over the cooled crust and spread into an even layer.
-
Bake for 30 to 35 minutes or until the edges are set and the center still jiggles slightly.
-
Allow the bars to cool to room temperature then refrigerate for at least 3 hours before slicing.
Note
- Use full-fat cream cheese for the creamiest texture.
- Ensure all ingredients are at room temperature to prevent lumps.
- Chill the bars completely to achieve clean even slices.
- Store leftovers in an airtight container in the refrigerator for up to 4 days.

