

Iced Creamy Vanilla Dirty Sodas are the perfect way to elevate your summer sipping game. This bubble-kissed vanilla cream float that dances over ice brings together effervescent club soda and a velvety vanilla cream layer for a playful contrast of cold bubbles and rich sweetness in every straw-swirled sip. Whether you’re lounging on the porch or hosting a backyard get-together, this beginner-friendly treat will have everyone coming back for just one more bubbly mouthful.
Key Ingredients
Before we get started, let’s round up the simple elements that make this treat shine. Each component plays a crucial role in balancing fizz, sweetness, and creaminess.
- 1 cup ice cubes: chills the drink and creates a frosty base.
- 1/2 cup club soda: provides a neutral bubbly canvas for vanilla flavor.
- 2 tablespoons vanilla syrup: sweetens the soda and infuses every sip with vanilla warmth.
- 1/4 cup heavy cream: adds a rich, silky layer that gently floats on top.
- 1 tablespoon half-and-half: lightens the cream for a smoother pour and texture.
- 1 teaspoon pure vanilla extract: intensifies the vanilla aroma and undertone.
How To Make Iced Creamy Vanilla Dirty Sodas
Ready to dive into layers of fizz and cream? These steps will guide you through assembling your drink so each sip reveals that playful contrast of bubbly soda and dreamy vanilla cream. With simple techniques like gentle stirring and careful pouring, you’ll achieve that signature layered effect every time.
1. Fill a tall glass with ice cubes. Make sure to pack it evenly so the layers have a sturdy foundation.
2. Pour vanilla syrup and vanilla extract over the ice. This ensures the rich vanilla flavor infuses from the bottom up.
3. Slowly add club soda to the glass. Pour against the ice to preserve carbonation and minimize spills.
4. Stir gently to combine the syrup and soda. Use a bar spoon or straw, keeping the motion light to maintain fizz.
5. In a small bowl whisk heavy cream and half-and-half until slightly thickened. Aim for soft peaks that still flow smoothly.
6. Carefully pour the cream mixture over the soda to create a layered effect. Tilt the glass slightly and pour over the back of a spoon for best results.
7. Serve immediately with a straw and enjoy. Sip from the bottom to invite the creamy layer upward with each bubble.
Serving Suggestions
When it comes to presenting these Iced Creamy Vanilla Dirty Sodas, a little flair goes a long way. Show off the layers and bring out their best features with these fun ideas.
- Dress up your glass with a vanilla bean pod on the rim to highlight the flavor theme.
- Garnish with a swirl of whipped cream and a light dusting of vanilla powder for extra indulgence.
- Slide in a striped paper straw in pastel colors to complement the creamy-white contrast.
- Serve on a chilled coaster or marble slab to keep the drink icy cold longer.
Tips For Perfect Iced Creamy Vanilla Dirty Sodas
A few insider tricks will take your dirty soda from good to absolutely show-stopping. Follow these friendly tips and you’ll nail each layer, sweetness level, and texture every time you mix up a batch.
- Use full-fat heavy cream for a richer texture
- Adjust the vanilla syrup for desired sweetness
- Gently stir to maintain the creamy layer on top
- Best enjoyed immediately while bubbly
How To Store It
While these Iced Creamy Vanilla Dirty Sodas are best enjoyed right away, you can prep components in advance to save time without losing flavor or fizz.
- Refrigerator Storage: Keep any unused cream mixture in a sealed jar for up to 1 hour, whisking lightly before use.
- Separate Cream: Store the soda and syrup blend in a chilled pitcher for up to 30 minutes; add ice fresh when ready to serve.
- Use Airtight Containers: Prevent flavor absorption by sealing club soda tightly if you need to prep ahead.
- Serve Within Minutes: For peak bubbly effect, assemble and drink within 5–10 minutes of combining ingredients.
Frequently Asked Questions
Got questions? Here are some bubbly answers to help you master every layer and sip.
- How can I achieve the distinct layered look in this drink?
A: The key is to pour the whisked cream mixture slowly over the back of a spoon held just above the soda layer. This slows the cream’s descent and keeps it from mixing immediately, creating a visible cream layer on top of the bubbly soda.
- Can I prepare the cream mixture ahead of time?
A: You can whisk the heavy cream and half-and-half up to 1 hour in advance and keep it chilled in the refrigerator. Just give it a quick re-whisk before pouring to restore its slight thickness and ensure it pours smoothly.
- What can I use if I don’t have vanilla syrup on hand?
A: Combine 2 tablespoons of simple syrup (equal parts sugar and water heated until dissolved) with an additional ½ teaspoon of pure vanilla extract. This approximates the sweetness and vanilla flavor of a commercial vanilla syrup.
- How can I adjust the sweetness level?
A: To make it less sweet, reduce the vanilla syrup by a half tablespoon or substitute half the syrup with plain simple syrup. For a sweeter taste, add up to an extra tablespoon of vanilla syrup, tasting as you go to avoid overpowering the drink.
- Is it possible to use a different type of soda?
A: Yes. While club soda offers a neutral bubbly base, you can substitute chilled sparkling water for a milder fizz or lemon-lime soda for a citrus twist. Adjust the vanilla syrup slightly if the alternative soda is already sweetened.
- Why is it important to stir gently after adding the soda?
A: Gentle stirring combines the vanilla syrup and soda without causing excessive fizzing or deflating the bubbles. Vigorously stirring will break down carbonation faster and prevent you from achieving that light, effervescent texture.
- How long will the drink stay bubbly and fresh?
A: For optimal fizz, serve immediately after assembly. The carbonation begins to fade after about 5–10 minutes, and the creamy layer will slowly blend into the soda. Enjoy within 5 minutes for the best bubbly and visual experience.
What Makes This Special
This Iced Creamy Vanilla Dirty Soda truly stands out thanks to its playful layers of vibrant bubbles and lush vanilla cream that surprise your taste buds with every sip. Its beginner-friendly approach means you don’t need fancy tools—just a glass, a spoon, and a spirit of summer fun. Feel free to print this article and save it for poolside lounging or sweet snack time. If you whip up a batch, drop a comment below or ask any questions—you know I love hearing how your fizzy creations turn out!
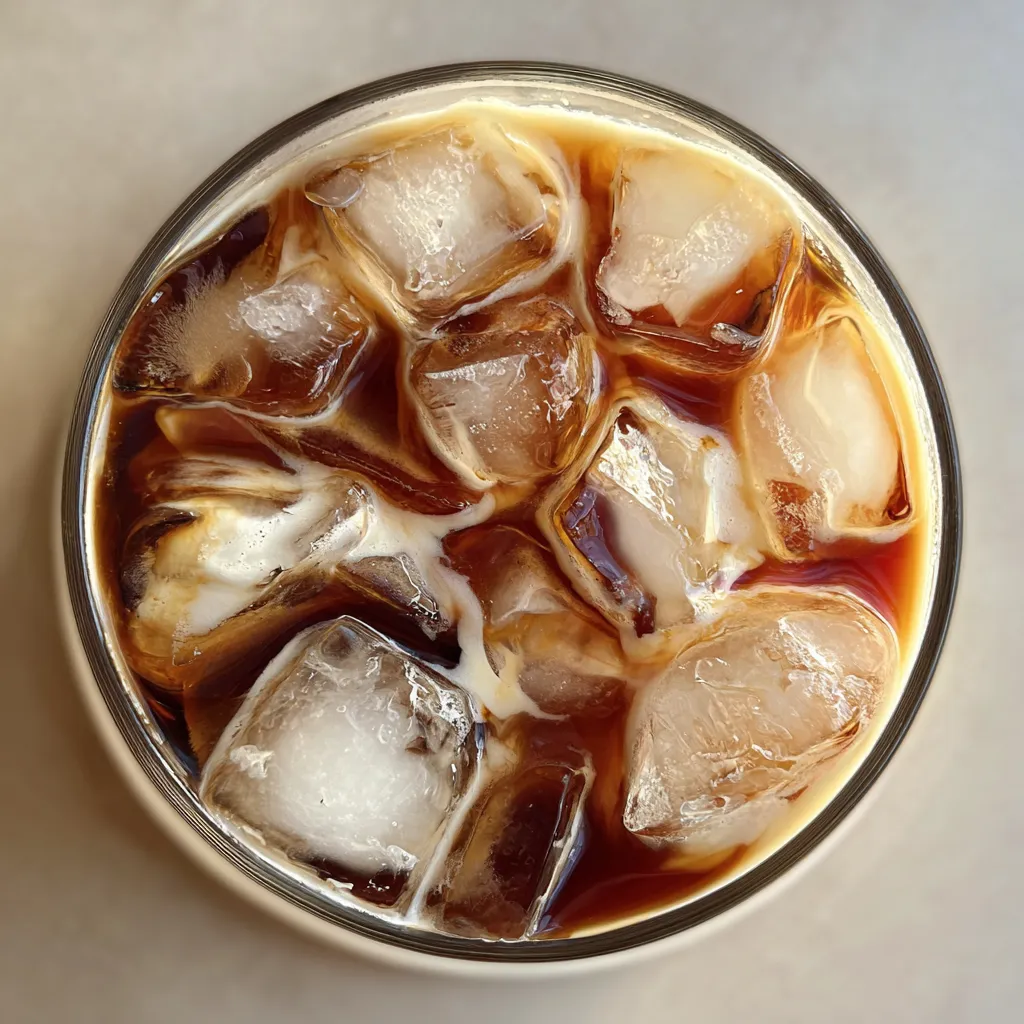

Iced Creamy Vanilla Dirty Sodas
Description
Chilled soda fizzes against a velvety vanilla cream layer, offering a playful contrast of cold bubbles and rich sweetness in every straw-swirled sip.
Ingredients
Instructions
-
Fill a tall glass with ice cubes.
-
Pour vanilla syrup and vanilla extract over the ice.
-
Slowly add club soda to the glass.
-
Stir gently to combine the syrup and soda.
-
In a small bowl whisk heavy cream and half-and-half until slightly thickened.
-
Carefully pour the cream mixture over the soda to create a layered effect.
-
Serve immediately with a straw and enjoy.
Note
- Use full-fat heavy cream for a richer texture
- Adjust the vanilla syrup for desired sweetness
- Gently stir to maintain the creamy layer on top
- Best enjoyed immediately while bubbly

