

Craving a zesty treat without heating up your kitchen? No-Bake Mini Key Lime Pie delivers sweet and tangy flavor in every bite, all without firing up the oven. With a buttery graham cracker crust cradling a creamy key lime filling whipped to fluffy perfection, these individual pies are as fun to make as they are to devour. Whether you’re hosting a backyard gathering or need a quick dessert idea, this recipe will brighten any occasion and leave you reaching for seconds (and thirds!).
Key Ingredients
Gather these simple ingredients, and you'll have everything needed to whip up your No-Bake Mini Key Lime Pie with ease.
- 1 cup graham cracker crumbs: Crunchy base for the mini crusts that holds all the tangy goodness together.
- 2 tablespoon granulated sugar: Balances sweetness in the crust and helps bind the crumbs when mixed with butter.
- 3 tablespoon melted unsalted butter: Moistens the crumbs and sets the foundation for a sturdy crust.
- 14 ounce sweetened condensed milk: Provides the rich, creamy sweetness that forms the body of the lime filling.
- 1/2 cup key lime juice: Delivers bright, tart citrus flavor that defines the classic key lime pie taste.
- 1 teaspoon lime zest: Adds an extra pop of zippy flavor throughout the filling.
- 1 teaspoon vanilla extract: Enhances the overall sweetness and depth of the lime mixture.
- 1 cup chilled heavy cream: Whipped into soft peaks for a light, airy texture in the filling.
- 2 tablespoon powdered sugar: Sweetens and stabilizes the whipped cream for smooth incorporation.
- 1 teaspoon additional lime zest for garnish: Finishing touch that adds color and an extra burst of citrus aroma.
How To Make No-Bake Mini Key Lime Pie
Ready to transform these pantry staples into perfect mini pies? This step-by-step guide will walk you through creating crisp crusts, mixing a tangy-sweet filling, and folding in fluffy whipped cream for that irresistible texture. Follow these detailed instructions, and you’ll have six adorable mini pies set and ready to impress in no time.
1. In a bowl combine graham cracker crumbs and granulated sugar.
Place the graham cracker crumbs and granulated sugar in a medium mixing bowl, then stir with a spoon until the mixture is evenly blended.
2. Stir in melted unsalted butter until mixture is evenly moistened and press into the bottom of six paper-lined muffin cups to form crusts.
Pour in the melted unsalted butter, mix until every crumb is coated, then firmly press the mixture into the bottoms of six paper-lined muffin cups to create uniform crusts.
3. Refrigerate crusts for at least 15 minutes to firm up.
Chill the lined muffin cups in the refrigerator for at least 15 minutes, allowing the butter to solidify and hold the crust shape.
4. In a separate bowl whisk together sweetened condensed milk, key lime juice, lime zest, and vanilla extract until smooth.
Combine sweetened condensed milk, key lime juice, lime zest, and vanilla extract in a clean bowl, and whisk vigorously until the mixture is silky and well blended.
5. In another chilled bowl beat heavy cream and powdered sugar until stiff peaks form.
Using a chilled mixing bowl and beaters, whip the heavy cream with the powdered sugar until you see stiff peaks that hold their shape when the whisk is lifted.
6. Gently fold whipped cream into the lime mixture until fully incorporated.
Add the whipped cream to the lime base and use a rubber spatula to fold gently until the mixture is uniform and light.
7. Divide the filling evenly among the chilled crusts and smooth the tops with a spoon.
Spoon or pipe the filling into each crust-lined cup, then smooth the surface with the back of the spoon for a neat finish.
8. Refrigerate the mini pies for at least 2 hours or until the filling is set.
Return the filled pies to the fridge and chill for a minimum of 2 hours, ensuring the filling firms up properly.
9. Just before serving, sprinkle additional lime zest on top of each mini pie.
Right before you serve, grate the additional lime zest over the tops to add a fresh, decorative pop of color and flavor.
Serving Suggestions
Once these little beauties are set, you can really make them shine on the dessert table. Here are a few ideas to elevate your presentation and delight your guests.
- Top each mini pie with a fresh mint sprig for a pop of color and an herbal fragrance that complements the lime.
- Dust a light layer of powdered sugar around the serving plate to create an elegant, snow-dusted effect.
- Serve alongside a scoop of vanilla bean ice cream for extra creaminess and contrast in temperature.
- Arrange on a tiered dessert stand with small decorative labels so guests can admire their citrusy charm.
Tips For Perfect No-Bake Mini Key Lime Pie
Nailing the balance between creamy sweetness and zesty tang is easier than you think. With a few friendly pointers, your mini pies will come out flawlessly every time.
- Use fresh key lime juice and zest for the brightest flavor
- Prepare the pies a day ahead and store in the fridge for a stress-free dessert
- Regular limes can be substituted if key limes are unavailable
- Store any leftovers in an airtight container in the refrigerator for up to 3 days
How To Store It
Proper storage keeps these pies as zesty and creamy as the day you made them. Whether you need to stash leftovers or prep ahead for a party, follow these methods to maintain top quality.
- Airtight Refrigeration: Transfer cooled pies to an airtight container and refrigerate for up to 3 days, preserving the smooth filling and crisp crust.
- Freezing Method: Place set pies on a baking sheet in the freezer until solid, then move to a freezer-safe bag for up to 1 month; thaw overnight in the refrigerator.
- Separate Garnish Storage: Store leftover lime zest in a small sealed container in the fridge and add it just before serving to keep the flavor bright.
- Individual Wrapping: For grab-and-go treats, wrap each mini pie in plastic wrap and refrigerate; this helps maintain a crisp crust and prevents drying.
Frequently Asked Questions
Here are answers to common questions about no-bake mini key lime pies:
- How long does it take to prepare and chill these no-bake mini key lime pies?
Active preparation (making the crust, mixing the filling, and whipping the cream) takes about 20–30 minutes. You’ll need at least 15 minutes to chill the crusts before filling and another 2 hours in the refrigerator for the filling to set. Plan for a total of around 2½ hours, though you can make them a day ahead for maximum convenience.
- Can I substitute regular limes if I don’t have key limes?
Yes. Regular Persian or Persian limes can be used in equal measure, though the flavor will be slightly less tart and more muted. To brighten the taste, consider adding an extra ½ teaspoon of lime zest when using regular limes.
- How can I ensure the graham cracker crust holds together?
Make sure your graham cracker crumbs are finely ground and evenly coated with the melted butter and sugar. Press the mixture firmly and evenly into the bottom of each paper-lined muffin cup using the base of a measuring cup or a small glass. Chilling for at least 15 minutes before adding the filling helps the butter re-solidify and keeps the crust intact.
- How do I know when the heavy cream has reached stiff peaks?
When you lift the whisk, the whipped cream should form peaks that stand straight up without curling over. The cream will look glossy and hold firm ridges. Stop whipping as soon as you reach this stage to avoid over-whipping, which can lead to grainy, butter-like curds.
- Can I make these pies in advance, and how should I store them?
Yes, you can prepare the pies a day ahead. After filling and chilling until set, cover the muffin tray tightly with plastic wrap or transfer the pies to an airtight container. Store in the refrigerator for up to 3 days. Add the final lime zest garnish just before serving to keep it bright and fresh.
- Is it possible to freeze the mini pies?
You can freeze them for up to 1 month. Place the filled and set pies on a baking sheet in the freezer until solid, then transfer to an airtight container or freezer bag. Thaw overnight in the refrigerator before serving. Note that freezing may slightly alter the whipped cream’s texture, but the flavor will remain intact.
- How can I scale this recipe if I need more or fewer servings?
To double or halve the recipe, simply multiply or divide each ingredient by the same factor. For example, to make 12 pies, use 2 cups graham cracker crumbs, 4 tablespoons sugar, 6 tablespoons butter, and so on. Adjust your tray size or work in batches to ensure even chilling and setting.
- Can I use silicone muffin cups instead of paper liners?
Yes, silicone cups work well and allow easy removal of the pies. Just press the crust firmly into the silicone molds and place them on a baking sheet for stability. Chill and fill as directed, then gently pop the pies out of the silicone cups before serving.
What Makes This Special
What’s not to love about a dessert that’s as refreshing as a breeze on a hot day and as simple as a quick shake of the mixer? These No-Bake Mini Key Lime Pies marry tangy key lime filling with a satisfyingly crunchy crust, all whipped together with clouds of cream in under thirty minutes of active work. They’re special because they’re fuss-free, portable, and endlessly adorable—perfect for kid-friendly gatherings or elegant dinner parties. Feel free to print this recipe and save it for later, and don’t forget to leave a comment or ask questions if you give it a whirl!
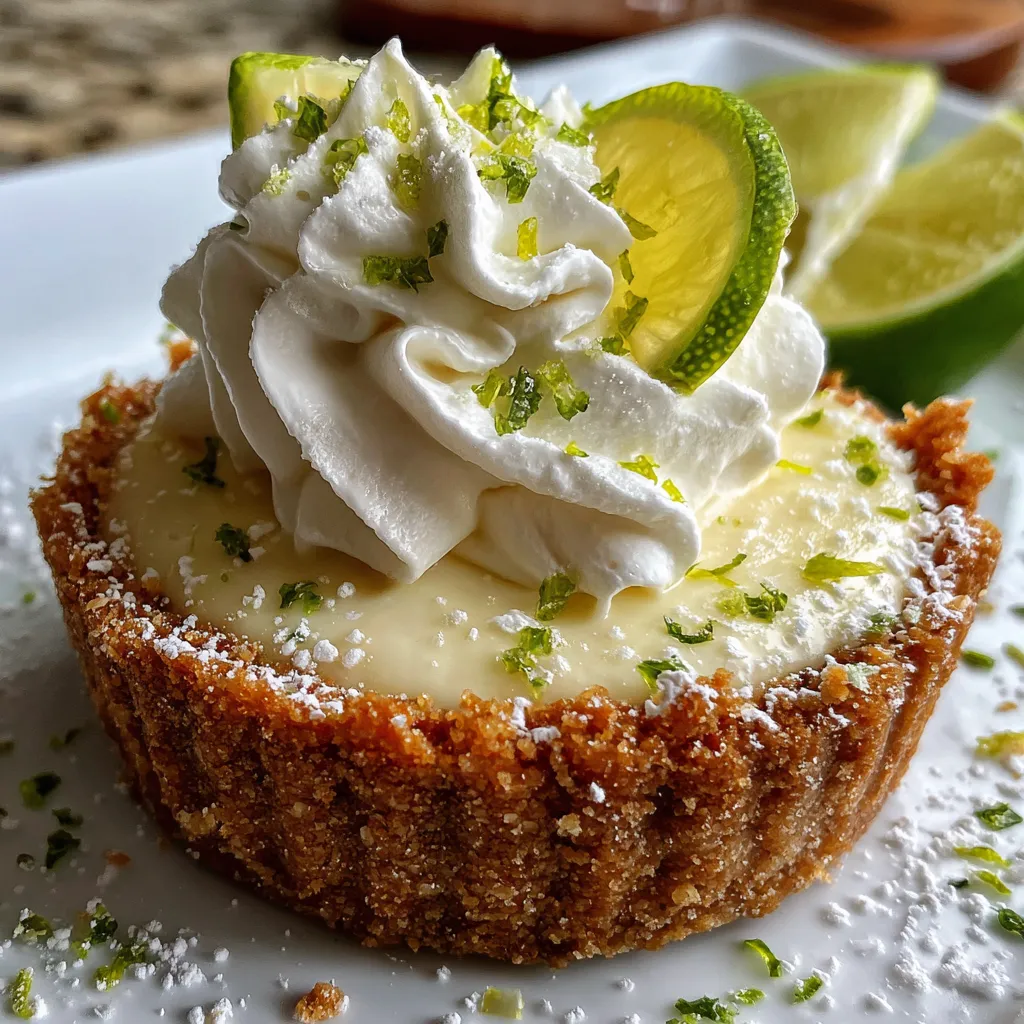

No-Bake Mini Key Lime Pie
Description
Mini graham cracker crusts cradle a creamy, zesty key lime filling folded with clouds of whipped cream. Each bite offers a refreshing tang and sweet smoothness—perfectly chilled for any hot afternoon.
Ingredients
Instructions
-
In a bowl combine graham cracker crumbs and granulated sugar.
-
Stir in melted unsalted butter until mixture is evenly moistened and press into the bottom of six paper-lined muffin cups to form crusts.
-
Refrigerate crusts for at least 15 minutes to firm up.
-
In a separate bowl whisk together sweetened condensed milk, key lime juice, lime zest, and vanilla extract until smooth.
-
In another chilled bowl beat heavy cream and powdered sugar until stiff peaks form.
-
Gently fold whipped cream into the lime mixture until fully incorporated.
-
Divide the filling evenly among the chilled crusts and smooth the tops with a spoon.
-
Refrigerate the mini pies for at least 2 hours or until the filling is set.
-
Just before serving, sprinkle additional lime zest on top of each mini pie.
Note
- Use fresh key lime juice and zest for the brightest flavor
- Prepare the pies a day ahead and store in the fridge for a stress-free dessert
- Regular limes can be substituted if key limes are unavailable
- Store any leftovers in an airtight container in the refrigerator for up to 3 days

