

This Gluten-Free Dairy-Free Watermelon Mochi is a playful summer treat that combines chewy pink mochi pillows with a juicy cube of watermelon at its heart. Soft, translucent dough gives way to sweet, refreshing juice in every bite, making it an irresistible gluten- and dairy-free dessert. Whether you’re craving a light snack or a fun party sweet, this recipe delivers a burst of summer freshness you won’t want to miss—grab your ingredients and let’s get sticky!
Key Ingredients
To whip up these delightful mochi bites, you’ll need a handful of pantry staples and fresh fruit. Each component plays a key role in creating that signature chew and juicy surprise:
- 1 cup glutinous rice flour: The essential base that gives mochi its classic springy texture.
- 1/4 cup tapioca starch: Helps bind the dough and contributes to its stretchy consistency.
- 1/2 cup granulated sugar: Adds just the right amount of sweetness to the rice dough.
- 1 cup watermelon puree: Infuses the mochi with natural color and refreshing melon flavor.
- 1/4 teaspoon salt: Balances the sweetness and enhances all the flavors.
- 2 cups diced seedless watermelon: Chilled cubes that become the juicy surprise at the center of each mochi.
- 1/2 cup tapioca starch: For dusting your work surface and coating the finished mochi to prevent sticking.
How To Make Gluten-Free Dairy-Free Watermelon Mochi
Crafting these mochi treats is straightforward: you’ll start by preparing the watermelon centers, then mix and cook a vibrant pink dough, and finally wrap each chilled cube in a tender mochi blanket. Follow the steps below carefully to achieve that perfect chewy exterior and juicy filling.
1. Place diced watermelon in the freezer for 30 minutes or until slightly firm. This helps the cubes hold their shape during assembly.
2. In a microwave-safe bowl, whisk glutinous rice flour, 1/4 cup tapioca starch, granulated sugar, salt, and watermelon puree until you have a smooth, lump-free batter.
3. Cover the bowl loosely and microwave on high for 1 minute; stir with a spatula, then microwave again for 1 minute until the mixture turns translucent and sticky.
4. Dust a clean work surface with 1/4 cup tapioca starch, transfer the hot dough onto it, and let it cool for a minute to touch without burning your fingers.
5. Divide the dough into 12 equal pieces, dust each piece with tapioca starch, and flatten into a 3-inch circle using your palms.
6. Place one chilled watermelon cube in the center of each circle and pinch the edges together firmly to seal the mochi dough around the fruit.
7. Roll each mochi ball lightly in the remaining tapioca starch to prevent sticking, then shake off any excess starch before serving.
Serving Suggestions
Once your mochi are ready, presentation and accompaniments can take them to the next level. Here are a few ideas to make each bite even more memorable:
- Serve chilled on a decorative platter to maintain that refreshing contrast between chewy dough and cold watermelon.
- Garnish with fresh mint leaves for a pop of color and a hint of herbal brightness that complements the melon.
- Drizzle with berry coulis or a thin ribbon of balsamic reduction for an elegant, tangy twist.
- Pair with iced green tea or a lightly sweetened jasmine tea to balance the dessert’s sweetness and cleanse the palate.
Tips For Perfect Gluten-Free Dairy-Free Watermelon Mochi
With a few insider tricks, you’ll master this intermediate-level treat and impress everyone at your table. Here’s how to keep your mochi flawless:
- Work quickly when wrapping the watermelon to prevent tearing the dough, so the center stays fully enclosed.
- For stovetop steaming, place the dough mixture in a heatproof dish and steam over boiling water for 15 minutes instead of microwaving—just cover tightly.
- Mochi is best enjoyed fresh but can be stored in an airtight container in the refrigerator for up to 24 hours.
- Excess tapioca starch keeps the mochi from sticking; brush off any loose starch before serving to avoid a powdery bite.
How To Store It
Keeping your watermelon mochi fresh is essential to preserve that perfect chew and juicy burst. Store them properly with these methods:
- Refrigerate in an airtight container: Place mochi in a single layer, separating them with parchment paper to prevent sticking; enjoy within 24 hours.
- Individual wrapping: Wrap each mochi lightly in plastic wrap to lock in moisture and prevent them from clumping together.
- Use parchment or wax paper layers: For larger batches, layer mochi between sheets of parchment in a container to maintain texture.
- Avoid freezing: While tempting, freezing can alter the chewy texture; if you must, thaw gently in the fridge before serving to regain some softness.
Frequently Asked Questions
Here are quick answers to common queries about making and enjoying your watermelon mochi:
- How long does it take to prepare and assemble the watermelon mochi from start to finish?
A: Including the initial 30-minute freeze for the diced watermelon, about two minutes of microwave time for the dough, a brief cooldown, and assembly, you’re looking at roughly forty to forty-five minutes in total. Most of that time is passive chilling and cooking, while active hands-on work takes around fifteen minutes.
- Can I use an alternative cooking method if I don’t have a microwave?
A: Yes. Instead of microwaving the dough mixture, transfer it to a heatproof dish and steam it over boiling water for fifteen minutes. Cover the steamer so no water drips in, then proceed with dusting, dividing, and wrapping the mochi just as you would after microwaving.
- How do I prevent the mochi dough from sticking to my work surface and my hands?
A: Generously dust your clean work surface and your hands with tapioca starch before handling the hot dough. Keep a small bowl of additional tapioca starch nearby to re-dust each piece as you shape and seal it. Once each mochi ball is formed, roll it lightly in the remaining starch, then shake off any excess before serving or storing.
- My dough seems too wet or too dry. How can I adjust the consistency?
A: If the dough feels overly sticky and unmanageable, dust in small teaspoons of tapioca starch until you can handle it without it sticking to your fingers. If the dough is too firm and cracks when you shape it, cover it and microwave or steam for an additional thirty seconds to soften, then knead lightly and proceed with dusting.
- How should I store leftover watermelon mochi, and how long will it stay fresh?
A: Place the mochi in a single layer in an airtight container, separating layers with parchment or dusting lightly with tapioca starch to prevent sticking. Store in the refrigerator and enjoy within twenty-four hours for the best texture and flavor.
- Why is tapioca starch used in this recipe, and can I substitute cornstarch?
A: Tapioca starch gives the mochi its characteristic chewiness and prevents sticking without altering the flavor. Cornstarch may leave a chalky taste and can’t replicate the same stretchy texture. For best results, stick with tapioca starch for both the dough formula and dusting.
- Is it possible to make these mochi ahead of time for a gathering?
A: Since mochi is at its peak texture when fresh, make them no more than a few hours before serving. If you need to prepare early, wrap each piece individually in plastic wrap and refrigerate. Remove and dust off excess starch just before serving to restore some of the original chewiness.
What Makes This Special
This Gluten-Free Dairy-Free Watermelon Mochi works because it marries the classic springiness of mochi with a juicy burst of natural watermelon juice—no gluten or dairy required! The soft, translucent dough and chilled melon cube create a playful texture duet that’s perfect for summer entertaining or a light treat any time. Don’t forget to print and save this article—you’ll want to revisit these chewy, refreshing bites again and again. If you give them a try, let me know how they turned out or drop any questions below!
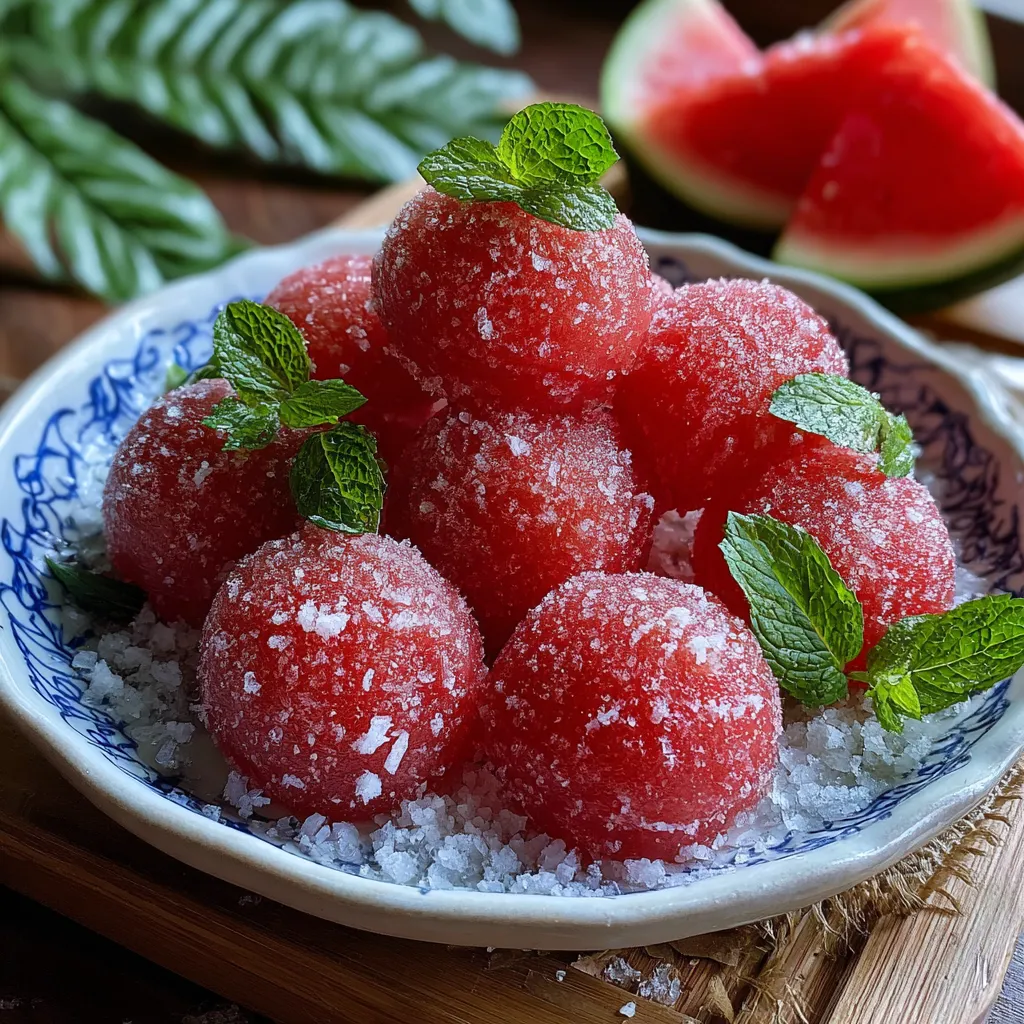

Gluten-Free Dairy-Free Watermelon Mochi
Description
Soft, translucent mochi dough gives way to a chilled watermelon cube that bursts with sweet, refreshing juice. Lightly dusted for the perfect chew, each bite balances springy sweetness and summer fruitiness in a gluten and dairy-free treat.
Ingredients
Instructions
-
Place diced watermelon in the freezer for 30 minutes or until slightly firm.
-
In a microwave-safe bowl, whisk glutinous rice flour, 1/4 cup tapioca starch, sugar, salt, and watermelon puree until smooth.
-
Cover the bowl loosely and microwave on high for 1 minute, then stir; microwave again for 1 minute until the dough is translucent and sticky.
-
Dust a clean work surface with 1/4 cup tapioca starch, transfer the hot dough onto it, and let it cool for a minute.
-
Divide the dough into 12 equal pieces, dust each piece with tapioca starch, and flatten into a 3-inch circle.
-
Place one chilled watermelon cube in the center of each circle and pinch the edges to seal the mochi around the cube.
-
Roll each mochi ball lightly in the remaining tapioca starch to prevent sticking, then shake off excess starch.
Note
- Work quickly when wrapping the watermelon to prevent tearing the dough.
- For stovetop steaming, place the dough mixture in a heatproof dish and steam over boiling water for 15 minutes instead of microwaving.
- Mochi is best enjoyed fresh but can be stored in an airtight container in the refrigerator for up to 24 hours.
- Excess tapioca starch keeps the mochi from sticking; brush off any loose starch before serving.

