
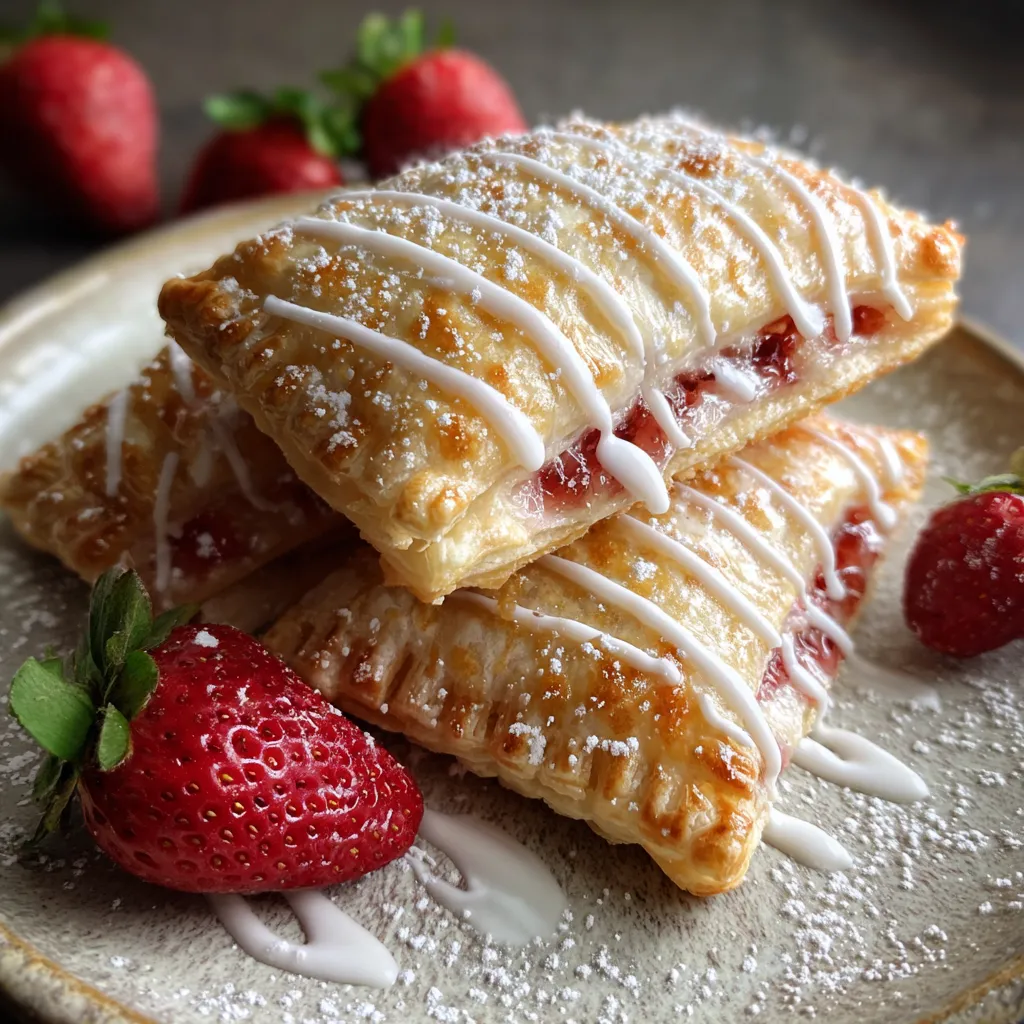
Get ready to transform breakfast with Buttery Flaky Homemade Strawberry Pop-Tarts, golden, flaky pastry pillows bursting with sweet strawberry jam, topped with a glossy vanilla drizzle that crackles with sweetness and melts on your tongue. These DIY pop-tarts capture the magic of golden layers of butter-rich dough peeling apart to reveal warm, fruity pockets—minus the processed preservatives. Perfect for a leisurely weekend brunch or an extra-special school-day treat, they’re simple enough for intermediate bakers and endlessly customizable. Grab your apron and let’s dive into a morning pastry adventure!
Every ingredient in this recipe works together to create those tender, flaky layers and sweet strawberry pockets you’ll love. Here’s what you need to gather:
Making these pop-tarts is a rewarding process that takes you step by step through creating a flaky butter-rich dough, assembling jam-filled parcels, and finishing with a glossy vanilla glaze. Embrace the folding and chilling stages to develop layers, then have fun sealing and venting each tart before baking to golden perfection. Let’s break down each phase so you can master every detail of this breakfast favorite.
1. In a large bowl whisk together the flour, sugar, and salt. Combine 2 1/2 cups all-purpose flour, 1 tablespoon granulated sugar, and 1 teaspoon salt, ensuring even distribution of dry ingredients to lay the foundation for a tender, seasoned crust.
2. Add the cold cubed butter and cut it into the flour. Use a pastry cutter or two knives to incorporate 1 cup of cold, cubed unsalted butter until pea-sized pieces remain, which will melt into pockets of steam and create flaky layers when baked.
3. Pour in the cold heavy cream and stir until the dough comes together. Drizzle 1/2 cup of cold heavy cream over the flour-butter mixture and gently stir until the dough just forms, being careful to avoid overmixing to maintain flakiness.
4. Shape and chill the dough. Pat the dough into a flat rectangle, wrap it tightly in plastic, and refrigerate for at least one hour to firm up the butter and relax the gluten.
5. Roll out the chilled dough. On a lightly floured surface, roll the dough into a 12×9-inch rectangle about 1/8 inch thick, working quickly to keep the dough cold.
6. Cut the dough into rectangles. Divide the dough into sixteen 3×2-inch rectangles, creating eight tops and eight bottoms for your pop-tarts.
7. Fill the bottom pieces with jam. Arrange the eight bottom rectangles on a parchment-lined baking sheet, then spoon about one tablespoon of strawberry jam into the center of each, leaving a small border around the edges.
8. Seal the pop-tarts. Lightly brush the edges of the jam-filled pieces with water or beaten egg, top with the remaining rectangles, gently press to seal, and crimp the borders with a fork to lock in the filling.
9. Prep for baking. Beat the remaining egg and brush it over the tops of each tart, then prick a few small holes in the surface with a fork or toothpick to allow steam to escape.
10. Bake until golden. Preheat your oven to 375°F, then bake the pop-tarts for about 20 minutes, or until they turn a beautiful golden brown around the edges.
11. Cool and transfer. Remove the tarts from the oven and let them rest on the baking sheet for 10 minutes before moving them to a wire rack.
12. Make the icing. In a small bowl, whisk together 1 cup powdered sugar, 2 tablespoons whole milk, and 1/2 teaspoon vanilla extract until smooth and pourable.
13. Glaze the pop-tarts. Drizzle the icing over the cooled pastries and allow it to set for a few minutes before serving.
These pop-tarts shine when paired with the right accompaniments, turning a simple bite into a showstopper. Whether you’re serving them for brunch, a special breakfast, or afternoon tea, a few thoughtful touches can elevate each pastry. From warm to chilled, here are some ways to present your homemade delights and make every serving feel extra special:
A few insider tips can make the difference between good and truly irresistible pop-tarts. Keeping everything cold, planning your chilling time, and adjusting for your kitchen’s quirks will help you achieve maximum flakiness, evenly baked pastry, and a professional-looking seal. Follow these notes to streamline your process, explore variations, and ensure every batch turns out beautifully golden, crisp, and packed with jammy goodness.
To keep your Buttery Flaky Homemade Strawberry Pop-Tarts tasting fresh and flaky, proper storage is key. Whether you plan to enjoy them over the next couple of days or freeze extras for later, following these simple methods will maintain the perfect texture and flavor of your pastries:
Here are some quick answers to common questions about baking and storing these homemade pop-tarts.
From start to finish, plan about 2½ to 3 hours. That includes 10–15 minutes to mix and shape the dough, at least 1 hour of chilling, 10 minutes to roll and assemble, 20 minutes of baking, 10 minutes of cooling on the baking sheet plus additional time for icing and setting.
Keep all ingredients as cold as possible. Use cold cubed butter straight from the refrigerator, and cold heavy cream. Work quickly when cutting the butter into the flour so it remains in pea-sized pieces. Chill the dough for at least an hour before rolling to allow the butter to firm up again, creating those flaky layers during baking.
Yes. You can make and refrigerate the dough up to one day in advance, tightly wrapped in plastic to prevent drying. You can also assemble the unbaked pop-tarts on a parchment-lined sheet, cover with plastic wrap, and refrigerate overnight. Bake directly from chilled for the best results.
Ensure your baking sheet is fully preheated or lined with fresh parchment paper to allow for even heat distribution. Don’t overfill with jam—about one tablespoon in the center of each rectangle is ideal. Pricking holes on the top allows steam to escape, reducing moisture buildup inside.
Lightly dampen the edges with water or beaten egg before pressing the top layer onto the bottom. If small tears occur, pinch a bit of dough on either side of the tear to seal it. You can also use excess scraps to patch larger holes, pressing firmly and crimping with a fork to ensure a tight seal.
Absolutely. You can substitute any fruit preserve such as raspberry or apricot, or use Nutella for a chocolate-hazelnut twist. Make sure the filling is thick enough to hold its shape and use the same one-tablespoon guideline for consistency.
Store cooled pop-tarts in an airtight container at room temperature for up to two days. For longer storage, freeze in a single layer on a baking sheet until solid, then transfer to a freezer-safe bag. Reheat frozen pop-tarts in a 350°F oven for 5–7 minutes until warmed through and crisp.
These pop-tarts hit the sweet spot between homemade charm and nostalgic convenience. The secret is in those cold, cubed butter pockets and patient chilling—giving a tunnel of crisp, flaky layers that cradle vibrant strawberry jam and a silky drizzle. Each step is designed to maximize flavor and texture, from rough-cutting butter to venting steam with fork pricks. Whether you’re a weekend baker or just craving a cozy breakfast, this recipe delivers showstopper results without complicated techniques. Go ahead, print it, tuck it in your recipe box, and let me know how your pastry pillows turned out—questions or flavor updates are always welcome!
Golden layers of butter-rich dough peel apart to reveal warm pockets of sweet strawberry jam, finished with a smooth vanilla glaze that crackles with sweetness and melts on your tongue.

Hey there ! I'm Julia Martinez, and welcome to my kitchen where tradition meets innovation. Growing up in a multigenerational household, I learned that the best recipes aren't just about ingredients – they're about the stories, memories, and love that get passed down through each carefully prepared dish.