
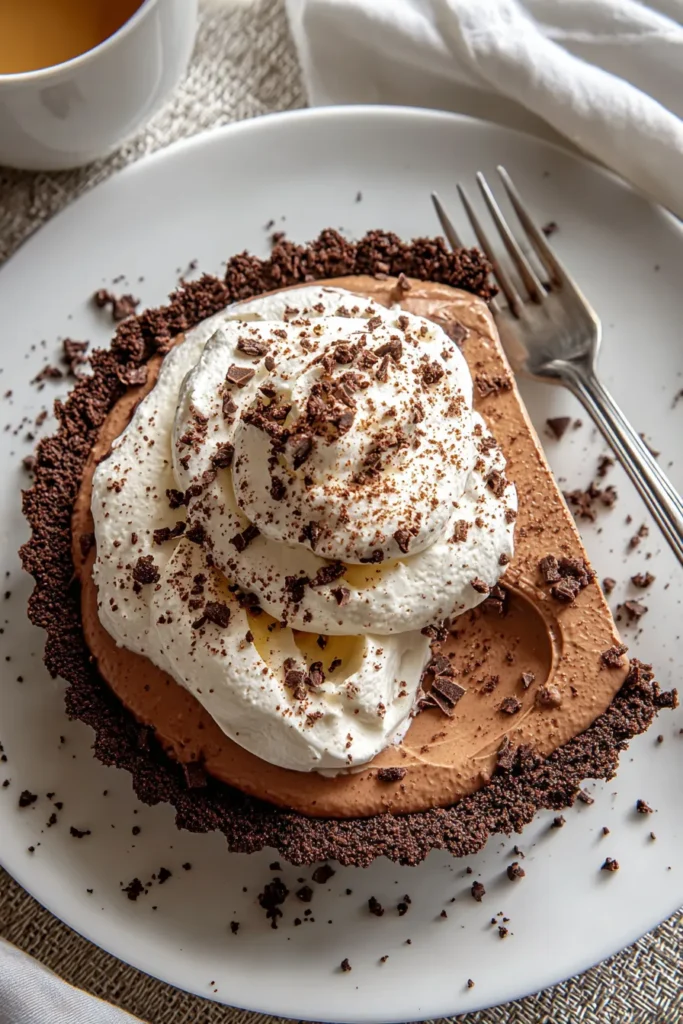
Every velvety spoonful of rich chocolate custard nestled inside a crisp, dark cookie crust is enough to make your heart skip a beat. This Chocolate Cream Pie with Espresso Whipped Cream is the epitome of indulgence, marrying the deep notes of bittersweet chocolate with a playful zing of coffee in the whipped topping. The contrast between the crunchy base and the silky filling creates a harmony that dances on your taste buds, while the espresso-infused cream adds a layer of sophistication that brings the whole dessert to life. Whether you’re celebrating a special occasion or simply treating yourself after a long day, this pie delivers both comfort and a touch of gourmet flair.
I still remember the first time I served this luscious pie at a cozy family gathering—eyes widened, smiles spread, and forks dove right in. There’s something magical about the process: whisking together warm milk and sugar until it thickens, folding in chopped bittersweet chocolate until it melts into a silky ribbon, then watching it set into a perfect custard under plastic wrap. With about 30 minutes of active prep, 20 minutes of gentle cooking, and 4–6 hours of chilling time, it’s an intermediate-level applause-getter that rewards patience with pure bliss. At roughly 350 calories per slice (based on 8 servings), this dessert strikes a balanced chord between decadent flavor and portion-friendly enjoyment. So grab your apron, dust off that pie dish, and let’s create something unforgettable.
Before we dive into the mixing bowls and saucepan, let’s meet the cast of characters that make this pie a showstopper. Each element has its own starring role, from delivering structure to providing deep, layered flavors that keep everyone coming back for another slice.
Let’s roll up our sleeves and create this dessert masterpiece step by step. You’ll craft the crisp chocolate crust, stir up a decadent chocolate custard, and top it all with a cloud of espresso-infused whipped cream.
1. Preheat the oven to 350°F (175°C). In a medium mixing bowl, combine the chocolate wafer crumbs and melted butter. Stir vigorously until the crumbs are evenly coated and hold together when pressed.
2. Press the crumb mixture firmly into the bottom and up the sides of a 9-inch pie dish, creating an even, compact layer. Bake for about 10 minutes to set the crust, then remove from the oven and let it cool completely on a wire rack.
3. In a medium saucepan, whisk together granulated sugar, cornstarch, and salt. Gradually whisk in the milk until the mixture is perfectly smooth, with no lumps.
4. Place the saucepan over medium heat and cook, stirring constantly with a heatproof spatula or whisk. After about 7–9 minutes, the mixture will thicken and begin to bubble. Allow it to boil for 1 minute, then remove the pan from the heat.
5. In a separate bowl, lightly whisk the egg yolks. Slowly drizzle in about 1 cup of the hot milk mixture while stirring constantly—this tempers the yolks and prevents them from scrambling.
6. Return the tempered yolk mixture to the saucepan, stirring thoroughly. Place back over medium heat and cook, stirring constantly, until the mixture just begins to boil again and thickens further.
7. Remove the pan from heat and stir in the chopped bittersweet chocolate and vanilla extract. Keep stirring until the chocolate is fully melted and the filling is smooth and glossy.
8. Pour the hot chocolate filling into the cooled crust. Immediately cover the surface with plastic wrap, pressing it directly onto the custard to prevent a skin from forming. Transfer the pie to the refrigerator for at least 4–6 hours, or until fully set.
9. In a large mixing bowl, combine the heavy cream, instant espresso powder, and powdered sugar. Using an electric mixer, beat until soft peaks form, being careful not to overwhip.
10. Spread the espresso whipped cream evenly over the chilled chocolate pie, creating gentle swirls or peaks for an elegant finish.
11. Garnish with chocolate shavings, slice into generous wedges, serve chilled, and savor every decadent bite!
Once your pie has set and the whipped cream is perfectly peaked, it’s time to think about presentation and pairing. These serving suggestions will help you elevate each slice from delicious to unforgettable, whether you’re hosting a dinner party or enjoying a quiet dessert night in.
Proper storage ensures every slice retains that freshly prepared taste and perfect texture. Whether you’re refrigerating leftovers or planning in advance for a celebration, these tips will keep your pie at its absolute best.
From the first, blissful bite of crisp chocolate crust to the cloudlike swirl of espresso-kissed whipped cream, this Chocolate Cream Pie with Espresso Whipped Cream is a celebration of texture, flavor, and technique. We’ve walked through every step, from mixing the base to tempering egg yolks and achieving that picture-perfect chill. Along the way, you’ve discovered how each ingredient contributes—from the deep bittersweet charm of finely chopped chocolate to the bright jolt of instant espresso powder. Whether you’re an experienced home cook looking for an intermediate-level challenge or a dessert enthusiast eager to impress guests, this pie checks all the boxes: it’s visually stunning, richly flavored, and surprisingly approachable with 30 minutes of active prep, 20 minutes of cooking, and a few hours of chilling. Feel free to print this article or save it for future reference and treat yourself whenever you’re in the mood for something truly indulgent.
If you have questions, need clarification on any steps, or simply want to share how your pie turned out, please leave a comment below. I can’t wait to hear about your triumphs, troubleshoot any bumps in the road, or swap stories of that first spoonful. And don’t forget—there’s a FAQ section coming up to address common queries and helpful tips. Happy baking, and may every slice bring a moment of pure chocolate-espresso bliss!
A velvety chocolate filling meets a crunchy cookie crust, all crowned with airy espresso-infused whipped cream. It's an irresistible treat for chocolate lovers!

Hey there ! I'm Julia Martinez, and welcome to my kitchen where tradition meets innovation. Growing up in a multigenerational household, I learned that the best recipes aren't just about ingredients – they're about the stories, memories, and love that get passed down through each carefully prepared dish.