
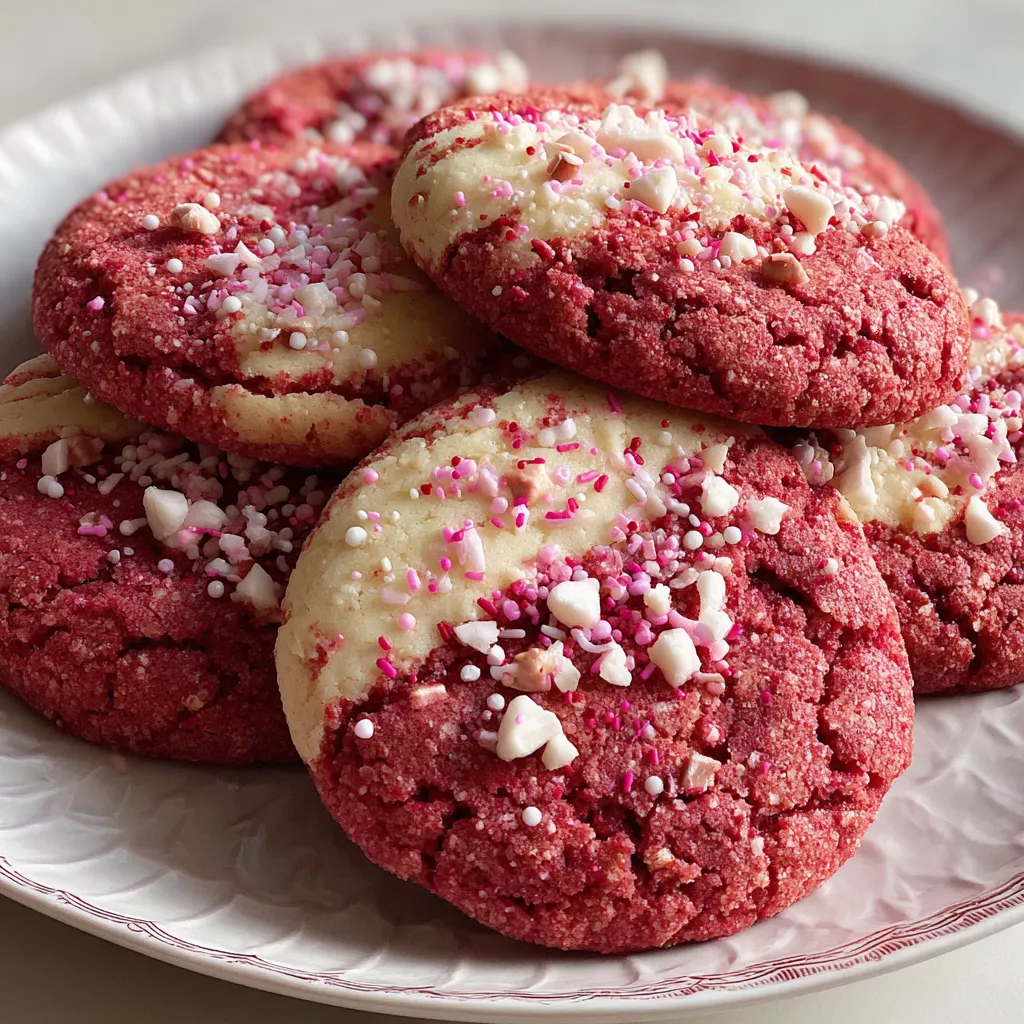
Get ready to spread holiday cheer one rosy bite at a time with these Christmas Pink Velvet Cookies! These tender, melt-in-your-mouth treats bring together creamy butter, a whisper of cocoa, and just the right splash of red coloring to create festive pink delights. Dotted with white chocolate chips and sprinkles, they’re as fun to make as they are to share—perfect for gifting, cookie exchanges, or an afternoon cookie decorating party. Let’s get baking!
Before diving in, gather your essentials for these soft, rosy cookies.
Ready to whip up a batch of these merry treats? From mixing to baking, each step is straightforward and beginner-friendly. You’ll start by preparing your workspace and dry ingredients, then move on to creaming, coloring, folding, and finally baking. Follow along closely to achieve those perfectly crinkled tops and soft centers that define the ultimate pink velvet cookie.
1. Preheat the oven to 350°F (175°C). Line two baking sheets with parchment paper or silicone baking mats to prevent sticking and ensure even baking.
2. In a medium bowl, whisk together the all-purpose flour, baking powder, baking soda, and salt. This dry mixture will be added later, so set it aside.
3. In a large mixing bowl, use an electric mixer on medium speed to cream the softened butter, granulated sugar, and brown sugar. Beat for 2–3 minutes until the mixture is light and fluffy, which incorporates air for a tender cookie.
4. Add the eggs one at a time, mixing well after each addition. Stir in the vanilla extract until fully combined and smooth.
5. In a small bowl, combine the cocoa powder, milk, and red food coloring. Stir until you have a smooth paste, then add this vibrant mixture to the butter-sugar bowl, blending on low speed.
6. Gradually add the reserved dry ingredients to the wet mixture, mixing on low until just combined. Be careful not to overmix, or the cookies may turn dense.
7. If you’d like extra pockets of sweetness and color, gently fold in the white chocolate chips and sprinkles using a spatula.
8. Use a cookie scoop or tablespoon to drop rounded balls of dough onto the prepared sheets, spacing them about 2 inches apart to allow for spreading.
9. Bake for 10–12 minutes, or until the edges are set and the tops appear slightly crinkled. The centers will still look soft—that’s perfect!
10. Remove from the oven and let the cookies cool on the baking sheet for 5 minutes before transferring them to a wire rack to cool completely.
Once baked and cooled, these festive treats are ready to wow. Whether you’re gifting, snacking, or decking out a dessert table, here are a few fun ways to serve your Christmas Pink Velvet Cookies:
These cookies are a holiday showstopper, and a few friendly pointers will ensure yours turn out just right. Pay attention to creaming times, chilling needs, and color adjustments to maintain that signature soft texture and festive pink shade.
Keeping your Christmas Pink Velvet Cookies fresh ensures they taste just-baked whenever you’re ready to indulge. Whether you’re stashing extras for later or saving dough for spontaneous baking sessions, follow these storage tips:
Here are answers to common questions about Christmas Pink Velvet Cookies:
Preparation takes about 15 minutes to measure and mix the ingredients, and baking takes 10 to 12 minutes per batch. Allow an additional 5 minutes of cooling time on the baking sheet and another 10 minutes on a wire rack before serving, making the total time around 40 minutes.
Yes. After scooping the dough into balls, place them on a baking sheet and freeze until firm, then transfer to a freezer-safe container for up to 3 months. Bake frozen dough with an extra 1–2 minutes of oven time. You can also prepare the dough in advance, store it in an airtight container in the refrigerator for up to 48 hours, and then bake as directed.
To make these cookies dairy-free, use plant-based butter and almond or oat milk instead of whole milk. Swap white chocolate chips for dairy-free or vegan versions. For a gluten-free option, replace the all-purpose flour with a 1:1 gluten-free flour blend that contains xanthan gum.
Adjust the red food coloring quantity to taste. For a deeper pink, add an extra teaspoon of food coloring or switch to gel food coloring, which provides more intense color without impacting dough consistency. For a lighter shade, reduce to ½ teaspoon.
Properly chilled dough will minimize spreading, but they’re meant to be slightly crinkled on top. Avoid over-creaming the butter and sugars, and don’t overmix once the flour is added. If your dough feels too soft, chill it for 15–20 minutes before scooping.
Absolutely. Fold in peppermint candy pieces for a festive crunch, swap sprinkles for crushed candy canes, or top the cooled cookies with cream cheese frosting (blend 4 ounces softened cream cheese, 1 cup powdered sugar, and ½ teaspoon vanilla) for extra flavor and decoration.
Store completely cooled cookies in an airtight container at room temperature for up to one week. Place a piece of parchment paper between layers to prevent sticking. For longer storage, freeze baked cookies in a single layer on a baking sheet, then transfer to freezer bags for up to 3 months. Thaw at room temperature before serving.
These Christmas Pink Velvet Cookies strike the perfect balance between festive flair and simple, feel-good baking. The hint of cocoa powder deepens that rosy hue, while creamy butter and sugars blend into a soft, tender dough. Optional white chocolate chips and sprinkles add pops of joy in every bite. Whether you’re printing this recipe to tuck into your holiday binder or saving it for your next cookie swap, these charming treats are guaranteed to wow. If you try them or have questions, leave a comment or share your experience—I can’t wait to hear how they turn out!
These cookies boast a tender, melt-in-your-mouth texture, colored a festive pink and kissed with cocoa. Creamy butter and sugars blend into a soft dough dotted with white chocolate chips and sprinkles for extra joy.

Hey there ! I'm Julia Martinez, and welcome to my kitchen where tradition meets innovation. Growing up in a multigenerational household, I learned that the best recipes aren't just about ingredients – they're about the stories, memories, and love that get passed down through each carefully prepared dish.