
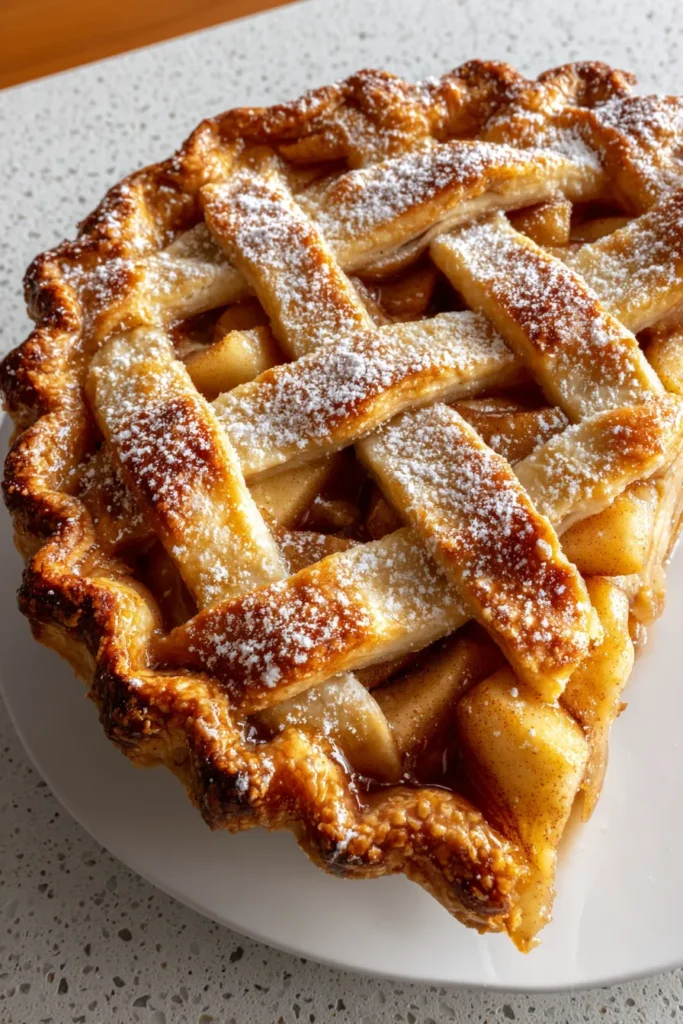
There’s something inherently comforting about a slice of classic apple pie that feels like a warm hug on a plate. This beginner-friendly dessert combines the perfect balance of sweet and tart, featuring tender Granny Smith apples wrapped in a tender, flaky crust. With about an hour of hands-on prep, another hour of gentle baking, and a 30-minute cooling period, this recipe fits beautifully into a leisurely afternoon or a festive gathering. Each slice carries roughly 350 calories, making it a satisfying treat that won’t leave you feeling overly indulgent.
As you embark on this baking adventure, you’ll find that the steps are straightforward enough for anyone—even if you’ve never made pie dough before. The process brings together simple pantry staples like all-purpose flour, butter, sugar, a touch of salt, and warming spices. At the end, you’ll be rewarded with a golden, lattice-topped masterpiece that practically begs to be served alongside a scoop of vanilla ice cream or a dollop of whipped cream. This pie effortlessly transforms ordinary kitchen moments into memorable shared experiences, whether you’re baking solo on a quiet afternoon or filling your home with celebratory cheer.
Before we dive into the step-by-step instructions, let’s get familiar with the stars of the show. Each ingredient plays a crucial role, from building that tender, flaky crust to infusing the filling with bright, warming flavors.
This pantry staple forms the backbone of the crust and helps thicken the apple filling. Its moderate protein content ensures a tender texture without becoming tough.
A small pinch in both the crust and the filling enhances sweetness and balances flavors, making every bite more vibrant.
Sprinkled into the crust and mixed with the apples, it adds sweetness, aids in browning, and helps draw out the fruit’s natural juices.
Chilled and diced into the dough, it creates pockets of steam that produce a flaky crust. Extra diced butter on top of the apples lends buttery richness.
Added one tablespoon at a time, this cold water binds the dough without melting the butter, preserving those flaky layers.
Known for their tart bite and firm texture, these apples hold up beautifully during baking and balance the sweetness of the sugars.
Its molasses notes deepen the sweetness of the filling, adding a subtle caramel undertone.
A splash brightens the filling, preventing apples from browning and enhancing their natural flavor.
This classic spice infuses the apples with warm, sweet-earthy aroma that epitomizes fall baking.
Just a hint adds complexity and a gentle, woodsy warmth to the filling.
Beaten with milk, it creates a luscious, golden glaze on the top crust for an inviting finish.
Combined with the egg yolk, it thins the wash for even coverage and helps the crust attain a beautiful sheen.
Every step in this recipe is designed to guide you through creating a perfectly flaky crust and a juicy, warmly spiced apple filling. Follow these instructions closely, and don’t rush—patience is the secret to pie perfection!
1. Preheat your oven to 425°F (220°C). Make sure the oven rack is positioned in the center so heat circulates evenly around the pie.
2. In a large bowl, combine all-purpose flour, salt, and granulated sugar. Add the chilled, diced unsalted butter, and use a pastry cutter or your fingertips to work the butter into the flour until the mixture resembles coarse crumbs with pea-sized bits of butter still visible.
3. Gradually stir in the ice water, one tablespoon at a time, just until the dough comes together and holds when pressed. Be careful not to overwork it. Divide the dough into two even portions, flatten each into a disc, wrap in plastic, and refrigerate for at least 1 hour.
4. On a lightly floured surface, roll out one dough disc into a circle large enough to fit your pie pan with a slight overhang. Gently transfer it to the pan, pressing it into the bottom and sides.
5. In another large bowl, toss sliced Granny Smith apples with granulated sugar, brown sugar, lemon juice, flour, cinnamon, nutmeg, and a pinch of salt until every slice is well coated.
6. Pour the apple mixture into the prepared crust, spreading it into an even layer. Scatter the extra diced unsalted butter pieces over the top so they melt into pockets of richness.
7. Roll out the second dough disc and carefully place it over the filling. Trim any overhang to about half an inch, then crimp the edges to seal. Use a sharp knife to cut slits in the top crust for steam to escape.
8. In a small bowl, whisk together the egg yolk and milk until smooth. Brush this glaze evenly over the top crust to achieve a golden, glossy finish.
9. Bake the pie at 425°F (220°C) for 15 minutes, then reduce the temperature to 350°F (175°C) and bake for an additional 35 to 45 minutes, or until the apples are tender and the crust is deeply golden.
10. Remove from the oven and cool for at least 30 minutes before slicing. This resting time allows the filling to set, ensuring clean, beautiful slices every time.
Now that your apple pie is perfectly baked and cooled, let’s talk about bringing it to the table in style. Whether you’re hosting a cozy family dinner or treating yourself after a long day, these serving ideas will elevate every slice.
Keeping your apple pie fresh ensures that each slice tastes just as delightful days after baking. Whether you’re storing it on the counter, in the fridge, or even the freezer, a few simple steps will maintain that flaky crust and juicy filling.
This Classic Apple Pie recipe has guided you through every step of creating a timeless, beginner-level dessert that combines bright, tart apples with a buttery, flaky crust. From mixing just the right amount of ice water into your dough to carefully crimping the edges of your top crust, each moment of preparation contributes to that blissful first bite. Remember that gathering the ingredients—simple pantry staples like all-purpose flour, sugar, and Granny Smith apples—makes this both accessible and rewarding. You’ve learned how to assemble the filling, achieve that beautiful golden glaze with an egg wash, and master the dual-temperature baking method for a perfectly browned crust. Feel free to print this article and save it for later, so the next time you’re craving comfort food, you’ve got all the tips and tricks at your fingertips. Scroll down to find a helpful FAQ section for quick answers to common pie-making questions.
If you decide to try this recipe, please leave your comments, questions, or feedback below. Did your family delight in that first warm slice? Were you surprised by how flaky your crust turned out? I’m here to help with any troubleshooting or to celebrate your baking wins. Whether you’re a total beginner or a seasoned home cook, this Classic Apple Pie is sure to become a cherished staple in your recipe collection. Happy baking, and I can’t wait to hear about your homemade pie adventures!
This Classic Apple Pie brings the perfect blend of sweet and tart flavors, with tender apples enveloped in a flaky crust. A cozy dessert that’s sure to impress!

Hey there ! I'm Julia Martinez, and welcome to my kitchen where tradition meets innovation. Growing up in a multigenerational household, I learned that the best recipes aren't just about ingredients – they're about the stories, memories, and love that get passed down through each carefully prepared dish.