
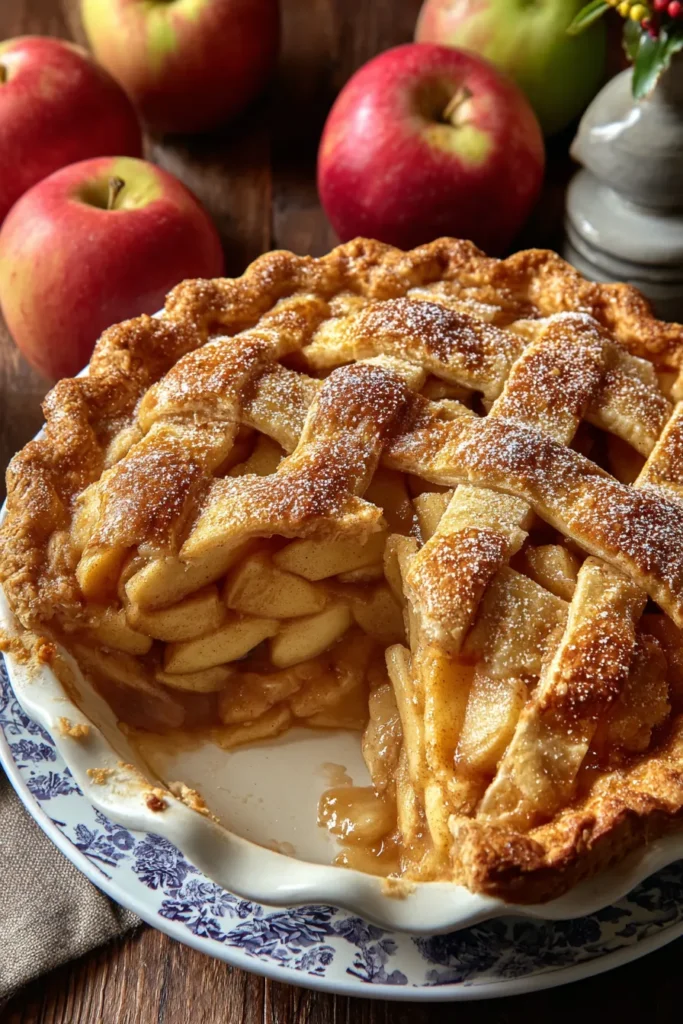
When crisp autumn breezes start teasing the leaves into a swirl of amber and gold, there’s nothing quite as comforting as the scent of a Classic Spiced Baked Apple Pie wafting through the kitchen. Each buttery layer of crust is like a warm hug, giving way to tender, cinnamon-kissed apple slices that gently whisper tales of cozy Sunday afternoons. The interplay of sweet and tart in every mouthful creates a melody of flavor that feels both timeless and deeply personal—like the taste of family traditions, passed down from one generation to the next. As you gather ingredients and roll out that delicate pastry, you’ll find yourself smiling, fully aware that something special is about to take shape in your own oven.
Every slice of this pie is an invitation to slow down and savor life’s simple pleasures: the satisfying crackle of the golden crust under your fork, the sparkle of sugar crystals catching the light, the hint of lemon brightening each bite and lingering at the edges of your palate. Whether you’re baking for a festive gathering or simply indulging in a moment of self-care, this Classic Spiced Baked Apple Pie promises to wrap you in layers of warmth, nostalgia, and genuine comfort. Trust me, once you experience that first forkful—rich, well-spiced, and encased in a perfectly flaky crust—you’ll be hooked. Let’s dive into the heart of what makes this pie so irresistibly charming.
Every outstanding pie begins with quality ingredients that work together to create an unforgettable harmony of texture and flavor. In this section, we’ll explore the core components that transform humble pantry staples into a golden, spiced delight. From the sturdy all-purpose flour that forms the backbone of your crust to the vibrant Granny Smith apples that lend a bright, tangy bite, each ingredient plays a vital role in building the perfect Classic Spiced Baked Apple Pie.
Provides structure to both the crust and filling, ensuring a tender, flaky base that holds sweet, juicy apples without turning soggy.
Balances sweetness and enhances overall flavor, sharpening the taste of the crust and intensifying the warm spices in the filling.
Sweetens the crust dough just enough to complement the tart apples, creating a subtle hint of sugar in every flaky layer.
Adds richness and moisture, creating those signature buttery pockets that make the crust irresistibly flaky. Using chilled butter prevents overworking the dough.
Binds the dough without warming the butter, ensuring a tender, flaky crust by minimizing gluten development and keeping the butter cold.
Deliver a crisp texture and bright tartness that stands up beautifully to baking, providing the perfect counterbalance to the sweet, spiced filling.
Coats the apple slices evenly, drawing out natural juices and caramelizing slightly during baking for a luscious, saucy center.
Thickens the released juices from the apples, preventing a runny pie and giving the filling a glossy, cohesive texture.
Imparts warm, familiar spice notes that define the aromatic profile of the pie, weaving comfort and nostalgia into every bite.
Adds depth and a subtle earthy sweetness, enhancing the complexity of the spice blend and complementing the cinnamon.
Brightens the filling with a fresh, tangy note and prevents the apples from oxidizing, keeping the slices looking and tasting their best.
Brushed on the top crust to create a shiny, golden-brown finish and encourage a delicate, rich color.
Thinned with egg yolk, it helps the glaze adhere smoothly to the crust and adds an extra touch of tenderness.
Provides a sparkling, crunchy top layer, offering a delightful contrast to the flaky crust and spiced filling beneath.

Bringing this Classic Spiced Baked Apple Pie to life is as rewarding as it is delicious. Below, you’ll find a step-by-step guide to crafting both the flaky crust and the warmly spiced filling. Each detail is designed to ensure your pie comes out perfectly golden and bursting with cozy flavor.
1. Preheat your oven to 425°F (220°C), positioning a rack in the center so heat circulates evenly for a beautifully browned crust.
2. In a large bowl, combine 2 1/2 cups flour, 1 tsp salt, and 1 tbsp sugar. Whisk gently to distribute the salt and sugar uniformly throughout the flour.
3. Add the chilled and diced butter to the flour mixture. Use a pastry cutter or your clean fingers to blend the butter into the flour until the mixture resembles coarse crumbs dotted with pea-sized pieces.
4. Gradually add ice water, one tablespoon at a time, mixing with a fork until the dough just starts to come together. Be careful not to overwork it—small, visible chunks of butter will yield a flakier crust.
5. Divide the dough into two equal portions, flatten each into a disk, wrap in plastic wrap, and refrigerate for at least 1 hour to let the gluten relax and the butter firm up.
6. In a separate large bowl, combine the sliced apples, 3/4 cup sugar, 2 tbsp flour, cinnamon, nutmeg, and lemon juice. Toss until every apple slice is evenly coated in that fragrant, sweet-spice mixture.
7. On a lightly floured surface, roll out one dough disk into a 12-inch circle. Transfer it to a 9-inch pie plate, gently pressing it into the bottom and sides, letting the excess drape over the edges.
8. Pour the apple mixture into the prepared crust, mounding it slightly in the center for a rustic look.
9. Roll out the second dough disk, place it over the apple filling, and trim the excess to leave a 1-inch overhang. Tuck the edge under the bottom crust, pressing firmly to seal, then flute or crimp the edges as you like.
10. In a small bowl, beat the egg yolk with the milk. Brush this egg wash over the top crust for a glossy, golden finish, and use a sharp knife to make a few small slits for steam to escape.
11. Sprinkle additional sugar over the egg-washed top to create a sparkling, crunchy crust once baked.
12. Bake in the preheated oven for 15 minutes, then reduce the temperature to 350°F (175°C) and continue baking for 35 to 45 minutes, or until the apples are tender and the crust is a deep, golden brown.
13. Allow the pie to cool on a wire rack for at least an hour before slicing. This resting time helps the filling set so every slice holds its shape beautifully.
After all that careful baking, it’s time to treat yourself to the fruit of your labor. A few thoughtful serving touches can elevate this Classic Spiced Baked Apple Pie from delicious to absolutely unforgettable. Whether you’re sharing a slice with loved ones or indulging solo, these suggestions will help you present and enjoy your creation at its very best.
The contrast between the hot, spiced filling and a scoop of cold, creamy ice cream creates a sublime temperature and texture play. Let the ice cream melt slightly over the pie for luscious ribbons of cream that mingle with the cinnamon-laced juices.
A rich, buttery caramel complements the tart apples and adds a decadent sweetness. Warm the sauce just enough to make it pourable, then create artistic streaks across each slice for a café-style presentation.
Whip heavy cream with a bit of powdered sugar and vanilla until soft peaks form. A cloud of fresh whipped cream adds lightness and balances the spice, making every forkful feel airy and bright.
Serve alongside a cup of chai tea or spiced cider to echo the warm cinnamon and nutmeg in the pie. The complementary flavors tie the whole experience together, making each bite feel like a cozy celebration.
Keeping your pie tasting fresh and flaky even after the first day is easier than you might think. Proper storage preserves the crust’s crispness, prevents the filling from drying out, and lets you enjoy those spiced, tender apples for days to come. Below are tried-and-true methods to maintain the flavors and textures you worked so hard to achieve.
Cover the cooled pie loosely with foil or a pie carrier lid. Store on the counter for up to two days. This method preserves the crust’s flakiness and the filling’s juiciness without drying it out.
Wrap leftover slices tightly in plastic wrap or place them in an airtight container. Refrigerate for up to four days. Chilling helps the flavors meld further, and gently reheating in a warm oven brings back that just-baked charm.
After cooling completely, wrap the entire pie in plastic wrap and then in aluminum foil. Freeze for up to three months. To bake, thaw overnight in the refrigerator, then reheat at 350°F (175°C) for 20–25 minutes until warmed through.
Slice the cooled pie, wrap each piece in plastic wrap, and place them all in a freezer-safe bag. This makes it easy to enjoy a single slice anytime—just reheat in the microwave or oven until warm, and you’ll have a quick, delightful treat.
Recapping the joys of this Classic Spiced Baked Apple Pie feels a bit like revisiting a heartwarming story that ends on a high note. We’ve journeyed through crisp, chilled butter being cut into flour to form a perfectly flaky crust, then tossed tart Granny Smith apples with sugar, flour, and fragrant spices. We witnessed the magic that happens when egg yolk and milk glaze meets golden pastry, and the satisfaction of that first knife cut through a bubbling, tender filling. From the detailed ingredient rundown to step-by-step instructions, serving suggestions, and storage tips, this article has walked you through every delicious detail. Printing out these pages to save in your recipe binder means you’ll always have a trusty guide on hand, ready for those moments when you want to bake something truly comforting.
Below you’ll find an FAQ section to help answer any lingering questions, whether you’re troubleshooting a soggy bottom crust or seeking ideas for variations on the classic theme. If you decide to try this recipe, please leave your comments, questions, or feedback! I’d love to hear how your pie turns out, any tweaks you’ve made, or even just how it made your home feel a bit cozier. Happy baking, and may every slice bring a warm smile to your table.
This Classic Spiced Baked Apple Pie is a comforting masterpiece with tender, cinnamon-sugared apples enveloped in a flaky, golden crust. Perfectly cozy for any occasion.

Hey there ! I'm Julia Martinez, and welcome to my kitchen where tradition meets innovation. Growing up in a multigenerational household, I learned that the best recipes aren't just about ingredients – they're about the stories, memories, and love that get passed down through each carefully prepared dish.