
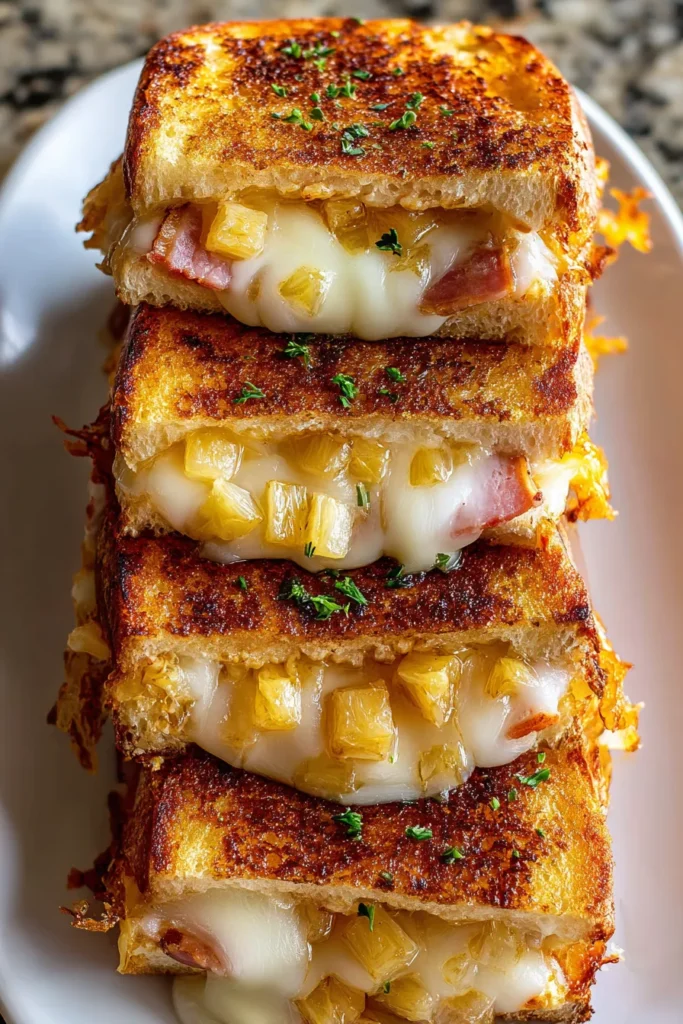
There's something irresistibly fun about layering sweet, soft Hawaiian rolls with molten cheese and just a hint of unexpected fillings. When the buttery crust hits the hot grill, it crackles into a golden, crispy shell that gives way to ooey-gooey cheddar, mozzarella, or a dreamy blend of both. Each bite feels like a playful nod to classic comfort food, yet surprises your taste buds with that signature tropical sweetness. This is the kind of recipe that makes you grin—especially when you lift the top slab and watch the cheese stretch like a string of laughter, inviting you to dive right in.
But this isn’t just any grilled cheese. It’s a conversation starter, a game-changer for lunch or a showstopper at your next gathering. You might start flipping rolls and adding layers on a quiet afternoon, only to realize you’ve unintentionally thrown a mini Hawaiian luau in your kitchen. The optional crispy bacon or ham adds a smoky closing argument to the sweetness, while bright pineapple pieces cut through the richness, delivering a burst of tangy sunshine. The very act of grilling these connected rolls feels like unlocking a playful secret—one that transforms a humble pantry staple into the ultimate party snack or quick family dinner.
Getting a sense of the key ingredients lets you appreciate why this sandwich works its magic. The blend of sweet, savory, and creamy elements is balanced so that no single taste overshadow another. Below are the stars you’ll need to assemble this mouthwatering treat and the role each plays in making it unforgettable:
These pillowy, slightly sweet rolls form the foundation, giving the sandwich its signature tender texture. Their soft crumb soaks up melted cheese beautifully and contrasts with the crisped exterior.
Whether you choose sharp cheddar, creamy mozzarella, or a custom blend, the cheese is the heart of the dish. It melts into every nook of the rolls, delivering that signature stretchy, savory vibe.
Spread on both cut sides for an even golden-brown crust, butter guarantees a rich, indulgent exterior. Using unsalted ensures you control the salt level and let the flavors shine.
Optional but highly recommended, these savory morsels introduce a smoky depth and satisfying crunch that play off the rolls’ sweetness. They’re perfect for meat lovers craving extra texture.
Offering a tangy twist, chopped pineapple adds bursts of tropical brightness that cut through richness. Their juicy acidity and mild sweetness highlight the Hawaiian spirit.
For that final flourish, drizzle either honey or sriracha on top. Honey elevates the sweetness, while sriracha wakes up your palate with a peppery zing.

Ready to turn these ingredients into a warm, cheesy delight? This method is straightforward, and you’ll love how easy it is to get those perfect layers and a golden crust every time. Follow each step carefully for maximum flavor and the satisfying presentation that comes from grilling the entire slab as one connected sandwich.
1. Preheat your grill or skillet over medium heat. Set it to a temperature that crisps the bread without burning it, ensuring even cooking and that signature golden color.
2. Carefully slice the entire block of Hawaiian rolls in half horizontally to create a top and a bottom slab, keeping them connected. This single-slab technique makes assembly and grilling a breeze.
3. Spread the softened butter evenly over the cut sides of the top and bottom slabs. Aim for a thin, consistent layer to achieve a crispy, flavorful crust on both sides.
4. Place the bottom slab of rolls buttered-side down onto the grill or skillet. Use a gentle press with your spatula to ensure full contact and that every roll gets toasted.
5. Layer the cheese slices evenly over the bottom slab. If desired, add bacon bits or ham slices and pineapple pieces for extra flavor. Be generous—this is where the gooey goodness happens.
6. Place the top slab of rolls over the cheese, buttered-side up. Align carefully so that the entire sandwich cooks uniformly and the cheese stays nestled between the rolls.
7. Grill each side for about 3–5 minutes or until the rolls are golden brown and the cheese is melting, pressing down gently with a spatula to ensure even grilling and that satisfying sizzle.
8. If using, drizzle honey or sriracha over the top before removing from heat for a sweet or spicy twist. This final step adds a flavor flourish that ties everything together.
9. Remove from the grill and let it cool slightly before cutting into individual roll-sized sandwiches. Cooling a bit helps the cheese stay put when you slice.
10. Serve warm and enjoy your delicious Hawaiian Roll Grilled Cheese. Each mini sandwich is a perfect blend of texture, sweetness, and melty cheese.
When it comes time to serve your Hawaiian Roll Grilled Cheese, think beyond the plate—consider colorful accompaniments that enhance its tropical-meets-comfort-food vibe. Whether you’re feeding a crowd or treating yourself to a solo feast, the right sides and presentation can turn a simple snack into an unforgettable experience. Below are four ideas to help you serve these mini masterpieces like a pro, complete with texture contrasts, vibrant hues, and flavor complements that will have everyone asking for more.
Planning ahead or dealing with leftovers? Storing your Hawaiian Roll Grilled Cheese properly will keep those layers as delightful as when you first pulled them off the skillet. The key is to control moisture, prevent sogginess, and preserve that irresistible chew of cheese and roll. Here are four methods to help you keep these mini sandwiches tasting their best—whether you refrigerate, freeze, or simply cover and revisit them later.
For short-term storage (a couple of hours), loosely cover the cooled sandwiches in aluminum foil. This will keep them warm and prevent the crust from becoming too soft while you finish other dishes.
Once completely cooled, place the individual sandwiches in an airtight container or wrap them tightly in plastic wrap and foil. Stored in the fridge, they’ll stay fresh for up to 2–3 days. Reheat in a preheated skillet for best results and to re-crisp the edges.
If you want to stash extras for later, wrap each mini sandwich tightly in plastic wrap and then in aluminum foil. Label and freeze for up to one month. To reheat, thaw overnight in the refrigerator, then crisp in a hot oven or skillet.
Avoid microwaving if you can—you’ll end up with a soggy exterior. Instead, place the sandwiches in a 350°F (175°C) oven or on a lightly greased skillet, pressing gently until the bread is golden and the cheese has re-melted.
This Hawaiian Roll Grilled Cheese recipe brings a playful twist to your mealtime lineup, marrying the sweetness of classic sweet rolls with the melty magic of cheese and the bright, tropical notes of optional pineapple or a drizzle of honey. We’ve covered everything from choosing the perfect soft rolls and layering the cheese to optional add-ins like crispy bacon bits or spicy sriracha. Plus, you’ve got clear, step-by-step instructions to ensure even cooking, a beautifully crisp crust, and that delightful stringy cheese pull. Whether you serve these pull-apart sandwiches as a casual lunch, an appetizer at your next gathering, or a fun dinner option for family night, they’re guaranteed to spark smiles and conversations.
Feel free to print this article and save it in your recipe binder so you can revisit the joys of this Hawaiian-inspired comfort food whenever the craving strikes. You’ll also find a FAQ section below to answer any burning questions and troubleshoot common hiccups. As you try out this recipe, don’t hesitate to leave comments, share your variations, or ask for tips if anything seemed tricky. Your feedback helps everyone in our cooking community learn and grow. If you experiment with different cheeses, unexpected fillings, or serving ideas, let us know how it turned out. We’re here cheering you on as you bring a little island sunshine to your table, one cheesy bite at a time.
Soft Hawaiian rolls filled with melty cheese and optional crispy bacon or tangy pineapple create a delightful twist on a classic favorite. Perfect for any meal!

Hey there ! I'm Julia Martinez, and welcome to my kitchen where tradition meets innovation. Growing up in a multigenerational household, I learned that the best recipes aren't just about ingredients – they're about the stories, memories, and love that get passed down through each carefully prepared dish.