
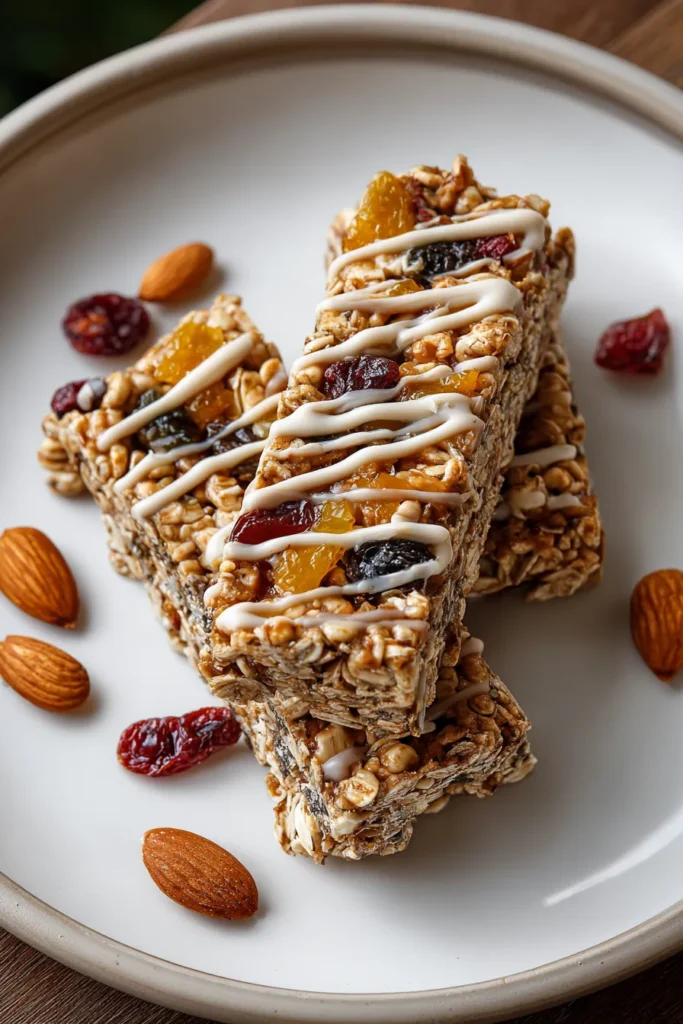
There’s something so satisfying about biting into a homemade cereal bar that’s packed with wholesome ingredients and bound together by creamy almond butter and a delicate touch of honey or maple syrup. These bars strike the perfect balance between chewy oats, crunchy nuts, and sweet pops of fruit. They aren’t just another breakfast item; they’re a little bundle of energy you hold in your hand, ready to fuel your morning run, school lunch, or midday slump. Each forkful celebrates the heartiness of rolled oats, the richness of almond butter, and the playful bursts of dried cranberries or apricots. Even better, you control exactly what goes into them, so there’s no weird preservatives or sneaky sugars—just ingredients you’d be proud to share with friends or stash in your own pantry.
On top of that, making these bars is a breeze, perfect for those weekends when you want some prep-ahead breakfasts or snacks. You’ll find yourself humming along in the kitchen, stirring together oats and seeds, inhaling the warm scent of vanilla and cinnamon, and envisioning how you’ll customize them next time—maybe tossing in dark chocolate chips or a scoop of protein powder. Whether you’re a seasoned baker or a total newbie, these cereal bars are wildly forgiving, endlessly versatile, and oh-so-delicious. They’re the kind of recipe you’ll return to again and again, swapping nuts and fruits with whatever’s in your pantry, and always ending up with a batch of golden, chewy bars that feel like a personal triumph.
When it comes to crafting the perfect cereal bar, every component plays its part. From creating structure to adding bursts of flavor and nutrition, these ingredients harmonize beautifully:
A classic base, rolled oats provide a hearty chew, fiber, and the bulk that holds each bar together. They soak up the almond butter mixture, giving the bars structure and that familiar granola-like texture.
Creamy almond butter acts as a natural binder, coating the oats and seeds while adding a rich, nutty flavor. Its healthy fats also contribute to the satisfying texture and keep you feeling full longer.
This sweetener not only provides the right amount of sticky sweetness but also helps everything adhere together. Honey brings floral notes, while maple syrup offers a deep, caramel-like richness.
Almonds, walnuts, or pecans add an irresistible crunch and extra protein. They contrast the chew of the dried fruit and oats, making each bite delightfully varied.
Raisins, cranberries, or apricots contribute bursts of natural sweetness and chewiness. Their vibrant flavors cut through the nutty base, adding color and a fruit-forward lift.
Coconut flakes offer a subtle tropical aroma and light, airy texture. They also absorb a bit of moisture, ensuring the bars aren’t too dense.
Tiny powerhouses, chia seeds thicken the mixture and boost fiber and omega-3 content. They swell slightly when mixed, enhancing the bars’ binding without extra liquid.
A splash of vanilla deepens all the flavors, bringing warmth and depth that balances the sweetness and nuttiness.
Just a hint of cinnamon brings gentle spice and complexity, accentuating the cozy flavors of oats and almond butter.
A pinch of salt is crucial for tying together sweet and nutty notes, ensuring your bars taste well-rounded and crave-worthy.

Let’s dive into the step-by-step process of assembling and baking these delicious, energy-boosting cereal bars. You’ll find the method straightforward, with simple kitchen tools and easily sourced ingredients delivering big flavor and satisfying texture.
1. Preheat your oven to 325°F (165°C) and line an 8x8 inch baking dish with parchment paper, leaving an overhang on the sides for easy removal later. This prevents sticking and ensures neat edges.
2. In a large mixing bowl, combine the rolled oats, chopped nuts, dried fruits, shredded coconut, chia seeds, cinnamon, and salt. Use a spatula to stir until thoroughly mixed, making sure every flake and seed is evenly distributed.
3. In a small saucepan set over low heat, gently warm the almond butter and honey (or maple syrup) while stirring constantly. This step helps the ingredients meld without scorching. Once the mixture is smooth, remove it from heat and stir in the vanilla extract.
4. Pour the warm almond butter mixture over the dry ingredients. Mix well using a spatula or wooden spoon until every oat and nut is fully coated in the glossy binder.
5. Transfer the combined mixture to your prepared baking dish. Use a spatula or the back of a spoon to press it firmly and evenly into the pan, ensuring there are no loose spots.
6. Bake in the preheated oven for 20–25 minutes, or until the edges turn golden brown and the center feels set.
7. Let the bars cool completely in the pan on a wire rack. This step is key for clean cuts and optimal texture—resist the urge to slice while still warm.
8. Once cooled, lift the parchment paper to remove the slab, then cut into bars or squares. Store in an airtight container at room temperature for up to one week, or in the refrigerator for longer shelf life.
These wholesome cereal bars shine on their own, but pairing and plating can elevate them to a whole new level. Whether you’re serving them for breakfast, mid-afternoon pick-me-ups, or a pre-workout snack, thoughtful presentation and simple accompaniments can make every bite feel special. Think about textures, temperatures, and complementary flavors that highlight the bars’ nutty, fruity profile. You might enjoy them warm with a drizzle, crisp with fresh toppings, or neatly wrapped for a busy day. Experimenting with pairings—like fresh fruit, creamy yogurt, or warm beverages—adds variety and turns a humble bar into a memorable treat. Ready to delight family, guests, or just yourself? Here are four fun ways to serve these bars:
Arrange sliced seasonal fruits such as strawberries, banana rounds, and kiwi alongside the bars. The juicy freshness balances the bars’ chewiness and turns breakfast or brunch into a colorful spread.
Layer chunks of the cereal bars with tangy Greek yogurt and a drizzle of honey in a clear glass. Top with extra berries or a sprinkle of chia seeds for a visually stunning and protein-packed treat.
For busy mornings or hikes, wrap each bar in parchment paper or reusable snack wrap. This keeps them fresh and portable, perfect for slipping into lunchboxes, gym bags, or a backpack.
Melt a handful of dark chocolate chips and lightly drizzle over cooled bars. Let the chocolate set before slicing—this adds a decadent touch without overpowering the wholesome flavors.
Proper storage is essential to maintain the freshness, texture, and flavor of your homemade cereal bars. These bars hold up well at room temperature but also last even longer when refrigerated or frozen correctly. By selecting the right containers, wrapping methods, and storage environments, you can enjoy bars that taste just-baked days or weeks after making them. Storing in an airtight environment prevents moisture loss and staling, while layering with parchment paper avoids sticking and preserves individual bar shapes. When freezing, quick portioning and secure wrapping ward off freezer burn and make it easy to grab a bar at a moment’s notice. Here are four reliable methods:
Place cooled bars in a single layer inside a sealed container. If stacking, separate layers with parchment paper to prevent sticking. Keep the container in a cool, dry pantry for up to one week.
Store bars in an airtight container or sealed bag in the fridge. The cooler temperature extends freshness for up to two weeks and slightly firms the bars, creating a chewier texture.
Individually wrap each bar in plastic wrap or parchment, then place them in a freezer-safe bag or container. Label with the date and freeze for up to three months. Thaw at room temperature for 30 minutes before eating.
Pre-portion bars into small reusable bags or snack boxes, layering with parchment paper. This makes grab-and-go mornings effortless and helps control serving sizes.
These homemade Healthy Cereal Bars have everything you could want in a breakfast or snack: hearty rolled oats, creamy almond butter, sweet honey or maple syrup, and a delightful mix of nuts, seeds, and dried fruits. Throughout the article, we’ve walked through each key ingredient, explaining the role they play in creating that perfect chew, crunch, and burst of flavor. The step-by-step baking instructions are designed for all skill levels, ensuring your bars come out golden and set every time. From preheating the oven to cooling on a wire rack, each technique supports easy preparation and delicious results. We also explored creative serving suggestions—pairings with fresh fruit, yogurt parfaits, on-the-go wraps, or a drizzle of dark chocolate to suit any mood or occasion. Finally, practical storage tips help you preserve freshness, whether you’re enjoying bars at room temperature, chilling in the fridge, or stashing in the freezer.
Feel free to print this article and save it for later reference—whether you’re planning a meal prep day, organizing snacks for the week, or preparing treats for friends and family. You can find a FAQ section below to answer any lingering questions about ingredient swaps, texture tweaks, or dietary preferences. We’d love to hear how your batch turns out: if you try the recipe, customize the mix-ins, or run into any stumbling blocks, please share your comments, questions, or feedback. Your stories and tips could inspire other home cooks to whip up their own delicious, nutrient-packed cereal bars!
These Healthy Cereal Bars blend the hearty flavor of rolled oats, creamy almond butter, and a medley of nuts and fruits, providing a delicious crunch and a boost of energy.

Hey there ! I'm Julia Martinez, and welcome to my kitchen where tradition meets innovation. Growing up in a multigenerational household, I learned that the best recipes aren't just about ingredients – they're about the stories, memories, and love that get passed down through each carefully prepared dish.