
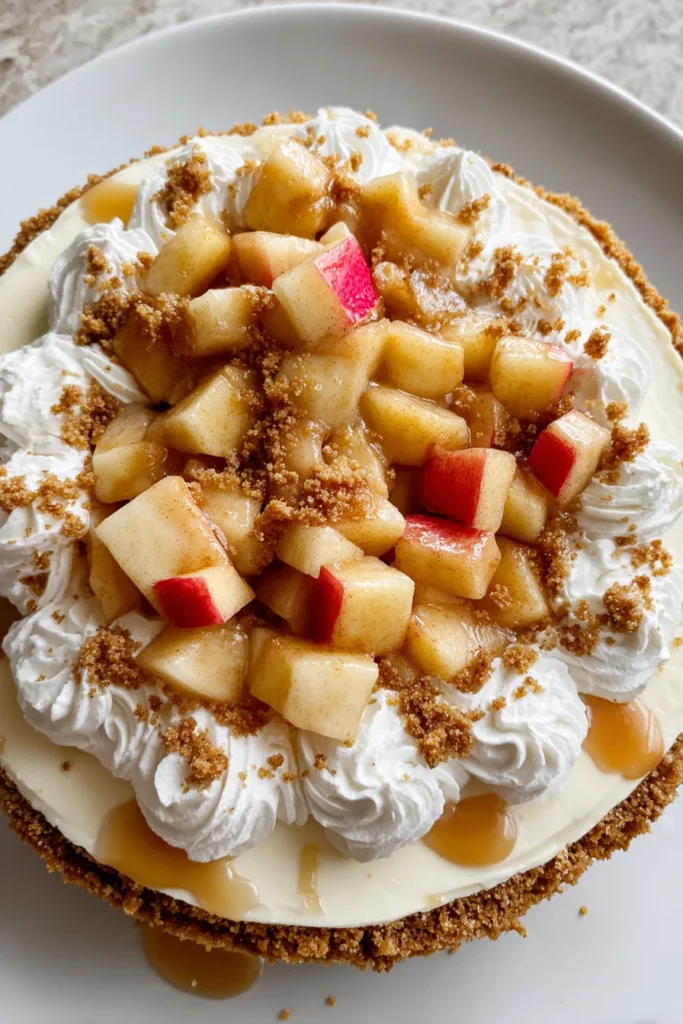
There’s something undeniably magical about combining the homely comfort of apple pie with the silky smoothness of cheesecake—especially when you don’t even have to turn on the oven. This No-Bake Apple Pie Cheesecake captures all the warm spices of a classic fall treat, wrapped up in a creamy dream that practically melts on your tongue. The buttery graham cracker crust sets the stage, giving a satisfying crunch that perfectly offsets the tender, sweet apples and rich, velvety cheese layer. With every bite, you’ll discover the subtle tang of lemon juice brightening the cinnamon-spiced apples and the gentle swirl of apple pie filling on top, making each slice feel like a special occasion.
Whether you’re planning a cozy family dinner, a festive party, or simply craving a sweet treat to elevate your afternoon coffee, this cheesecake has you covered. It’s the kind of recipe that feels fancy but is astonishingly easy—no baking means less stress, and the make-ahead element ensures you can prep everything in minutes and let your fridge work the rest. Plus, the layers of flavors and textures invite playful tweaks: a dash of nutmeg, a handful of chopped nuts, or even swapping in berry toppings for a different twist. Get ready to wow your friends and indulge in a dessert that feels like a hug in every forkful.
Before you start assembling this dreamy dessert, let’s take a closer look at the superstar ingredients that make each layer shine. Understanding their roles will help you appreciate how they work together and inspire any creative swaps you might want to try.
These fine crumbs form the sturdy, buttery foundation of your cheesecake. When mixed with sugar and melted butter, they bind together into a crisp, flavorful crust that’s both supportive and satisfying.
Sprinkled right into the crumb mixture, this white sugar adds subtle sweetness and helps the crust hold its shape once chilled, balancing the tang of the cheese and apples.
Melted until golden, butter brings richness and moisture to the graham cracker crumbs, ensuring a compact, tender crust that won’t crumble apart when you slice.
The heart of any cheesecake, softened cream cheese provides that signature creamy texture and tangy flavor, creating a luscious filling that contrasts beautifully with the spicy apples.
Whisked into the cream cheese, this ultra-fine sugar sweetens the filling without graininess and helps stabilize the mixture for a smooth, consistent bite.
A splash of vanilla infuses the filling with aromatic warmth, rounding out the sweetness and enhancing the overall depth of flavor.
Whipped into stiff peaks, this cream adds volume and lightness to the dense cheese mixture, yielding an airy, mousse-like texture that melts in your mouth.
A crisp duo of Granny Smith and Honeycrisp apples lends both tartness and natural sweetness, while their firm bite stands up well against the soft cheesecake filling.
The quintessential spice for fall desserts, cinnamon enhances the apples with cozy, fragrant notes that mingle effortlessly with the rich cheese layer.
A little acidity brightens the apple mixture, preventing browning and adding a fresh pop that balances the richer components.
Poured on top, this sweet-tart filling adds glossy color and extra fruit flavor, making the cheesecake look as irresistible as it tastes.
Fresh apple pieces sprinkled on top bring a contrasting crunch and vibrant look to each slice, perfect for garnish.
A dollop of softly spooned whipped cream on each serving adds a cloud-like finish, enhancing the creamy dessert experience.
Let’s walk through the simple yet satisfying steps to bring this no-bake masterpiece to life. Each phase—from crust to garnish—works in harmony to create a dessert that’s as stress-free as it is scrumptious.
1. Prepare the crust
In a medium mixing bowl, combine the graham cracker crumbs, granulated sugar, and melted butter. Stir vigorously until the mixture resembles wet sand, ensuring every crumb is coated for a perfectly bonded base.
2. Form the crust
Transfer the crumb mixture to the bottom of a 9-inch springform pan. Press it firmly using the back of a measuring cup or your fingertips, creating an even, compact layer. Chill in the refrigerator to set while you move on to the filling.
3. Beat the cream cheese
In a large mixing bowl, use an electric mixer to whip the softened cream cheese until it’s smooth and free of lumps. This step ensures a silky filling.
4. Sweeten and flavor
Gradually add the powdered sugar and vanilla extract to the cream cheese, mixing on low speed until fully incorporated and the texture is creamy.
5. Whip the cream
In a separate bowl, whip the heavy cream with clean beaters until stiff peaks form (about 3–4 minutes). Be careful not to overbeat, or it may turn grainy.
6. Fold in whipped cream
Gently fold the whipped cream into the cream cheese mixture, preserving as much air as possible to keep the filling light and fluffy.
7. Add the spiced apples
In another bowl, combine the diced apples, cinnamon, and lemon juice. Fold this mixture into the cheese filling until the apples are evenly distributed.
8. Assemble the layers
Pour the cheesecake filling over the chilled crust, spreading it evenly to the edges with a spatula. Smooth the surface and then spoon the apple pie filling across the top, creating a luscious fruit layer. Tuck any extra diced apples into the filling for decorative appeal.
9. Chill to set
Cover the springform pan with plastic wrap and refrigerate for at least 4–6 hours, preferably overnight, to allow the cheesecake to firm up. When ready, remove the sides of the pan, slice into wedges, and top each piece with optional whipped cream and fresh apple garnish.
Once your No-Bake Apple Pie Cheesecake has set perfectly, it’s time to turn it into a showstopper on your dessert table. Whether you’re entertaining guests or treating yourself to an indulgent slice, these serving ideas will elevate the experience and highlight every luscious layer.
Slice the cheesecake into neat wedges and arrange them on chilled porcelain plates. Add a light dusting of cinnamon over the top and a small sprig of mint for a touch of color and contrast.
Serve each slice alongside a scoop of vanilla bean ice cream. As the cold ice cream meets the creamy cheesecake, you’ll get a delightful temperature and texture contrast, turning every bite into a sensational moment.
Present your cheesecake at brunch or afternoon tea with cups of rich, cold-brew coffee or a frothy latte. The slight bitterness of coffee beautifully balances the sweetness, making this pairing a crowd-pleaser.
For an eye-catching presentation, spoon the crust, filling, and apple topping into individual mason jars. Seal them with decorative lids and ribbons for portable, single-serve treats that guests can enjoy on the go.
Proper storage is key to preserving the flavor, texture, and freshness of this delicious dessert. Whether you’re saving slices for later or preparing the cheesecake days in advance, follow these tips to maintain its delightful layers.
Refrigeration is your best friend when it comes to no-bake cheesecake. After your cheesecake has chilled and set, keep it covered in the springform pan or transfer slices to an airtight container. This prevents the filling from drying out and guards against absorbing other flavors in the fridge.
Layer parchment paper between slices when storing in an airtight container to prevent sticking. Keep chilled for up to 5 days, ensuring each piece is as fresh as the day you assembled it.
Wrap the entire cheesecake or individual servings tightly in plastic wrap, then cover with a layer of aluminum foil. This double barrier locks in moisture and stops the apple topping from sliding off—ideal for party prep up to 3 days in advance.
If you need longer storage, freeze slices by first flash-freezing them on a baking sheet for about an hour. Then wrap each slice in plastic wrap and place in a freezer-safe bag. Thaw in the refrigerator overnight when ready to serve, preserving up to 1 month.
For potlucks or picnics, pack individual slices in disposable tupperware with paper liners between layers. Keep them in a cooler with ice packs to ensure the cheesecake remains firm until it’s time to enjoy.
This No-Bake Apple Pie Cheesecake brings together the best of both worlds: the cozy, spiced apples of a classic pie and the rich, creamy allure of cheesecake—all without ever firing up the oven. From the crisp, buttery graham cracker crust to the fluffy, whipped-cream-laced filling, and finally that jewel-toned apple pie topping, each layer offers a harmonious balance of flavors and textures that’s sure to impress every palate. By following these straightforward steps, you can prepare a show-stopping dessert in under 30 minutes of hands-on work, then let your fridge take care of the rest as it sets to perfection. Whether you’re celebrating a special occasion or simply seeking a sweet escape on a chilly afternoon, this recipe is guaranteed to become a seasonal favorite.
Feel free to print this article and tuck it into your favorite recipe binder, or save it digitally for quick reference next time you’re craving a fall dessert that doubles as an easy entertaining solution. Scroll down to find a FAQ section that answers common questions and offers additional tips for customizing this treat to your personal taste. If you give this No-Bake Apple Pie Cheesecake a whirl, please share your experience in the comments—questions, feedback, and stories are always welcome. Happy chilling and even happier indulging!
Experience the creamy, rich layers of cheesecake mingling with spiced apples and a buttery graham cracker crust. No baking required—just chill and serve!

Hey there ! I'm Julia Martinez, and welcome to my kitchen where tradition meets innovation. Growing up in a multigenerational household, I learned that the best recipes aren't just about ingredients – they're about the stories, memories, and love that get passed down through each carefully prepared dish.