
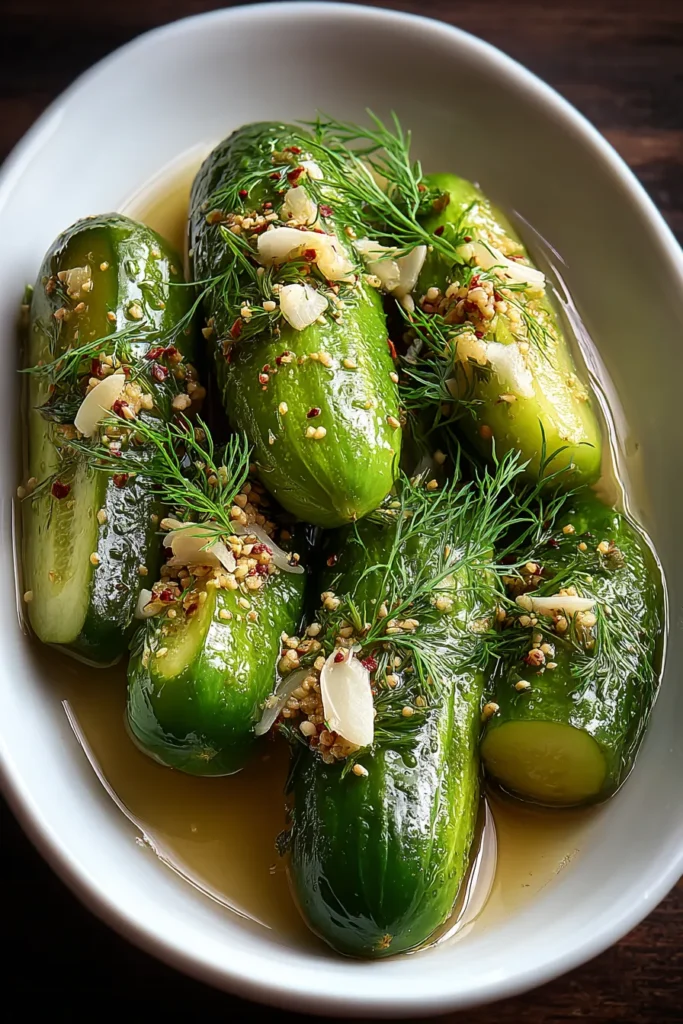
There’s something undeniably satisfying about opening your fridge and spotting those little glass jars brimming with crunchy dill pickles kissed by garlicky goodness. You remember the day you chopped fresh dill from the garden, smashed garlic cloves under your knife, and marveled at how simple ingredients can transform into something so vibrant. These refrigerator dill pickles are the epitome of easy homemade goodness—they require minimal prep, no special canning equipment, and deliver maximum flavor in just a few days. Whether you’re a newbie in the kitchen or a seasoned home cook looking for a quick project, this small batch recipe is tailor-made for you.
As you slice through that first pickle spear after 48 hours, you’ll notice how the white vinegar brine has seeped into every pore, harmonizing with crunchy cucumbers and aromatic dill. Each bite offers a perfect balance of tang, garlic spice, and a hint of heat from red pepper flakes—all while maintaining a fresh, herbaceous note. At just around 150 calories per serving and with a total time commitment of roughly 25 minutes hands-on (plus a restful 24-hour chill), these pickles are a beginner-friendly appetizer or lunch side that fits effortlessly into any busy schedule. Get ready to fall in love with the easiest, most delicious refrigerator pickles you’ve ever made.
Before diving into the pickling process, let’s meet the stars of this show. Each ingredient plays a crucial role in creating the characteristic crunch, tang, and garlicky aroma that sets these quick refrigerator pickles apart.
Often labeled Persian or Kirby cucumbers, these snug little cukes hold up exceptionally well to pickling. Their firm texture stays crisp, ensuring every bite has that perfect snap.
The foundation of your brine, water dilutes the vinegar just enough to create a balanced, drinkable pickling liquid that allows flavors to meld without overwhelming the cucumbers.
This clear vinegar imparts the signature tang that makes pickles… pickles! It also acts as a mild preservative, helping to keep your cucumbers bright and crisp in the fridge.
With its coarse grains and clean taste, kosher salt enhances the natural cucumber flavor and helps draw moisture out, promoting optimal crunch.
A touch of sugar rounds out the acidity, creating a harmonious sweet-tart profile that keeps these pickles approachable and delightful.
Peeled and lightly smashed to release their oils, garlic infuses the brine with a warm, savory depth that pairs beautifully with fresh dill.
Each unbroken peppercorn slowly releases its spicy, aromatic essence into the brine, adding subtle heat and complexity.
These tiny seeds pop in your mouth, contributing a gentle pungency that lifts the overall flavor profile.
A dash of red pepper flakes brings a lively kick, perfect for anyone who craves a tingle on the tongue.
The herbaceous backbone of any dill pickle, fresh dill leaves and stems lend a bright, feathery fragrance that defines these pickles.

Now that we’ve assembled our flavorful lineup, it’s time to turn them into crunchy refrigerator pickles. Follow these detailed steps to ensure every jar is bursting with garlicky, herby goodness.
1. Prepare your cucumbers by washing them thoroughly under cool running water, ensuring any dirt or residue is completely removed. Trim the blossom and stem ends to prevent softening. If you’re working with thicker cukes, use a sharp knife to cut them into spears or rounds so the brine can fully penetrate.
2. In a medium saucepan, combine the water, white vinegar, kosher salt, and granulated sugar. Place over medium heat and stir constantly until the salt and sugar are completely dissolved. Watch for a gentle simmer around the edges—this ensures the brine is perfectly balanced. Once dissolved, remove from heat and let it cool slightly to release some steam.
3. In a clean jar or several small jars, evenly distribute the smashed garlic cloves, whole black peppercorns, mustard seeds, red pepper flakes, and the roughly chopped fresh dill. Layering the aromatics at the bottom intensifies the flavor infusion.
4. Pack the cucumbers tightly into the jars, standing them upright or laying them snugly, and leave about 1/4-inch of headspace at the top. This air gap allows the brine to circulate without overflowing.
5. Carefully pour the warm vinegar mixture over the cucumbers, ensuring they are fully submerged. Tap each jar gently on the counter to release any trapped air bubbles. If needed, top up with extra brine or vinegar-water mix to keep all veggies covered.
6. Seal the jars with their lids and let them rest at room temperature until they’re no longer warm to the touch. This gradual cooling helps prevent condensation inside the jars.
7. Once cooled, place the jars in the refrigerator and allow them to pickle for at least 24 hours before tasting. For the richest flavors and optimal crunch, aim for 2–3 days of refrigeration.
These tangy, garlicky pickles deserve a starring role at your table. Whether you’re hosting friends or simply jazzing up a solo sandwich, here are four creative ways to showcase their crunchy charisma.
Proper storage ensures your small batch pickles stay crisp, flavorful, and perfectly safe to eat. With a few simple guidelines, you’ll extend their shelf life and maintain that garden-fresh charm.
To begin with, always refrigerate promptly after cooling. Pickles rely on cold temperatures to slow bacterial growth and maintain crunch. Keep them on a sturdy shelf rather than the door, where temperatures fluctuate.
Ensure cucumbers remain fully underwater in the brine. If the liquid level drops over time, top it up with a quick mix of equal parts vinegar and water.
Glass jars with tight-sealing lids are ideal for preventing strong odours from mingling in your fridge and locking in that tangy dill aroma.
Aim for around 37–40°F (3–4°C). A stable environment helps preserve the vibrant color and crisp texture of your pickles.
Even though these pickles can last up to 2 months, marking the date they were made will help you enjoy them at their peak flavor and avoid keeping them too long.
Crunchy, garlicky, and bursting with fresh dill, these refrigerator dill pickles are proof that you don’t need fancy equipment to create gourmet condiments at home. We’ve walked through every step—from prepping the cucumbers and crafting the tangy brine to sealing jars and letting patience work its magic in the fridge. Along the way, you learned about each key ingredient’s role, discovered serving suggestions that highlight their bright flavor, and picked up storage tips to keep them at their absolute best. This beginner-friendly recipe fits seamlessly into any kitchen routine: just 15 minutes of hands-on prep, a quick 10-minute brine simmer, and then a leisurely 24-hour wait for that satisfying crunch.
Feel free to print this article and save it in your recipe binder or digital collection for easy reference. You’ll find a FAQ section below to troubleshoot any pickling query you might have—though we’re confident these simple instructions will set you on the path to success. If you try this recipe, please drop a comment, share your pickling adventures, or ask any questions you have. Whether you’re seeking advice on spice substitutions or curious about how long they’ll last, we’d love to hear your feedback and help you create the perfect jar of homemade pickles every time.
These homemade refrigerator dill pickles are bursting with garlicky goodness and vibrant dill flavor. Easy to make and ready in just a few days, they're perfect for snacking or adding to any meal.

Hey there ! I'm Julia Martinez, and welcome to my kitchen where tradition meets innovation. Growing up in a multigenerational household, I learned that the best recipes aren't just about ingredients – they're about the stories, memories, and love that get passed down through each carefully prepared dish.