
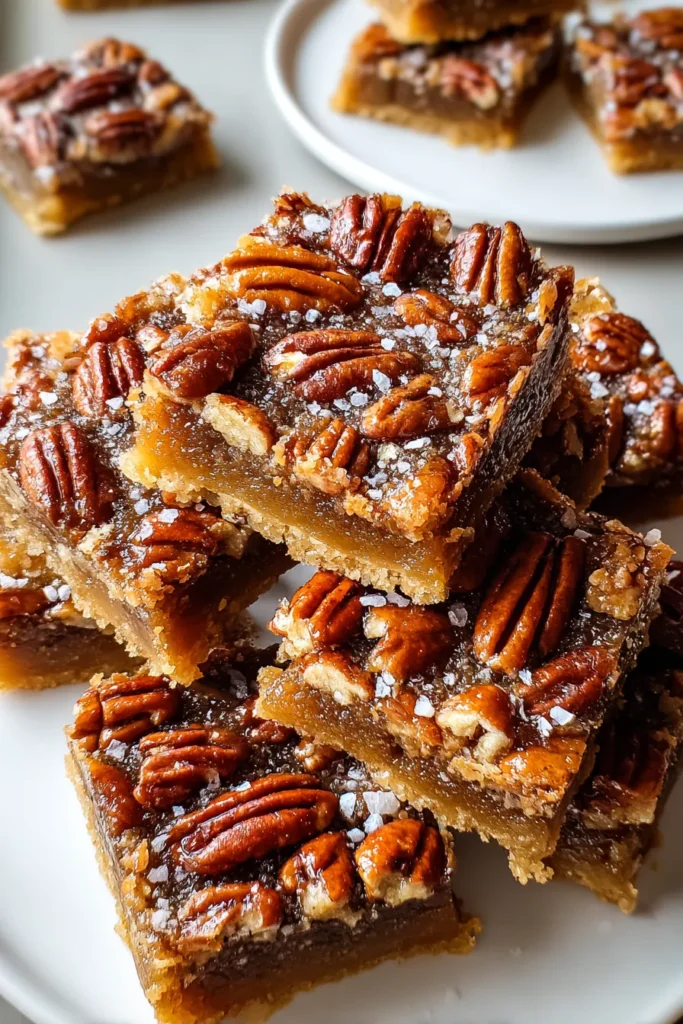
If you’re chasing that perfect harmony of sweet and savory in a dessert bar, these Salted Maple Pecan Pie Bars are your new best friend. They start with a buttery, flaky crust that gives way to a rich, custardy filling studded with toasted pecans and kissed by pure maple syrup. Every bite offers a delightful crunch followed by a smooth, caramel-like center that’s balanced by just the right touch of sea salt. Whether you’re gathering friends for a cozy afternoon coffee or need a standout treat for the holidays, these bars take center stage. They are as comforting as a slice of classic pecan pie, but so much easier to slice and share—no messy forks required!
In my kitchen, these bars have become a ritual. On chilly mornings, I nestle a fresh square in my palm and watch the maple syrup glisten under the soft light. My family heads straight to the fridge where they’re stored, hunting for that next piece of nutty, salty perfection. Over the years, I’ve learned a few tricks—like giving those pecan halves a quick toast or resting the bars overnight for flavors to marry even more deeply. The result? A dessert bar that’s both elegant enough for Thanksgiving dinner and easy enough for a random Tuesday treat. Trust me, once you bake these, you’ll find any excuse to whip up another batch.
Before we dive into the baking, let’s meet the stars of the show. Each ingredient plays a crucial role in creating that ideal texture and flavor balance—think of them as an orchestra, each adding its own note to a mouthwatering symphony.
Provides the sturdy base for the crust, yielding a tender, flaky texture that holds up under the rich filling.
Sweetens the crust and helps it brown to a light golden color, contributing to both flavor and structure.
Enhances all the other flavors, cutting through sweetness and balancing the richness of butter and sugar.
Cold and cubed, it creates pockets of steam in the crust, making it irresistibly flaky and rich without overpowering salt.
Offer a satisfying crunch and nutty depth, soaking up the maple custard while maintaining their crisp texture.
Infuses the filling with an earthy sweetness and a hint of caramel notes that pair beautifully with pecans.
Adds moisture and a subtle molasses flavor, deepening the filling’s complexity and giving it that classic pecan pie vibe.
Brings a luscious creaminess to the filling, making it silky and smooth rather than overly dense.
Rounds out the sweetness with floral, aromatic undertones, amplifying the maple’s natural flavor.
Sprinkled on top, it provides that final pop of contrast—an invitation for your taste buds to wake up.
Bind everything together, creating a custard-like filling that sets just right—firm enough to slice, yet tender under your fork.
Ready to transform these ingredients into a show-stopping dessert? In this section, you’ll find every step detailed to guide you toward bakery-worthy bars. Follow along, and soon your kitchen will be filled with the warmth of maple, nuts, and golden crust.
1. Preheat your oven to 350°F (175°C). Grease a 9x13-inch baking pan and line it with parchment paper, leaving some overhang on the sides. This parchment sling makes it easy to lift out the bars once they’re cooled.
2. In a large mixing bowl, whisk together the flour, granulated sugar, and salt. Add the cold, cubed butter, then use a pastry cutter or your fingertips to work it into the dry ingredients. Aim for a texture resembling coarse crumbs, with pea-sized bits of butter throughout.
3. Press the mixture evenly into the prepared pan, focusing on an even thickness from corner to corner. Bake in the preheated oven for 15 minutes, or until the edges turn a light golden brown. Remove from the oven and set aside.
4. While the crust bakes, make the filling. In a medium saucepan over medium heat, combine maple syrup, light brown sugar, and heavy cream. Stir to dissolve the sugar, then bring to a gentle boil. Let it simmer for about 1 minute, then remove from heat.
5. Stir in vanilla extract and sea salt. Allow the mixture to cool for a few minutes so it doesn’t scramble the eggs in the next step.
6. In a separate bowl, lightly beat the eggs. Slowly drizzle the slightly cooled maple mixture into the eggs, whisking constantly. This gradual incorporation prevents the eggs from curdling.
7. Arrange the pecan halves in an even layer over the warm crust. Pour the maple-egg mixture on top, ensuring every nut is coated with that luscious custard.
8. Return the pan to the oven and bake for an additional 30–35 minutes, until the filling is set with a slight jiggle in the center and the top is golden brown.
9. Remove from the oven and, if you like, sprinkle a touch more sea salt on top. Let the bars cool completely in the pan on a wire rack—this final rest ensures clean slices.
10. Once fully cooled, lift the bars out using the parchment paper overhang. Cut into squares and serve!
These bars are irresistibly good on their own, but elevating the presentation and flavors can turn them into an unforgettable dessert experience. Whether you’re hosting a weekend brunch or impressing holiday guests, these ideas will inspire you.
Gently reheat a bar in the microwave for 10–15 seconds, then top with a dollop of freshly whipped cream. The contrast of warm, gooey filling and cool cream is pure magic.
Place a bar on a dessert plate and crown it with a generous scoop of high-quality vanilla ice cream. As the ice cream melts, it blends into a creamy sauce that drips down the sides.
Cut bars into bite-sized pieces and arrange them on a charcuterie board alongside dark chocolate chunks, dried fruit, and roasted nuts. Perfect for grazing at parties!
For maple lovers, lightly warm some pure maple syrup and drizzle it over each bar just before serving, amplifying that signature flavor.
Proper storage keeps your bars tasting as fresh as the day you baked them. Whether you’re planning ahead for a gathering or boxing up leftovers, these guidelines will help maintain that perfect texture and flavor.
If you plan to enjoy them within 24 hours, store bars in an airtight container at room temperature. Keep them in a cool, dry spot away from direct sunlight.
For longer freshness—up to 5 days—place bars in an airtight container or wrap the pan tightly with plastic wrap, then chill. This slows any moisture loss and keeps the custard silky.
Freeze individual bars by wrapping each tightly in plastic wrap, then storing in a zip-top freezer bag. They’ll keep for up to 3 months. Thaw overnight in the fridge before serving.
When stacking bars, separate layers with parchment paper to prevent sticking. This little trick ensures each bar lifts away cleanly without taking corners off its neighbors.
And there you have it: a complete guide to making, serving, and storing these mouthwatering Salted Maple Pecan Pie Bars. From a buttery, flaky crust to a luscious, maple-sweet filling dotted with crunchy pecans, this recipe captures all the flavors of a classic pecan pie with the convenience of bars you can slice ahead of time. With an intermediate difficulty level and about 25 minutes of prep plus 50 minutes of baking, these bars are perfect for bakers who want to impress without spending all day in the kitchen. The rest time of 2 hours might feel long, but trust me—it’s worth the wait for clean, gorgeous squares. Each bar clocks in around 320 calories, making it a reasonable indulgence for dessert lovers.
Feel free to print this article or save it in your digital recipe box for easy reference whenever you need a show-stopping dessert. You’ll also find a handy FAQ below to troubleshoot any kitchen questions. If you give these bars a try, I’d love to hear how they turned out—drop a comment, share a photo, or ask any questions you have about the process. Happy baking, and may your home be filled with the sweet, nutty joy of salted maple pecan perfection!
These Salted Maple Pecan Pie Bars burst with rich, nutty flavors, a hint of sweetness from maple syrup, and a perfect touch of sea salt. Ideal for any occasion!

Hey there ! I'm Julia Martinez, and welcome to my kitchen where tradition meets innovation. Growing up in a multigenerational household, I learned that the best recipes aren't just about ingredients – they're about the stories, memories, and love that get passed down through each carefully prepared dish.