
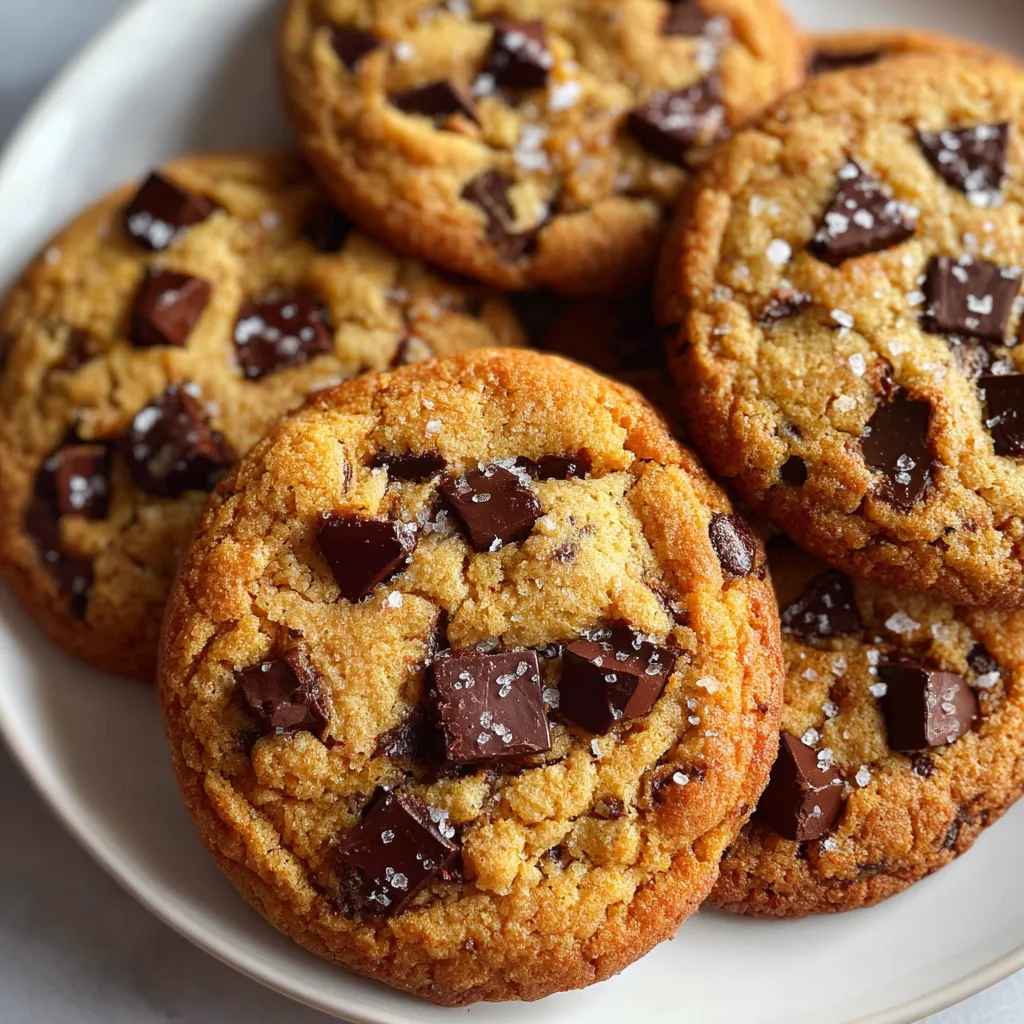
Soft Batch Cookies with Browned Butter and Chocolate Chips deliver melting centers and nutty browned-butter notes in every pillowy bite. Golden-browned butter gives each cookie a toasty warmth, while tender dough yields gooey chocolate pockets and a whisper of flaky sea salt. Whether you’re an afternoon snack seeker or craving late-night indulgence, these cookies are your new go-to treat—soft, rich, and impossible to resist.
Gathering high-quality ingredients is the first step toward baking perfect Soft Batch Cookies with Browned Butter and Chocolate Chips. Each component plays a special role in achieving that irresistible texture and flavor.
Baking these cookies is a fun journey from browning butter to pulling soft, gooey rounds from the oven. You’ll start by prepping pans and chilling dough, then move through melting and caramelizing butter, whisking sugars, folding in dry ingredients, and finally chilling and baking. Follow each detailed step to ensure your cookies turn out thick, tender, and packed with melted-chocolate goodness.
1. Prepare your pans: Begin by lining two large baking sheets with parchment paper or silicone baking mats—this prevents sticking and promotes even browning. Make space in your fridge to chill the dough once it’s mixed.
2. Brown the butter: Cut the butter into pieces and place them in a light-colored saucepan so you can watch the color change. Melt over medium heat, stirring frequently. The butter will foam, then the milk solids will turn golden brown and smell nutty (about 5–7 minutes total). As soon as you see amber flecks, remove from heat, scrape all browned bits into a heatproof bowl, and let cool for 15–20 minutes until just warm.
3. Mix dry ingredients: In a medium bowl, whisk together the flour, cornstarch, baking soda, baking powder, and salt until evenly combined. Set aside.
4. Start the cookie dough: Add both brown sugar and granulated sugar to the slightly cooled browned butter. Whisk or use a hand mixer on low until the mixture looks thick, glossy, and mostly smooth, about 1–2 minutes.
5. Add eggs and flavorings: Incorporate the eggs one at a time, beating well after each addition until smooth and slightly thickened. Beat in the vanilla extract and Greek yogurt or sour cream (if using) just until combined; the mixture should be shiny and cohesive.
6. Incorporate dry ingredients: Add the flour mixture in two batches, folding gently with a spatula or mixing on low until no dry streaks remain. Do not overmix—stop as soon as the dough comes together.
7. Fold in chocolate: Gently fold the semisweet chips and dark chocolate chunks into the dough so they’re evenly distributed.
8. Chill the dough: Cover the bowl tightly with plastic wrap or a lid. Chill for at least 1 hour (2–4 hours is ideal) and up to 48 hours. If chilled longer, let dough sit at room temperature for 15–20 minutes before scooping.
9. Preheat oven: Position racks in the upper and lower thirds and preheat to 350°F (175°C).
10. Shape the cookies: Use a medium scoop (1½ tbsp) for smaller cookies or a large scoop (3 tbsp) for bakery-style. Roll each portion into a cylinder-shaped ball and place 2–3 inches apart on prepared sheets.
11. Bake: Place both sheets in the oven—one on each rack—and bake 9–11 minutes for smaller cookies or 11–13 minutes for larger. Rotate and swap the pans halfway through for even browning. Centers should look slightly underbaked.
12. Finish and cool: Right out of the oven, press extra chocolate pieces on top and sprinkle with flaky sea salt if desired. Let cookies cool on the sheet for 8–10 minutes, then transfer to a wire rack. Enjoy warm for ultimate gooeyness.
These cookies shine on their own, but a few fun serving ideas can elevate your treat time even more. Whether you’re hosting a gathering or enjoying a solo snack, here’s how to make each bite even better.
These cookies are all about texture balance and flavor depth. A few simple tricks will help you get bakery-worthy results every time, whether you’re a seasoned baker or a curious first-timer. Follow the tips below to dial in softness, thickness, and chocolatey goodness.
Proper storage is key to keeping these cookies soft, chewy, and full of flavor—even days after baking. Whether you want to save them for a week or lock in freshness for the freezer, here are a few methods you can trust.
Here are quick answers to the most common cookie queries:
From start to finish, plan for about 1 hour 45 minutes to 2 hours. That includes 15–20 minutes browning and cooling the butter, 10 minutes mixing, at least 1 hour chilling, then 9–13 minutes baking per batch plus cooling time. If you chill longer (up to 48 hours), factor that into your schedule.
Browning the butter develops nutty, caramel-like flavors and reduces water, boosting richness. Use a light-colored pan so you can watch the milk solids turn golden. Stir constantly over medium heat and remove from the heat as soon as you see amber flecks on the bottom. Immediately transfer to a cool bowl to halt cooking.
The yogurt or sour cream adds moisture and tang, compensating for the reduced water in browned butter. If you skip it, your cookies may be slightly less tender. You can substitute an equal amount of crème fraîche or full-fat buttermilk, or simply proceed without—but consider pulling them from the oven a minute earlier to retain softness.
Once fully cooled, place cookies in an airtight container at room temperature. Layer them between sheets of parchment paper to prevent sticking. They’ll stay soft and chewy for up to 4–5 days. For extra freshness, tuck a piece of bread into the container—the moisture from the bread helps keep the cookies tender.
Yes. Scoop dough balls onto a tray, freeze until solid (about 1–2 hours), then transfer to a freezer bag for up to 3 months. Bake from frozen, adding 1–3 minutes to the bake time. You can also freeze cooled baked cookies in an airtight container with parchment between layers; thaw at room temperature for about 30 minutes before serving.
Chilling the dough for at least 2–4 hours is key. Cold dough spreads less in the oven, yielding tall, pill-shaped cookies. Use cornstarch in the flour mixture to bolster structure, and shape each scoop into a slightly cylindrical ball. Baking on parchment or silicone mats at 350 °F with adequate spacing also helps maintain height.
Let the dough sit at room temperature for 15–20 minutes to soften slightly, then use a cookie scoop or warm your hands with a quick rinse and dry before rolling. If it’s still too firm, let it rest another 5–10 minutes. Avoid microwaving, which can unevenly soften and melt the chocolate.
You can experiment, but results vary. For gluten-free, use a 1:1 all-purpose gluten-free flour blend that contains xanthan gum. Substituting coconut sugar for brown sugar or honey for granulated sugar will alter moisture and spread—reduce liquid slightly and watch bake time closely. Always test a small batch first.
These Soft Batch Cookies with Browned Butter and Chocolate Chips nail the perfect balance of chewiness and gooey chocolate thanks to browned butter, cornstarch, and a well-chilled dough. The browned butter’s toasty sweetness, mixed chocolate pockets, and a hint of flaky salt make every bite feel like a bakery treat. Go ahead, print this article and tuck it into your recipe binder—then let me know if you have questions, need troubleshooting tips, or want to brag about your cookie success in the comments!
Golden-browned butter creates a warm, toasty aroma while tender cookies give way to gooey chocolate pockets and a whisper of flaky sea salt

Hey there ! I'm Julia Martinez, and welcome to my kitchen where tradition meets innovation. Growing up in a multigenerational household, I learned that the best recipes aren't just about ingredients – they're about the stories, memories, and love that get passed down through each carefully prepared dish.