
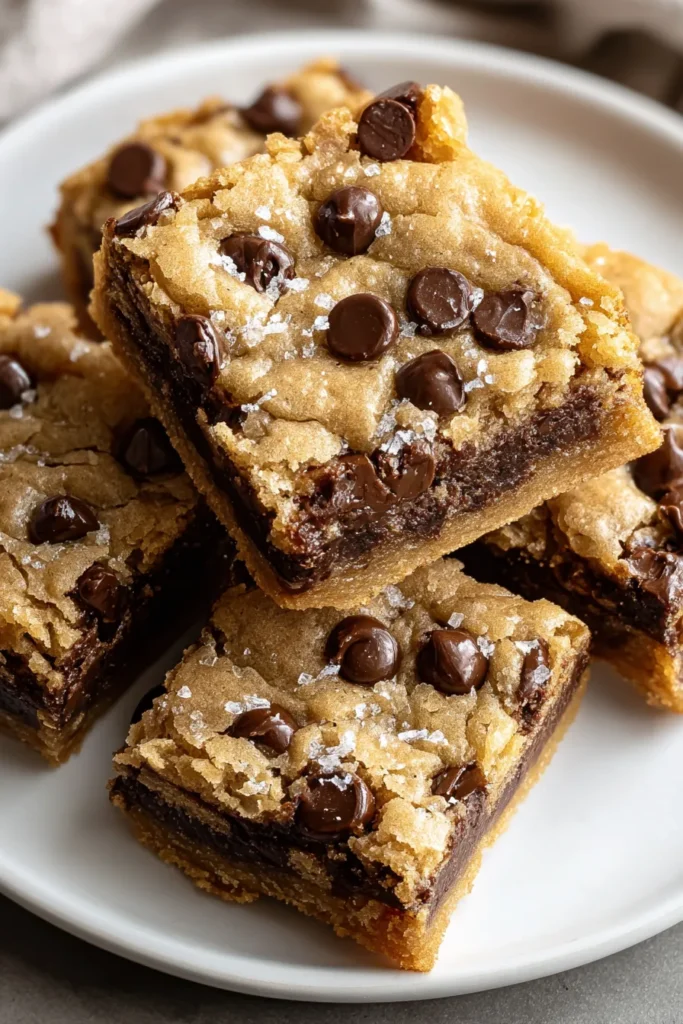
A warm slab of buttery sweetness fresh from the oven is exactly what you need when the craving for something chewy, decadent, and downright irresistible strikes. These Soft & Chewy Cookie Bars combine the simplicity of a one-pan dessert with all the nostalgia of a classic chocolate chip cookie. As you slice into that tender, golden surface, you’ll find ribbons of gooey chocolate nestled in every corner—each bite delivering that perfect balance of crispy edges and soft, chewy center. Whether you’re winding down after a busy day or rallying the troops for a sweet afternoon pick-me-up, these bars are the ultimate remedy for any sweet-tooth emergency.
For fellow home bakers who shy away from complicated recipes, this one is a dream come true. With a beginner-friendly difficulty level, just 15 minutes of active prep time, and about 25–30 minutes in the oven, you’ll have a pan loaded with twelve generous bars in under an hour, including rest time. At roughly 250 calories per bar, you can indulge in this dessert without the elaborate fuss—just pure, comforting joy in every square. As someone who’s tested this recipe on both my most experienced baker pals and my nephews on a weekend baking spree, I can promise you’ll end up with enthusiastic smiles all around the kitchen table.
Every standout recipe depends on a few star players to bring flavor, texture, and structure together. In this case, each ingredient plays a crucial role in creating those irresistibly soft, yet just-barely-crisp edges—and that melt-in-your-mouth chewiness at the center. Let’s meet the lineup:
This pantry staple provides the structure that holds everything together. It creates the perfect canvas for those tender centers and slightly crisp edges.
A touch of this leavening agent ensures just enough rise and spread, giving the bars their signature thin, crackly top.
It doesn’t just season—salt enhances sweetness and balances the flavors, making each bite more complex and satisfying.
Melted to silky perfection, butter brings richness and lends that delightful chew, while allowing the sugars to meld seamlessly.
Packed with molasses, this sugar offers deep caramel notes and extra moisture, which contribute to the bars’ chewiness.
It adds light sweetness and helps create those slightly crisp edges that frame the soft interior.
A splash of vanilla provides a warm, aromatic undertone that rounds out the flavors.
The whole egg contributes structure and lift, helping the bars hold their shape.
Extra yolk means more moisture and richness, enhancing texture without adding too much fluff.
These little morsels are the pockets of gooey delight that make every bite unforgettable, with just the right balance of sweet and bitter.
Ready to dive into the baking process? This recipe flows effortlessly from step to step, guiding you through mixing, baking, and cooling so you end up with picture-perfect bars that taste even better than they look.
1. Preheat your oven to 325°F (165°C). Grease a 9x13 inch baking pan or line it with parchment paper for easy removal and minimal cleanup.
2. In a medium bowl, whisk together the flour, baking soda, and salt. This ensures an even distribution of leavening and seasoning—no uneven pockets! Set this dry mix aside.
3. In a large mixing bowl, beat together the melted butter, brown sugar, and granulated sugar until the mixture is smooth and cohesive. The goal is a glossy, slightly thick batter that will bake into chewy perfection.
4. Stir in the vanilla extract. Then, add the egg and egg yolk one at a time, gently mixing after each addition until you have a homogenous, velvety batter.
5. Gradually add the dry ingredients to the wet mixture, stirring just until the flour streaks disappear. Be careful not to overmix—that’s the secret to tender bars.
6. Fold in the chocolate chips with a spatula, making sure they’re evenly distributed throughout the dough for uniform pockets of melty chocolate.
7. Spread the dough evenly into the prepared baking pan, using a spatula to smooth the top so your bars bake uniformly.
8. Bake for 25–30 minutes, or until the edges are lightly golden and the center appears set but still soft. A thin knife or toothpick should come out with a few moist crumbs.
9. Remove from the oven and let the pan cool on a wire rack for at least 10 minutes. Once cooled to the touch, lift out the parchment and cut into bars. Serve warm or at room temperature.
These cookie bars are delightful on their own, but with a few extra touches, you can elevate them into showstopping treats for every occasion. Whether you’re serving them at a potluck, pairing them with coffee, or presenting them as the grand finale of a dinner party, these ideas will help you impress with minimal effort.
Storing these bars properly keeps their texture just right—from the first day they’re baked to a week later. With the right methods, you can preserve that soft center and chewy edges without any sacrifice in taste. Here are a few tried-and-true methods:
Place cooled bars in an airtight container. Keep layers separated by parchment paper to prevent sticking. Stored this way, they stay fresh for up to five days.
For a firmer texture and longer shelf life, store bars in a sealed container in the fridge. They’ll last up to a week and develop a slight, satisfying chew as they chill.
Individually wrap bars in plastic wrap and then place them in a freezer-safe bag. Freeze for up to three months. Thaw at room temperature or warm briefly in the microwave for that just-baked feel.
Pre-cut bars and wrap them in wax paper or reusable wraps for on-the-go snacks. Store in a sealed box at room temperature or refrigerate for up to five days.
From the first scoop of velvety dough to the last bite of a warm, gooey chocolate-laden square, these Soft & Chewy Cookie Bars are a celebration of simple ingredients achieving extraordinary results. We’ve covered everything—from the key players in the ingredient lineup to step-by-step baking instructions—so you can bake with confidence, whether this is your first time or your fiftieth. This dessert fits beautifully into a busy schedule, requiring just 15 minutes of prep and 25–30 minutes in the oven, plus a brief 10-minute rest. The result? Twelve generous bars, each around 250 calories, perfect for sharing at family gatherings or savoring with your favorite cup of coffee. Feel free to print this article and save it for future baking sessions—your kitchen helper is right at your fingertips whenever the sweet temptation strikes.
Below this article, you’ll also find a handy FAQ section that tackles common questions about variations, troubleshooting, and tasty twists. If you give this recipe a whirl, I’d love to hear how it turned out. Drop a comment, share your own tweaks, or ask any baking questions you might have. Your feedback helps make our community of home cook enthusiasts even stronger—and who knows, your tip might be the next reader’s secret to cookie bar perfection! Happy baking!
These cookie bars boast a delightful blend of buttery goodness, rich flavors, and gooey chocolate chips, making every bite an unforgettable treat that you'll crave again and again.

Hey there ! I'm Julia Martinez, and welcome to my kitchen where tradition meets innovation. Growing up in a multigenerational household, I learned that the best recipes aren't just about ingredients – they're about the stories, memories, and love that get passed down through each carefully prepared dish.