
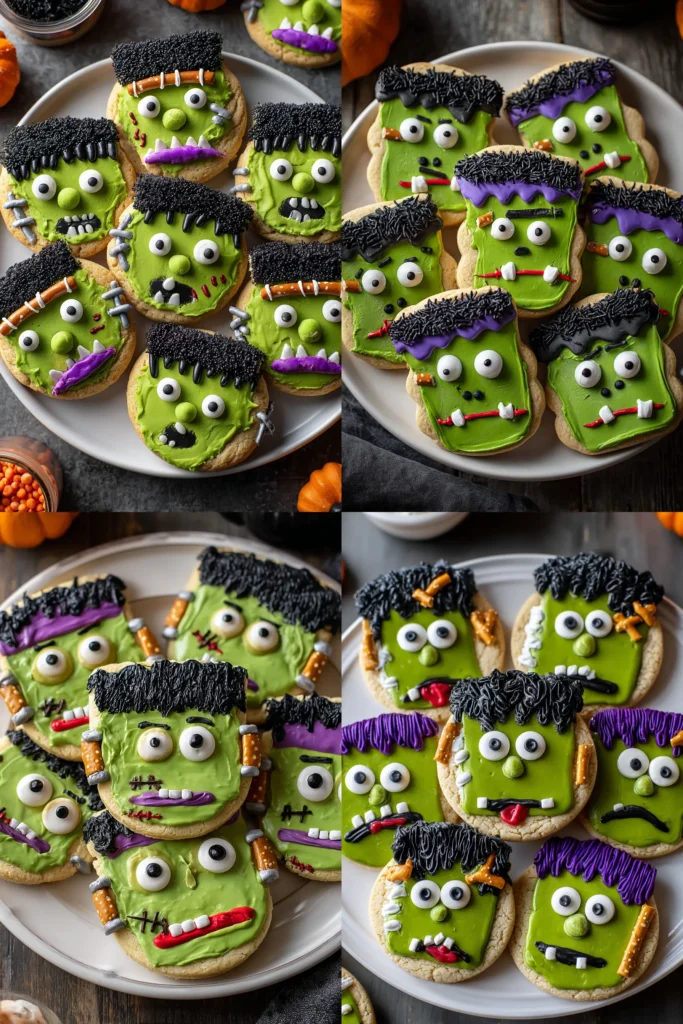
Halloween is almost here, and there’s no better way to celebrate than with a batch of delightfully eerie Frankenstein cookies. These spooky Halloween Frankenstein Cookies are a feast for the eyes and a treat for your taste buds, blending vibrant Halloween spirit with buttery, melt-in-your-mouth goodness. From the moment you stir that green-hued dough, you’ll feel like a mad scientist in a candy-coated laboratory, whipping up a dessert that’s as fun to decorate as it is to devour. Whether you’re baking with little monsters in tow or hosting a late-night ghoulish gathering, these cookies are sure to steal the show.
I’ve found that the beauty of this recipe lies in its simplicity: if you’re a beginner in the kitchen, you’re in luck—this beginner-friendly dessert comes together in under an hour, including a quick 20-minute prep, a 10-minute bake, and a 30-minute rest while your Franken-creatures cool down and wait for their dramatic facial features. Every cookie becomes its own character with candy eyes, pretzel bolts, and stitch-like icing marks in bold black and scarlet red or purple. These vibrant green cookies are not just a feast for the eyes but also a delight for your taste buds, combining buttery softness with playful decorations that practically beg to be photographed and shared. So roll up your sleeves, grab a piping bag, and get ready for a spook-tacular treat with these fun and easy Halloween Frankenstein Cookies!
Before you dive in, let’s talk about the stars of the show. Each ingredient plays a crucial role in creating a soft, colorful cookie canvas ready to be transformed into Frankenstein’s next masterpiece.
With your ingredients laid out, this recipe guides you step by step through crafting the ultimate Halloween cookie. From mixing to decorating, here’s how to transform simple dough into a batch of spooky masterpieces.
1. Preheat your oven to 350°F (175°C) and line a baking sheet with parchment paper to prevent sticking and ensure even baking.
2. In a large mixing bowl, cream together the softened butter and sugar until the mixture is light and fluffy, about 2–3 minutes using an electric mixer.
3. Add the egg and vanilla extract to the butter mixture, beating until the dough is well combined and smooth.
4. In a separate bowl, whisk together the all-purpose flour, baking soda, and salt to distribute the leavening agent evenly.
5. Gradually add the dry ingredients to the wet ingredients, mixing until a dough forms—avoid overworking to keep cookies tender.
6. Add green food coloring to the dough and knead by hand until the color is evenly distributed. Adjust the intensity by adding more coloring if you want a deeper green shade.
7. Roll the dough into small balls, about 1 inch in diameter, and place them on the prepared baking sheet. Flatten each ball slightly to create a rounded rectangle shape, perfect for Frankenstein’s face.
8. Bake in the preheated oven for 8–10 minutes, or until the edges are lightly golden. Allow the cookies to cool completely on the baking sheet before decorating.
9. Once cooled, use black gel icing or melted chocolate to draw hairlines and stitches on the top of each cookie.
10. Attach candy eyes onto each cookie using a small dot of icing as glue, creating all kinds of monster expressions.
11. Stick small broken pieces of pretzel sticks into the sides of the cookies to represent Frankenstein’s bolts, giving them that iconic look.
12. Use the purple or red icing to draw a mouth and add additional scars as desired, making each cookie uniquely spooky.
These Frankenstein cookies shine when presented just right. Whether you’re setting up a haunted buffet or delivering treats to classmates, here are some creative ways to serve your spooky creations:
Keeping your Frankenstein cookies fresh ensures every bite is just as good as the first. Proper storage prevents sogginess, preserves their shape, and maintains the crisp details of your decorations.
This recipe for Spooky Halloween Frankenstein Cookies has everything you need to celebrate the season in style: vivid green dough, playful decorations, and a fuss-free process perfect for beginners and baking pros alike. We’ve covered step-by-step instructions, a detailed breakdown of each ingredient’s role, and creative serving and storage ideas to keep your cookies at peak freshness. With just under an hour from start to finish—including prep, bake, and rest time—you’ll have a crowd-pleasing dessert that looks like it walked straight out of a mad scientist’s lab. Whether you’re hosting a haunted house party or looking for a sweet afternoon activity with the kids, these vibrant green cookies combine buttery softness with spooky fun that everyone will love.
Feel free to print out this article and save it for later—you can stash it in your recipe binder or pin it to your kitchen wall for quick reference. Below this guide you’ll find a handy FAQ section to answer any questions that pop up as you bake. If you give this recipe a whirl, I’d love to hear how your Frankenstein faces turned out! Drop a comment, ask questions, or share your own creative decorating tips and feedback. Happy baking, and have a monstrously sweet Halloween!
These vibrant green cookies are not just a feast for the eyes but also a delight for your taste buds, combining buttery softness with delightful decorations.

Hey there ! I'm Julia Martinez, and welcome to my kitchen where tradition meets innovation. Growing up in a multigenerational household, I learned that the best recipes aren't just about ingredients – they're about the stories, memories, and love that get passed down through each carefully prepared dish.