
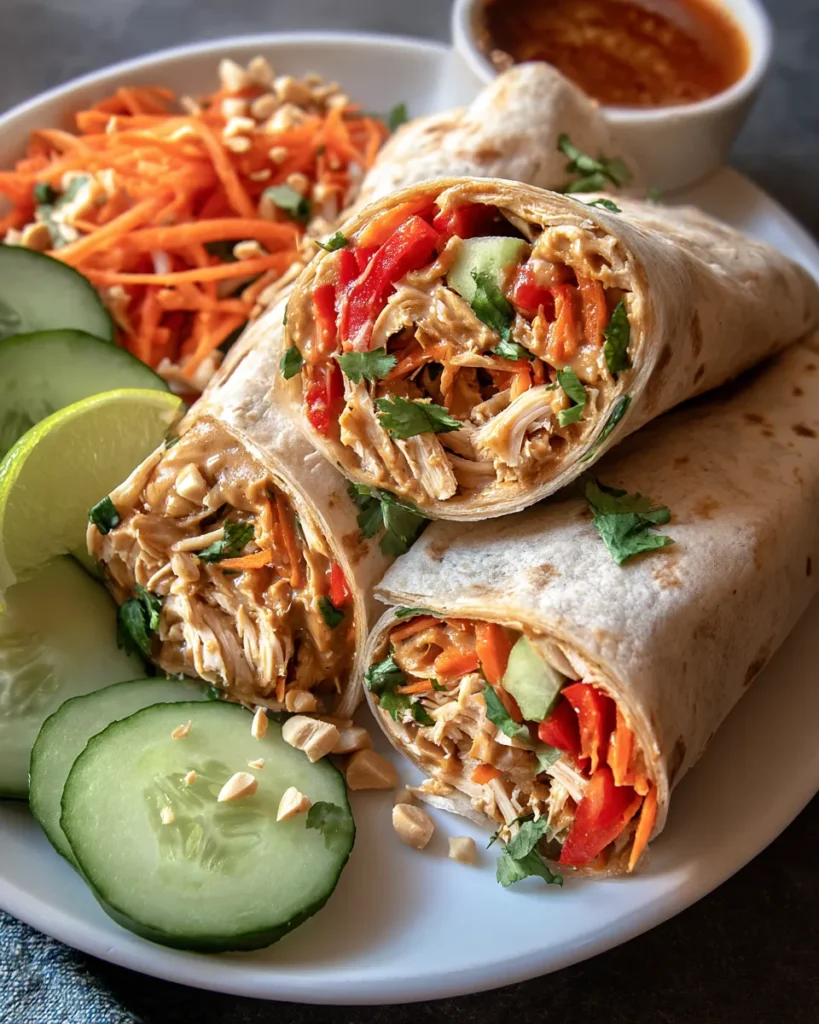
These Thai Peanut Chicken Wraps are a vibrant, flavor-packed meal that brings a burst of Thai-inspired goodness to your table. Picture tender, shredded chicken coated in a luscious, creamy peanut sauce and nestled alongside crisp, colorful vegetables—all wrapped up in a soft flour tortilla. This recipe strikes the perfect balance between savory, sweet, and tangy notes, making every bite an exciting adventure for your taste buds. Whether you’re looking for a quick lunch to power you through a busy day or a light dinner that doesn’t skimp on satisfaction, these wraps fit the bill.
What’s even better? You don’t need to be a seasoned chef to pull this off. With simple pantry staples like peanut butter, soy sauce, and rice vinegar, plus everyday produce like carrots and cucumber, you’ll have everything you need to assemble these beauties. The best part is the hands-on time: just 15 minutes of prep, zero cooking or resting time, and you’re ready to roll. Four servings come in at around 450 calories each, making this an ideal option for a healthy lunch or a fuss-free dinner. Beginner-friendly and bursting with texture, these Thai Peanut Chicken Wraps are destined to become a new go-to in your meal rotation.
Before diving into the step-by-step instructions, let’s explore the core components that make these wraps shine. Each ingredient plays a vital role in delivering that perfect blend of creaminess, crunch, and zesty Thai flair.
Tender, lean protein that soaks up the rich peanut sauce. Using leftover rotisserie chicken or pre-cooked chicken breast makes this recipe a breeze.
The heart of the creamy sauce, lending nutty depth and smooth texture. It balances out the tanginess of the vinegar and the saltiness of the soy sauce.
Adds a savory, umami punch and helps to thin the peanut butter into a silky, coatable sauce.
A touch of natural sweetness that rounds out the sauce, preventing it from becoming too salty or acidic.
Provides a bright, tangy lift that cuts through the richness of the peanut butter and ties all the flavors together.
A small drizzle infuses a toasty, aromatic layer, elevating the overall depth of the sauce.
Minced garlic delivers a punch of sharp, garlicky warmth—an essential flavor builder.
Grated ginger brings a clean, zesty kick that complements the peanut butter’s richness.
Adds sweet crunch and vivid color, boosting both texture and visual appeal.
Thin slices contribute juicy sweetness and a crisp bite.
Julienned strips lend a refreshing, cooling contrast to the creamy sauce.
Brightens the wrap with its citrusy, herbaceous notes, giving it that unmistakable Thai essence.
Soft and pliable vessels that hold all the ingredients together—feel free to use whole wheat or gluten-free wraps if preferred.
A squeeze of fresh lime juice adds a zesty finish and balances the savory, nutty flavors.
The final garnish, offering an extra layer of crunch and a pop of nutty goodness.
Time to bring everything together! This section will guide you through each step, ensuring your wraps come out perfectly every time.
1. In a medium bowl, whisk together the peanut butter, soy sauce, honey, rice vinegar, sesame oil, minced garlic, and grated ginger. Continue whisking until the mixture is smooth, well combined, and free of lumps—this is your irresistible Thai peanut sauce.
2. Transfer the shredded chicken into a large mixing bowl and add half of the prepared peanut sauce. Use a spatula or tongs to toss the chicken gently, making sure each strand is evenly coated in that luscious, nutty mixture.
3. Lay a flour tortilla flat on your workspace. Using the back of a spoon, spread a generous tablespoon of the remaining peanut sauce evenly over the surface of the tortilla, leaving a small border around the edges.
4. On top of the sauced tortilla, layer a portion of the peanut-coated chicken, then add shredded carrots, red bell pepper slices, julienned cucumber, and chopped cilantro. Take care not to overfill so you can roll the wrap without spilling.
5. Starting at one end, tightly roll the wrap toward the opposite side, tucking in both sides as you go to secure the fillings. Place the seam side down on your cutting board. Repeat with the remaining wraps and fillings.
6. Once all wraps are rolled, use a sharp knife to slice each one in half diagonally, showcasing those vibrant layers. Arrange the halves on a platter for an inviting presentation.
7. Finish by garnishing with chopped peanuts for extra crunch and placing lime wedges on the side. A quick squeeze of lime brightens every bite and completes this delightful fusion wrap.
Once your wraps are rolled and ready, think about creative ways to present and enjoy them. These serving ideas transform a simple meal into a memorable spread, whether you’re hosting friends or treating yourself to a fun lunch.
Serve your wraps alongside a light cucumber-and-mint salad dressed in lime juice and a drizzle of sesame oil. The cool, fresh greens complement the rich peanut flavors and add a crisp counterpoint.
Set out small bowls of extra peanut sauce, spicy Sriracha mayo, or sweet chili sauce. Let each person customize their wrap with an additional layer of sauce to match their spice preference.
Offer carrot and celery sticks lightly tossed in a splash of rice vinegar and a sprinkle of salt. Their crunch makes for a fun textural contrast and echoes the fresh ingredients inside the wrap.
Arrange the wrap halves on a large, flat platter with lime wedges, chopped peanuts, and cilantro sprigs scattered around. The vibrant reds, greens, and oranges turn a simple meal into an eye-catching feast.
If you find yourself with leftovers or want to meal-prep these delightful wraps, proper storage will keep them fresh, flavorful, and ready to enjoy later. Follow these tips to preserve texture and taste.
Individually wrap each finished wrap in plastic wrap or parchment paper to prevent moisture loss. Place them in an airtight container and store in the refrigerator for up to 2 days. This method keeps the tortillas soft and the fillings crisp.
For longer-term storage, wrap each individual portion tightly in plastic wrap, then foil. Label and freeze for up to 1 month. When you’re ready to enjoy, thaw overnight in the fridge and then crisp it up in a skillet or a toaster oven.
If you plan to assemble wraps later, store the Thai peanut sauce in a sealed jar or container in the refrigerator for up to 1 week. Give it a good stir before using, as it may firm up when chilled.
Chopping vegetables and shredding chicken ahead of time streamlines assembly. Store prepped carrots, peppers, cucumber, and chicken in separate airtight containers in the fridge. Assemble your wraps just before serving to preserve the best crunch.
This Thai Peanut Chicken Wrap recipe is proof that you don’t need hours in the kitchen to create something truly special. From the creamy, nutty sauce to the crisp ribbons of vegetables and tender chicken, each element comes together effortlessly. With just 15 minutes of prep and zero cooking time, you’ll whip up four satisfying meals that are perfect for lunch, a light dinner, or meal prep. The bold flavors—sweet honey, tangy rice vinegar, savory soy sauce, and zesty ginger—make this wrap a standout, yet it’s still beginner-friendly and wonderfully adaptable. Feel free to swap in tofu or shrimp, add a dash of Sriracha for heat, or experiment with different greens for even more color and crunch.
Go ahead and print this article or save it in your recipe collection—you’ll be reaching for it again and again. Below, you’ll find a handy FAQ section to answer any lingering questions about techniques or substitutions. If you give these wraps a try, I’d love to hear how they turned out! Drop a comment or question, share your own twists, or let me know if you need any help perfecting your roll. Happy wrapping!
Packed with tender chicken, vibrant veggies, and a creamy peanut sauce, these wraps are a zesty and satisfying meal perfect for lunch or dinner!

Hey there ! I'm Julia Martinez, and welcome to my kitchen where tradition meets innovation. Growing up in a multigenerational household, I learned that the best recipes aren't just about ingredients – they're about the stories, memories, and love that get passed down through each carefully prepared dish.