

Fall baking can be as warm and welcoming as your favorite sweater, and this Apple Slab Pie hits every sweet note you crave. Savor the flavors of fall with this scrumptious Apple Slab Pie, perfect for dessert or a gathering! It brings together a tender, flaky crust and a mountain of thinly sliced apples that dance in a blend of cinnamon, nutmeg, and a whisper of lemon juice. Classified as a beginner-friendly dessert, this slab pie demands just 30 minutes of hands-on prep, 45 minutes in a preheated 375°F (190°C) oven, and a 30-minute rest so the juices have time to settle. The finished 18×13-inch tray yields 24 squares, each packing around 350 calories — just right for a cozy slice à la mode. If you’ve ever feared tackling your own pie, these easy recipes steps will have you cruising through baking mode, turning this slab pie into a centerpiece for any fall gathering. From family dinners to potlucks, it’s a baking winner that transforms simple pantry staples into pure seasonal joy.
Beyond its generous size and inviting aroma, this slab pie tells a story in every bite. Each thin apple slice offers the perfect balance of sweet tanginess and comforting spice, courtesy of cinnamon and nutmeg dancing together in harmony. The hint of lemon juice brightens the flavor profile, ensuring every forkful feels fresh and lively rather than overly sweet. When that golden crust—brushed with a glossy egg wash and kissed with sparkling coarse sugar—emerges from the oven, you’ll feel like you’ve unlocked a secret fall treasure. This recipe strikes the ideal crowd-pleasing chord: it’s simple enough for beginner bakers but impressive enough to earn rave reviews at any gathering. Whether you’re looking to elevate your holiday dessert table or simply craving a slice of homemade apple goodness, this slab pie invites you to gather around. Serve it warm alongside a scoop of vanilla ice cream or let it cool fully for clean, neat squares. Whichever route you choose, you’re in for a memorable treat that captures the very essence of autumn baking.
KEY INGREDIENTS IN APPLE SLAB PIE
Every great pie starts with quality ingredients, and this Apple Slab Pie is no exception. From the sturdy foundation of flour to the cozy spices that warm your soul, each component plays an essential role in creating the perfect balance of flaky crust and juicy apple filling.
- All-purpose flour
The backbone of both the crust and the filling, it provides structure for a tender, flaky texture while also helping to thicken the apple juices as they bake.
- Salt
A small pinch enhances the overall flavor of the crust, balancing sweetness and intensifying the buttery notes.
- Unsalted butter
Chilled and cubed, it creates flaky layers in the crust as it melts, delivering rich, buttery taste with every bite.
- Cold water
Added gradually to the flour-butter mixture, it brings the dough together without melting the butter, ensuring the crust remains tender and flaky.
- Apples
Thinly sliced for even cooking, their natural sweetness and slight tartness form the heart of this dessert, providing juicy pockets of flavor.
- Granulated sugar
Coats the apples for a glossy, caramelized filling that’s sweet without being overpowering.
- Ground cinnamon
Infuses warm, spicy notes that complement the apples, adding depth and classic fall character.
- Ground nutmeg
Offers a subtle, earthy warmth that rounds out the spice profile without overshadowing the fruit.
- Lemon juice
Brightens the filling, preventing the apple slices from browning and balancing the sweetness with a mild tang.
- Egg
Beaten and brushed on the top crust, it creates a beautiful golden sheen and helps the coarse sugar adhere.
- Coarse sugar
An optional finishing touch that adds sparkle and crunchy texture to the baked crust.
HOW TO MAKE APPLE SLAB PIE
Let’s turn those wonderful ingredients into a golden, crowd-pleasing slab pie. Follow these detailed steps to build a flaky crust, spice-dusted apple filling, and a perfect top layer that bakes up to a beautiful, bubbly masterpiece.
1. Preheat the oven to 375°F (190°C) ensuring it reaches the ideal temperature so your pie bakes evenly from edge to center.
2. In a large bowl, combine flour and salt. Using a pastry cutter, cut in butter until the mixture resembles coarse crumbs, which helps create flaky layers.
3. Stir in cold water, a tablespoon at a time, until the dough just comes together into a ball. Divide the dough into two disks, wrap in plastic, and refrigerate for at least 30 minutes to keep it firm.
4. On a lightly floured surface, roll out one disk of dough to fit an 18×13-inch rimmed baking sheet. Carefully transfer the dough to the sheet, pressing gently to line the pan.
5. In another large bowl, toss sliced apples with granulated sugar, extra flour, cinnamon, nutmeg, and lemon juice until every sliver is well coated—this mix thickens as it bakes.
6. Spread the apple mixture in an even layer over the prepared crust, ensuring no bare spots remain.
7. Roll out the second dough disk to cover the apples—either as a solid top crust or a lattice—and position it over the fruit.
8. Trim any excess dough, then fold and seal the edges by crimping to the edge of the pan to lock in juices.
9. Brush the top with beaten egg and, if you like, sprinkle coarse sugar for a hint of crunch and sparkle.
10. Bake for 40–45 minutes, or until the crust is golden brown and the apples are tender and bubbling.
11. Allow the slab pie to cool on a wire rack before cutting into 24 squares to set the filling and make clean slices.
SERVING SUGGESTIONS FOR APPLE SLAB PIE
Serving this Apple Slab Pie becomes almost as fun as baking it. Whether you’re gathering the family for a cozy Sunday dinner or setting up a festive fall potluck, this dessert adapts effortlessly to any occasion. Its generous 18×13-inch format means you can slice into neat squares that look bakery-worthy without requiring delicate handiwork. I love pairing each warm slab with an ice-cold scoop of vanilla bean ice cream so that sweet caramel-like juices mingle with creamy melting bliss. Yet, this pie is equally delicious at room temperature—perfect for make-ahead events where ease of serving is key. For an extra-special touch, you can brush the edges of each slice with melted butter and a sprinkle of cinnamon sugar just before serving, giving it an extra hint of sparkle and flavor. With the pie already shining in gold and sugar on top, each presentation feels festive and inviting, ready to be the shining star at your next fall gathering. I sometimes garnish each plate with a few fresh mint leaves or a dusting of powdered sugar for an elegant finish. If you’re feeling adventurous, serve alongside a small shot glass of warm caramel sauce for guests to drizzle at will. Kids love the interactive element, and it’s a sweet finale to any evening. Customize your garnish with chopped pecans or crushed graham crackers for extra texture, turning each slice into a mini creation. No matter how you dress it up, this Apple Slab Pie remains the star, ready to wow taste buds and spark conversation.
- Classic à la mode
Warm square served with a scoop of vanilla bean ice cream, letting the melting cream mingle with juicy apple filling.
- Whipped cream cloud
Dollop freshly whipped cream spiked with a hint of vanilla or cinnamon to add lightness and a creamy counterpoint.
- Caramel drizzle
Warm salted caramel sauce lightly drizzled in a crisscross pattern for indulgent sweetness and a touch of sophistication.
- Savory cheese pairing
Top a warm slice with a thin piece of sharp cheddar cheese for a delightful sweet-and-savory twist that surprises and delights.
HOW TO STORE APPLE SLAB PIE
Knowing how to store your leftover Apple Slab Pie ensures you can enjoy those layers of cinnamon-kissed apples and flaky crust long after the first generous slice has been devoured. Since this dessert yields a large 18×13-inch tray, it often lasts beyond one sitting—but proper storage is key to preserving both texture and flavor. After letting the slab cool completely, you’ll want to decide between room-temperature keeping, refrigeration, or even freezing, depending on when you plan to serve it again. Each method comes with its own tips: covering the top loosely to keep crumbs crisp, sealing airtight to lock in moisture, or wrapping tightly to prevent freezer burn. With simple adjustments like using parchment paper to separate slices or adding a dash of lemon juice before reheating, you can maintain the pie’s fresh-from-the-oven appeal. Whether you’re wrapping an entire slab or just a few individual pieces, selecting the right approach will safeguard that signature flaky crust and juicy filling. For day-of enjoyment, keeping the pie loosely covered at room temperature maintains a delightfully crisp top layer, while the filling stays soft and luscious. If you need to hold onto leftovers for up to three days, refrigeration in an airtight container or wrapped snugly in plastic wrap will do the trick—just let it come back to room temperature before serving for the best flavor. For long-term storage, freeze fully cooled squares by placing layers between parchment paper sheets in a freezer-safe bag or container, where they’ll stay fresh for up to two months. When ready to indulge, thaw slices in the refrigerator overnight or on the countertop for an hour, then warm gently in a low oven so that the crust crisps back up without drying out. Embracing these storage methods means every slice tastes as if it just emerged from your own oven, making any day feel like fall dessert season.
- Room Temperature Storage
After cooling completely, cover the pie loosely with foil or a clean kitchen towel and keep it at room temperature for up to 24 hours to preserve the flaky crust while maintaining soft filling.
- Refrigeration
Store cooled pie in an airtight container or wrap securely with plastic wrap, keeping it in the fridge for up to three days. Before serving, bring to room temperature or warm briefly in the oven to refresh the crust.
- Freezing Whole
Wrap the entire cooled slab in two layers – first plastic wrap, then aluminum foil – to prevent freezer burn. Freeze for up to two months. Thaw in the refrigerator overnight before reheating.
- Freezing Individual Slices
Place cooled squares between sheets of parchment paper in a freezer-safe bag or container. Freeze flat for up to two months. Reheat single portions directly from frozen at a low oven temperature until warmed through.
CONCLUSION
From beginning to end, this Apple Slab Pie journey is all about embracing the cozy spirit of fall with minimal fuss and maximum flavor. We started by pulling together simple pantry staples—flour, butter, apples, sugar, and spice—and transformed them into a beginner-friendly dessert that looks like it took hours of skill but feels as easy as whipping up your favorite cup of coffee. With a total investment of 30 minutes of hands-on work, 45 minutes in the oven at 375°F (190°C), and a 30-minute rest, you’ll end up with an impressive 18×13-inch tray yielding 24 squares. Each bite balances sweet-tart apple filling, warm notes of cinnamon and nutmeg, and a buttery crust that’s golden and flaky, topped with a shimmer of egg wash and optional coarse sugar for crunch. Whether you’re serving this slab pie as a show-stopping finale to a family dinner or packing it for a potluck, you’ll find this recipe fits right in with any fall recipes lineup. Feel free to print this article and save it for later use—your future self will thank you for having the step-by-step guide and tips all in one place. Don’t forget, you can also find a helpful FAQ below, ready to answer common questions about this scrumptious dessert.
I hope this guide has inspired you to roll up your sleeves and bake your own Apple Slab Pie, whether it’s your first time making a crust or you’re a seasoned baking enthusiast looking for a crowd-pleaser. I would love to hear how yours turns out—did you opt for a solid top crust or a lovely lattice? Did you enjoy it au naturel, or did you top it with ice cream, whipped cream, or a drizzle of caramel? Please share any comments, questions, or feedback if you try this recipe or need help along the way. Your experiences and tips might just spark a new twist for someone else’s next baking adventure. Thank you for letting me be part of your kitchen escapades—I can’t wait to hear about the memories your Apple Slab Pie creates around your table!
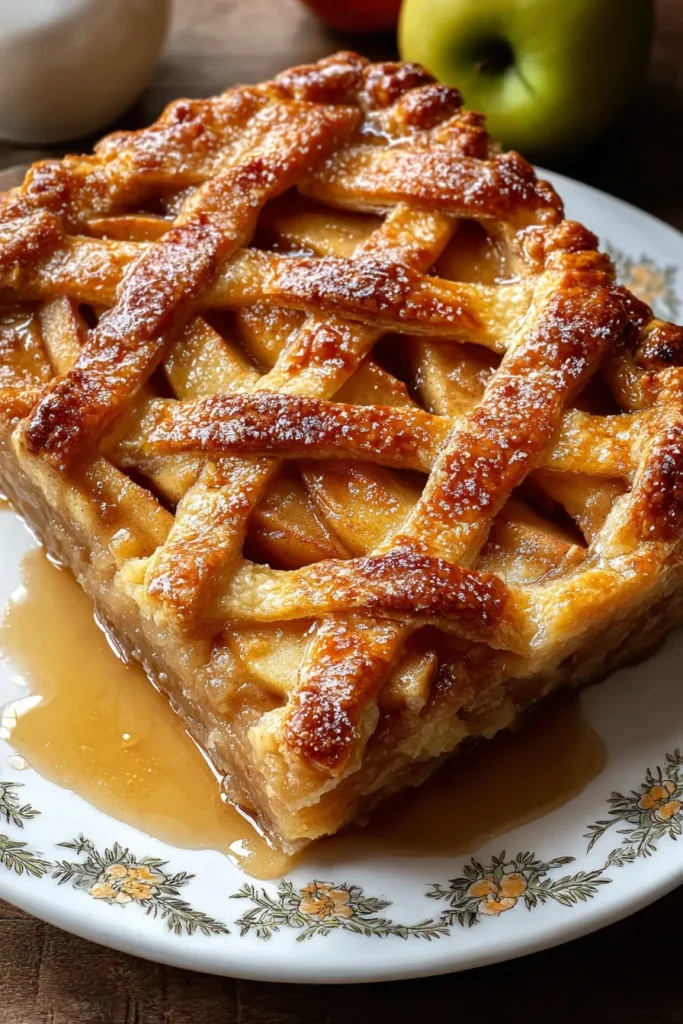

Apple Slab Pie
Description
This Apple Slab Pie features a flaky crust overflowing with sweet and tangy apples, spiced perfectly with cinnamon and nutmeg. It's a delightful treat that’s sure to impress at any gathering.
Ingredients
Instructions
-
Preheat the oven to 375°F (190°C).
-
In a large bowl, combine flour and salt. Using a pastry cutter, cut in butter until the mixture resembles coarse crumbs.
-
Stir in water, a tablespoon at a time, until the dough forms a ball. Divide the dough in half and form into disks. Wrap in plastic and refrigerate for at least 30 minutes.
-
On a lightly floured surface, roll out one disk of the dough to fit into an 18x13-inch rimmed baking sheet. Transfer to the baking sheet.
-
In a large bowl, toss the sliced apples with granulated sugar, flour, cinnamon, nutmeg, and lemon juice until well coated.
-
Spread the apple mixture evenly over the crust in the baking sheet.
-
Roll out the remaining dough to cover the apples. You can either cover it entirely with a solid sheet or create a lattice top.
-
Trim and fold the edges underneath to seal, then crimp them to the edge of the pan.
-
Brush the top crust with beaten egg and sprinkle with coarse sugar, if desired.
-
Bake in the preheated oven for approximately 40 to 45 minutes, or until the crust is golden brown and the apples are tender.
-
Let cool on a wire rack before cutting into squares and serving.
Note
- Use a mix of tart and sweet apples for a balanced flavor.
- Chilling the dough helps it to maintain its shape when baking.
- Serve à la mode with vanilla ice cream for a classic touch.
- This pie is perfect for feeding a crowd due to its large size.
- Adjust spices according to your taste preference.
- Leftovers can be sealed and stored in the refrigerator for up to 3 days.

