

There’s something utterly satisfying about the first bite into a crisp, sweet, and tangy pickle that practically sings on your tongue. When you make bread and butter pickles at home, you’re not just preserving cucumbers—you’re capturing a moment of pure, crunchy delight that pairs flawlessly with sandwiches, charcuterie boards, or even a simple snack bowl. I remember the first time I tasted these golden slices at a neighbor’s summer barbecue: their glossy sheen and vibrant aroma beckoned me from across the yard. That initial crunch was like the crackle of fireworks, followed by a dance of sweet apple cider vinegar and warm turmeric on my palate. Even now, every jar I seal feels like bottling sunshine, ready to reveal its sweet and zesty personality whenever I crave a burst of bright flavor.
Making these pickles is a bit like conducting a flavor orchestra. You start with humble cucumbers, thinly sliced for maximum crunch, and invite onions and green peppers to join the chorus. A generous sprinkle of kosher salt helps coax out excess moisture, ensuring each slice stays satisfyingly firm. Then comes the magic: apple cider vinegar meets granulated sugar, mustard seeds, celery seeds, turmeric, cloves, and cinnamon—ingredients that weave together into a golden elixir. As this mixture simmers, the kitchen fills with a warm, spicy scent that promises comfort in every jar. Once packed into sterilized containers and tucked away for a week, you’ll find that the flavors deepen and meld, offering that nostalgic, sweet-and-savory hug in every crisp bite. Trust me, it’s a ritual you’ll want to repeat all year long.
KEY INGREDIENTS IN BREAD AND BUTTER PICKLES
Before we dive into the step-by-step guide, let’s chat about the stars of the show. Each ingredient plays a vital role in crafting the ideal balance of sweet, tangy, and warmly spiced notes that define bread and butter pickles.
- Cucumbers
These are the foundation of your pickles. Pickling cucumbers bring a firm texture and mild flavor that soaks up the brine beautifully without turning mushy.
- Onion
Thinly sliced onion adds a subtle bite and a touch of natural sweetness. It also contributes to the visual appeal of your jars with its gentle layers.
- Green Bell Pepper
A hint of green pepper brings a fresh, vegetal note and a crisp bite that complements the cucumbers and onions.
- Kosher Salt
This coarse salt helps draw out excess moisture from the vegetables, ensuring they stay crunchy when pickled.
- Apple Cider Vinegar
The tangy backbone of the brine, apple cider vinegar provides acidity and a hint of fruity aroma that brightens every bite.
- Granulated Sugar
Responsible for the signature sweetness, sugar balances the vinegar’s acidity and rounds out the overall flavor profile.
- Mustard Seeds
Tiny bursts of peppery warmth, mustard seeds lend a subtle spice that comes alive in the hot brine.
- Celery Seeds
Celery seeds add an earthy, slightly bitter note that deepens the brine’s complexity without overpowering the sweetness.
- Ground Turmeric
A small pinch of turmeric delivers a golden hue and a gentle, earthy spice that ties the flavors together.
- Ground Cloves
Cloves introduce a sweet and aromatic touch that enhances the overall warmth of the pickle brine.
- Ground Cinnamon
This sweet-spicy powder rounds out the spice blend with a cozy hint of holiday-like aroma.

HOW TO MAKE BREAD AND BUTTER PICKLES
Let’s transform those fresh ingredients into jars of tangy-sweet goodness! Follow these detailed steps to ensure each batch turns out perfectly crunchy and full of vibrant flavor.
1. In a large bowl, combine the thinly sliced cucumbers, onions, and green peppers. Sprinkle the entire mixture with kosher salt, then toss to coat evenly. Let this salted vegetable mix sit for about 1 hour—this crucial resting period draws out excess moisture, ensuring the final pickles remain crisp.
2. After an hour, thoroughly rinse the vegetables under cold water to remove any excess salt. Place them in a colander and drain well, giving the slices a gentle shake to remove lingering water.
3. In a large pot, pour in the apple cider vinegar and add granulated sugar, mustard seeds, celery seeds, ground turmeric, ground cloves, and ground cinnamon. Set the pot over medium-high heat and bring the brine to a rolling boil, stirring constantly until the sugar fully dissolves and the spices become fragrant.
4. Carefully add the drained vegetable mixture into the hot brine. Lower the heat to medium and simmer gently for about 10 minutes, stirring occasionally to ensure every slice is coated and heated through.
5. While the vegetables are simmering, prepare your sterilized jars. Using a canning funnel, pack the hot pickles tightly into the jars, leaving about 1/2 inch of headspace at the top for expansion.
6. Wipe the rims of the jars with a clean, damp cloth to remove any residue. Seal each jar with its lid and ring. Place the sealed jars into a boiling water bath and process for 10 minutes to create a proper seal.
7. Carefully lift the jars out of the water bath and set them on a towel-lined counter. Let them cool undisturbed at room temperature. Once cooled, store in a cool, dark place and allow the flavors to develop fully for at least 1 week before enjoying.
SERVING SUGGESTIONS FOR BREAD AND BUTTER PICKLES
Bread and butter pickles are incredibly versatile, lending their sweet-and-spicy charm to so many dishes. Their bright crunch can elevate simple meals or serve as the star of a snack spread. Let’s explore some delightful ways to showcase these pickles.
- Gourmet Sandwiches
Layer sliced bread and butter pickles on grilled cheese, turkey clubs, or pastrami sandwiches for an instant flavor upgrade. The tangy crunch cuts through rich meats and melted cheese, balancing every bite.
- Charcuterie Boards
Arrange a small pile of colorful pickle slices alongside cured meats, artisanal cheeses, and nuts. Their sweet zing serves as a palate cleanser between savory bites.
- Salad Enhancer
Chop a few pickle slices and toss them into green salads, potato salads, or pasta salads. These crunchy gems add texture and a pop of flavor that will surprise and delight your guests.
- Garnish for Burgers and Sliders
Top juicy beef or veggie burgers with a couple of bread and butter pickles to bring a sweet and spicy contrast. It’s a classic combo that never fails to satisfy.
HOW TO STORE BREAD AND BUTTER PICKLES
Proper storage is key to preserving that fresh, crunchy texture and vibrant flavor of your homemade pickles. If you follow these guidelines, your jars will stay delicious for months, even up to a year under the right conditions.
- Cool, Dark Pantry or Cupboard
Store unopened jars in a pantry or cupboard away from direct sunlight and heat sources. This environment helps maintain a consistent temperature and prevents the vinegar from oxidizing.
- Refrigeration After Opening
Once a jar is opened, keep it in the refrigerator with the lid tightly sealed. Chilling slows down microbial growth and retains the pickle’s signature crunch.
- Check Seals Before Storage
After the boiling water bath, ensure each lid has a firm, concave seal. If the lid can be pressed down and pops back, refrigerate and consume those jars first.
- Label with Dates
Write the canning date on each jar. This simple step helps you rotate through older batches first, ensuring nothing goes past its peak flavor period.
CONCLUSION
Thank you for sticking with me through this crunchy, sweet, and tangy adventure—you’re now equipped to create the ultimate homemade bread and butter pickles! From the moment those cucumbers, onions, and peppers meet salt to the final simmer in a fragrant spice-infused brine, every step is an opportunity to infuse personality into your jars. You’ve learned how to balance the sweetness of sugar with the bite of vinegar, and how spices like mustard seeds and turmeric promise warmth in each mouthful. Once you’ve packed and sealed those jars, the hardest part is waiting a week while the flavors meld into something truly magical.
Feel free to print and save this article; it’s your trusty guide to crunchy delight any time the mood strikes. And if you have questions or need a hand tweaking the sweetness, adjusting the spice level, or troubleshooting seals, just drop a comment below. Your feedback and experiences make this kitchen conversation even richer. Happy pickling, and I can’t wait to hear about the first time your family breaks into those jars of golden goodness!
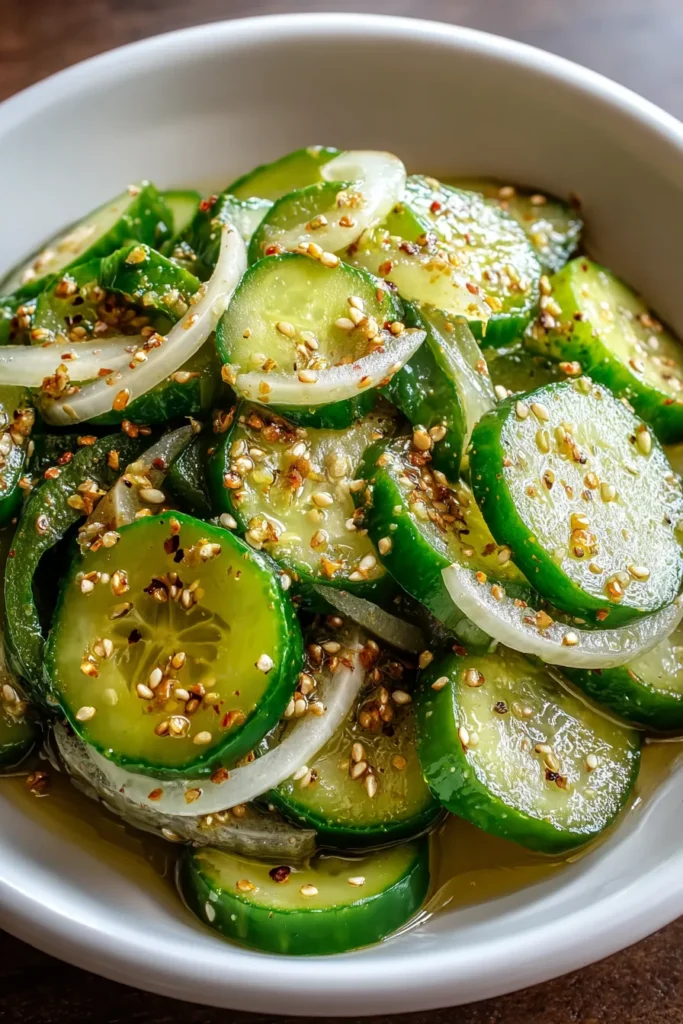

Bread and Butter Pickles
Description
These homemade bread and butter pickles bring a perfect balance of sweetness and spice, with crunchy cucumbers and vibrant flavors, perfect for sandwiches or snacks.
Ingredients
Instructions
-
In a large bowl, combine the sliced cucumbers, onions, and green peppers. Sprinkle with kosher salt and mix well. Allow the mixture to sit for about 1 hour to draw out excess moisture.
-
After an hour, rinse the vegetables under cold water to remove excess salt and drain them in a colander.
-
In a large pot, combine the apple cider vinegar, sugar, mustard seeds, celery seeds, turmeric, cloves, and cinnamon. Bring the mixture to a boil over medium-high heat, stirring until the sugar is dissolved.
-
Add the drained vegetable mixture to the pot. Reduce the heat to medium and simmer for about 10 minutes, ensuring all the vegetables are coated and heated through.
-
Carefully pack the hot pickles into sterilized jars, making sure to leave about 1/2 inch of headspace at the top.
-
Wipe the rims clean and seal with lids. Process in a boiling water bath for 10 minutes to seal.
-
Remove the jars from the water bath and let them cool completely at room temperature. Store in a cool, dark place for at least 1 week to allow the flavors to develop fully.
Note
- Bread and butter pickles are traditionally sweet with a hint of spice, making them perfect for sandwiches or as a side.
- This recipe yields about 4 pint-sized jars.
- You can adjust the sweetness by reducing the amount of sugar if desired.
- Be sure to use pickling cucumbers for a firmer texture.
- These pickles will keep well for up to a year if properly sealed and stored.

