

Sink your fork into the luscious layers of this Caramel Apple Upside-Down Cake, where each bite is a celebration of tender cake and caramel-kissed apples. The moment you cut into the cake is electric: golden apple slices gleaming atop a rich, buttery base that oozes with warm, sweet caramel. As the cake releases its steamy embrace, you’ll notice a gentle sweetness mingling with a whisper of tartness—thanks to crisp Granny Smith or Honeycrisp apples—that dances on your palate and makes every mouthful unforgettable.
This cake isn’t just a dessert; it’s an invitation to slow down, savor the comforting flavors of fall, and gather around a plate of pure joy. It’s the perfect centerpiece for a cozy weekend brunch, a festive holiday table, or a simple family dessert that turns ordinary moments into memorable celebrations. Whether you’re an experienced baker or an enthusiastic home cook diving into your first upside-down cake, this recipe is designed to guide you through every step with ease, ensuring you end up with a fragrant, gorgeous treat that’s as delightful to share as it is to eat.
KEY INGREDIENTS IN CARAMEL APPLE UPSIDE-DOWN CAKE
Every ingredient in this recipe works in harmony to create the ultimate dessert experience. From the foundation of tender cake crumb to the glistening caramel layer beneath the apple slices, each component plays a vital role. Below, you’ll find the stars of this show, with a closer look at why they matter and how they contribute to flavor, texture, and structure.
- Unsalted Butter
Provides a rich, creamy base for the caramel layer and keeps the sweetness balanced. When melted and combined with sugar, it forms a silky coating for the apples and ensures a tender, moist crumb in the cake itself.
- Brown Sugar
Delivers deep, molasses-like sweetness and a soft chewiness. Its humid texture blends perfectly with melted butter to create that iconic, sticky caramel topping that clings to every apple slice.
- Apples
Offer a delightful contrast of sweet and tart, plus a lightly crisp texture even after baking. Whether you choose Granny Smith for tang or Honeycrisp for natural sweetness, these slices turn the cake into an autumnal masterpiece.
- All-Purpose Flour
Builds the structure of the cake, ensuring it rises evenly and holds together without being too dense. It’s the backbone of the tender crumb that you’ll slice into after baking.
- Baking Powder
Introduces essential lift, helping the cake fluff up around the apple layer and creating a light, springy texture that feels like a cloud in every bite.
- Baking Soda
Reacts with brown sugar and buttermilk elements (like the milk and sugar combo) to give additional rise and a slight caramelized flavor.
- Salt
Enhances all the sweet components, balancing flavors and preventing the cake from tasting overly sugary, while allowing the spices and apples to shine.
- Ground Cinnamon
Infuses warmth and spice, weaving through both the caramel layer and the cake batter to create that classic apple-and-cinnamon pairing we all love.
- Vanilla Extract
Adds aromatic depth, rounding out the sweetness with floral and creamy notes that make the cake taste bakery-fresh.
- Eggs
Bind ingredients together, create structure, and trap air when beaten with sugar. They help the cake rise and give it a tender, melt-in-your-mouth quality.
- Granulated Sugar
Balances moisture and sweetness in the batter, ensuring a soft texture while contributing to that classic cake flavor we crave.
- Milk
Provides moisture and richness, helping to dissolve sugars and distribute flavor evenly. It also contributes to a smooth, velvety crumb.
HOW TO MAKE CARAMEL APPLE UPSIDE-DOWN CAKE
Let’s dive into the baking process step by step. You’ll learn how to create that irresistible caramel layer, arrange your apples like a pro, and whip up a fluffy cake batter that bakes to golden perfection. Follow these instructions closely, and you’ll soon have a warm, aromatic dessert ready to share.
1. Preheat your oven to 350°F (175°C). Thoroughly grease a 9-inch round cake pan with non-stick cooking spray or softened butter, then set it aside to ensure the caramel doesn’t stick.
2. In a medium bowl, combine the melted butter and packed brown sugar. Stir vigorously until the mixture takes on a silky, uniform consistency. Pour this glossy caramel into the bottom of the prepared pan, then use a spatula to spread it evenly into a thin, gleaming layer.
3. Arrange the apple slices over the caramel mixture, overlapping each piece to form an attractive, decorative pattern. Take your time to place the slices in concentric circles or a fan shape so every slice bakes evenly.
4. In another bowl, whisk together the all-purpose flour, baking powder, baking soda, salt, and ground cinnamon. Ensure the dry ingredients are fully blended before setting the bowl aside.
5. In a large mixing bowl, beat the granulated sugar and eggs with an electric mixer on medium speed for 2–3 minutes, until the mixture is light and fluffy, pale in color and slightly increased in volume.
6. Add the vanilla extract to the fluffy eggs and sugar, then mix until the aroma disperses throughout the batter.
7. Gradually add the dry flour mixture to the wet ingredients, alternating with the milk. Begin and end with the flour mixture, mixing just until the batter is smooth. Be careful not to overmix, or your cake may turn out dense.
8. Gently pour the batter over the arranged apple slices, spreading it out carefully to ensure every apple is hidden beneath a smooth cake layer.
9. Bake for 40–45 minutes, or until the top turns golden and a toothpick inserted into the center comes out clean. You’ll notice the edges pulling away slightly from the pan when it’s done.
10. Once baked, remove the pan from the oven and allow the cake to cool in the pan for 10 minutes. Then, use a thin knife to run around the edges, loosening the cake from the pan’s sides.
11. Place a serving plate over the pan, then invert the cake in one swift motion. Gently lift the pan to reveal the caramel-coated apples on top. Let the cake cool completely before slicing and serving.
SERVING SUGGESTIONS FOR CARAMEL APPLE UPSIDE-DOWN CAKE
When it comes to serving this Caramel Apple Upside-Down Cake, presentation and accompaniments can elevate each bite to a restaurant-quality experience. Whether you’re hosting a casual family dinner or celebrating a special occasion, these suggestions will help you present your cake in style while accentuating its flavors and textures. From hot and steamy to cool and creamy pairings, you can play with contrasts or keep things classic. Pull out your favorite serving ware, garnish thoughtfully, and watch as your guests marvel at the caramel sheen and perfect apple arrangement. Each tip below is designed to guide you toward a memorable, multi-sensory dessert moment.
- Serve slices warm with a generous scoop of vanilla ice cream melting over the top. The cold, creamy ice cream contrasts beautifully with the sticky, hot caramel and tender apple, creating a blissful balance of temperatures and textures.
- Dust the top with a light sprinkle of powdered sugar right before serving. This simple garnish brightens the appearance, adds a hint of sweetness, and evokes a snow-kissed look that’s perfect for fall or winter gatherings.
- Pair each slice with a drizzle of homemade caramel sauce or a swirl of whipped cream flavored with a pinch of cinnamon or nutmeg. These little extras turn a lovely home-baked cake into an indulgent treat worthy of a special celebration.
- Arrange fresh apple slices or a sprig of mint on each plate for a pop of color. Not only does this add visual appeal, it reminds guests of the fresh fruit inside the cake and ties the presentation together with a natural, elegant flourish.
HOW TO STORE CARAMEL APPLE UPSIDE-DOWN CAKE
A cake this delicious deserves proper storage to maintain its moist crumb and glossy caramel finish. Whether you’re savoring leftovers over a few days or preparing in advance for a crowd, following these storage tips will help preserve flavor and texture. You’ll learn how to wrap, refrigerate, and even freeze this cake so that every slice tastes just as magical as the first. Keep in mind that moisture and temperature control are key: too much humidity can make the cake soggy, while too little can dry it out. Here are the best options to keep your Caramel Apple Upside-Down Cake at peak enjoyment.
- Store at room temperature in an airtight container: After the cake has cooled completely, transfer it to a cake dome or sealed container. This method preserves the tender crumb and prevents the caramel from hardening. It will stay fresh for up to three days.
- Refrigerate for up to five days: If you plan to keep the cake a bit longer or live in warm weather, place it in the fridge wrapped tightly in plastic wrap, then in an airtight container. Chill before serving to help the caramel set, and bring to room temperature or warm gently in the microwave before eating.
- Freeze slices individually: For longer storage, wrap each cooled slice in plastic wrap, then a layer of aluminum foil. Place the wrapped slices in a freezer-safe bag, label with the date, and freeze for up to two months. Thaw in the fridge overnight or at room temperature for a few hours.
- Reheat gently with low heat: To revive the cake’s fresh-from-the-oven texture, preheat your oven to 300°F (150°C). Place slices on a baking sheet for 5–7 minutes until warmed through. This restores softness and reactivates the caramel’s sticky decadence.
CONCLUSION
This Caramel Apple Upside-Down Cake has everything you love about sweet treats and comfort food rolled into one beautiful, cozier-than-cozy dessert. From the tender, buttery cake base to the perfectly caramelized apple slices on top, every element works together to delight your senses and spark conversation around the table. You’ve learned which key ingredients bring out the best flavors, how to master each step of the process, and clever ways to serve and store your creation. Whether you bake it for a bustling holiday gathering or a quiet afternoon tea, this cake promises to be the highlight of any spread.
Feel free to print this article and tuck it into your recipe binder for easy reference—this is one recipe you’ll want to return to again and again. Below, you’ll find a handy FAQ section to answer even more of your baking questions. If you try this recipe or experiment with your own twists, please leave a comment or share your experience. Your feedback, questions, and tips help make our cooking community richer, and I can’t wait to hear how your Caramel Apple Upside-Down Cake turns out!
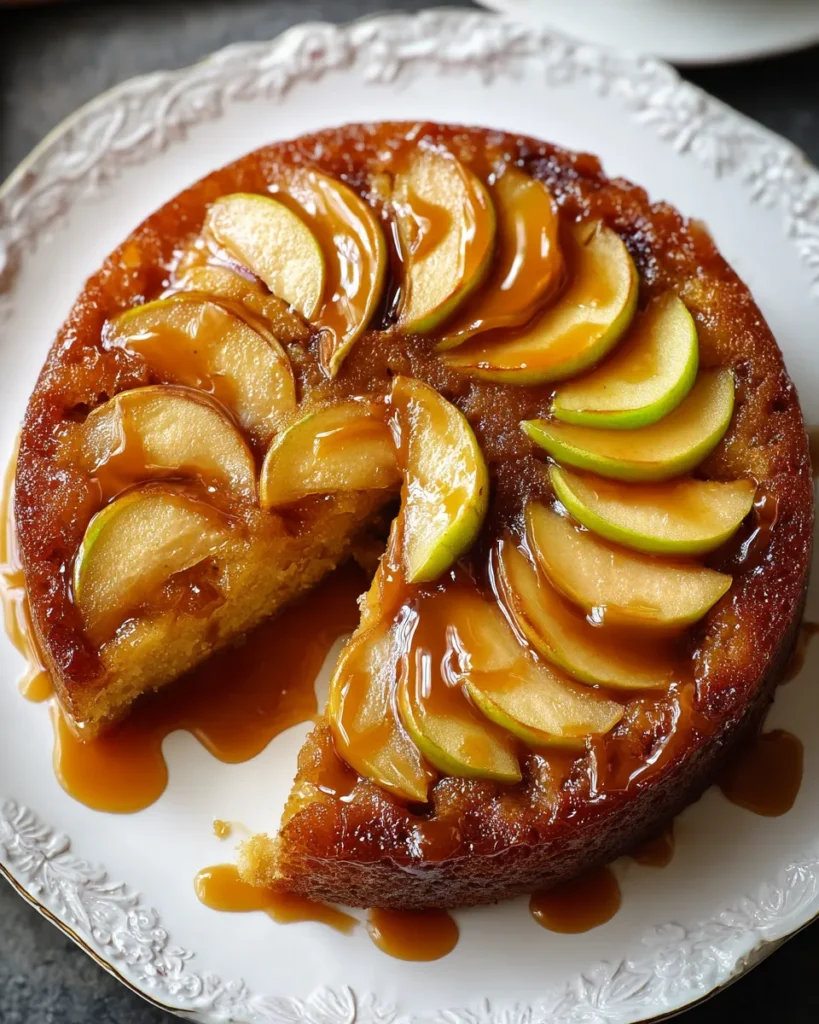

Caramel Apple Upside-Down Cake
Description
This caramel apple upside-down cake is a delightful blend of sweet and tart, featuring soft apple slices atop a buttery, caramelized base that’s simply irresistible.
Ingredients
Instructions
-
Preheat your oven to 350°F (175°C). Grease a 9-inch round cake pan with non-stick cooking spray or butter and set aside.
-
In a bowl, combine the melted butter and brown sugar. Stir until well blended. Pour this mixture into the bottom of the prepared cake pan and spread evenly.
-
Arrange the apple slices on top of the brown sugar mixture, overlapping them as desired to create a decorative pattern.
-
In another mixing bowl, whisk together the flour, baking powder, baking soda, salt, and cinnamon until well mixed. Set aside.
-
In a separate large bowl, beat together the granulated sugar and eggs using an electric mixer on medium speed until light and fluffy, about 2-3 minutes.
-
Add the vanilla extract to the egg mixture and mix well.
-
Gradually add the dry flour mixture to the wet ingredients, alternating with the milk, starting and ending with the flour mixture. Mix until just combined and smooth, but do not overmix.
-
Carefully pour the batter over the arranged apple slices in the cake pan. Gently spread it out to ensure even coverage.
-
Bake the cake in the preheated oven for 40-45 minutes or until a toothpick inserted into the center comes out clean.
-
Once baked, remove the cake from the oven and let it cool in the pan for about 10 minutes. Then, run a knife around the edges to loosen the cake. Carefully invert the cake onto a serving plate.
-
Allow the cake to cool completely before slicing and serving.
Note
- This cake can be served warm with a scoop of vanilla ice cream for an extra indulgent treat.
- You can also add a pinch of nutmeg for added warmth in the flavor profile.
- Leftovers can be stored in an airtight container at room temperature for up to 3 days.

