

There’s something truly magical about slipping a heavy cast iron skillet into the oven and knowing that in just under an hour you’ll have golden, bubbly goodness waiting for you. This Cast Iron Apple Crisp celebrates the simple joys of baking from scratch—no fancy gadgets, just your favorite skillet, a handful of pantry staples, and a big bowl of freshly sliced apples. We’re talking about that perfect balance of sweet and tart fruit nestled under a crunchy, buttery oat topping. Each spoonful offers contrasting textures—tender, cinnamon-kissed apples giving way to that irresistible crumble that shatters delightfully between your teeth. Whether you’ve got an old family skillet passed down through generations or you’ve just invested in your very first one, this recipe is about more than dessert. It’s about creating warm memories that linger long after the last crumb has disappeared.
I still vividly remember the first time I made this for a weekend brunch with friends. The moment I slid the skillet out of the oven, everyone paused mid-conversation, noses inches from the rising steam, eyes widening at the sight of apples bubbling beneath a golden blanket of oats. We each grabbed spoons, diving in before the crisp had even cooled, laughing as melting wisps of vanilla ice cream dripped down our chins. That’s the beauty of comfort food—it brings people together, sparks stories, and invites everyone to linger a little longer. Best of all, this dessert is pure beginner-friendly magic. In just 20 minutes you can assemble the components, then let the oven do the rest during a roughly 40-minute bake. After a brief 5-minute rest, you’ve got six generous servings, about 350 calories each—perfect for sharing or sneaking a midnight snack when the house is quiet. So grab your apron, warm up that skillet, and let’s get ready to fill your kitchen with joy.
KEY INGREDIENTS IN CAST IRON APPLE CRISP
Before we dive into the step-by-step cooking magic, let’s take a moment to appreciate the star players in this apple crisp symphony. Each ingredient plays a distinct role: some bring sweetness, others add spice or crunch, and together they build layers of flavor and texture you’ll crave all year long.
- Apples
Firm, fresh apples bring juicy sweetness and a hint of natural tartness. Their ability to soften yet hold shape under heat is crucial for that ideal bite—tender but not mushy.
- Lemon Juice
A splash of brightness that balances the sweetness and prevents the apple slices from browning too quickly. It adds a subtle tang and lifts the overall flavor profile.
- Brown Sugar
Rich, caramel-like sweetness that melds beautifully with the warming spices. It helps create a sticky, luscious syrup as it cooks down with the apples.
- Ground Cinnamon
Classic warming spice that infuses the fruit with cozy, aromatic depth. It’s the backbone of any great apple dessert.
- Nutmeg
A pinch of nutmeg adds a sweet-earthy undertone and a little warmth that complements the cinnamon without overpowering.
- Salt
Just a small amount enhances and rounds out all the sweet and spiced notes. Salt is the unsung hero in many desserts.
- Rolled Oats
These provide hearty, rustic texture to the topping. They toast up golden in the oven, offering that satisfyingly crisp contrast to soft apples.
- All-Purpose Flour
Acts as a binding agent in the crumble, helping the butter and oats form cohesive clusters that bake up perfectly.
- Unsalted Butter
Brings richness and helps achieve that flaky, buttery topping. When softened and cut into the dry ingredients, it yields tender, crumbly clusters.
- Chopped Walnuts or Pecans (Optional)
For extra crunch and nutty flavor, stir in your favorite toasted nuts. They add another dimension of texture that’s simply irresistible.
- Vanilla Ice Cream or Whipped Cream (Optional)
A dollop of cold, creamy goodness on top transforms each bite into a decadent experience. The temperature contrast elevates the dish to pure bliss.
HOW TO MAKE CAST IRON APPLE CRISP
Let’s roll up our sleeves and walk through the simple yet transformative steps that turn humble ingredients into a soul-soothing dessert. Whether you’re an oven novice or a seasoned home cook, these clear instructions will guide you from prep to plate.
1. Preheat your oven to 350°F (175°C). Ensuring the oven is fully heated before baking helps the crumble topping turn that perfect shade of golden brown while the apples soften evenly.
2. In a large bowl, combine the sliced apples with lemon juice, brown sugar, cinnamon, nutmeg, and salt. Toss everything thoroughly so each apple slice is coated in the flavorful mixture. Let it rest for about 10 minutes to allow the sugars and spices to meld, drawing out juices and creating a lightly syrupy base.
3. In another bowl, mix the rolled oats, flour, and softened butter. Using your fingers or a pastry cutter, work the butter into the dry ingredients until the mixture resembles coarse crumbs—think sandy bits with some small clumps. If you’re using chopped nuts, gently fold them in now to distribute evenly.
4. Grease a 10- to 12-inch cast iron skillet lightly with butter or cooking spray to prevent sticking. Spread the apple mixture in an even layer across the bottom, ensuring no juices pool on one side.
5. Spread the oat-and-butter crumble evenly over the top of the apples, covering them completely for a uniform bake and crunchy surface.
6. Place the skillet in the preheated oven and bake for about 35–40 minutes. Keep an eye on the topping—it should turn a beautiful golden brown and you’ll see the edges of the apple filling bubbling up through the oats.
7. Once done, carefully remove the skillet from the oven and let it cool for a few minutes. This brief resting period allows the juices to thicken slightly, making it easier to serve.
8. Serve warm, topping each portion with vanilla ice cream or whipped cream if desired. The contrast of hot crisp and cool cream is nothing short of heavenly.
SERVING SUGGESTIONS FOR CAST IRON APPLE CRISP
When it comes to serving this hearty dessert, presentation and complementary flavors can elevate the experience from delightful to unforgettable. Whether you’re hosting a cozy family dinner or a casual get-together with friends, these suggestions will help you plate each portion with flair and flavor harmony.
- Classic Warm and Creamy
Serve each scoop of apple crisp straight from the skillet onto a plate, then top generously with a scoop of vanilla ice cream. The melting ice cream mingles with the hot apple juices to create a luscious sauce—pure comfort in every bite.
- Whipped Cinnamon Cream
Add a festive twist by whipping heavy cream with a touch of powdered sugar and a dash of ground cinnamon until soft peaks form. Dollop this over the crisp to introduce an airy yet spiced component that contrasts beautifully with the crunchy topping.
- Caramel Drizzle
For a sweet, glossy finish, warm up store-bought or homemade caramel sauce and drizzle it in a zig-zag pattern over the top. The extra layer of richness pairs perfectly with the tartness of the apples.
- Nutty Crunch Garnish
Toast a handful of walnuts or pecans in a dry skillet until fragrant, then roughly chop and sprinkle on top just before serving. The freshly toasted nuts add an extra hit of texture and a toasty aroma that wows every guest.
HOW TO STORE CAST IRON APPLE CRISP
Proper storage ensures your apple crisp retains its texture and flavor for as long as possible, letting you savor leftovers without compromise. Whether you want to enjoy it over the next few days or prep components in advance, these tips will keep your crisp tasting just-baked.
- Refrigerator Storage
Allow the crisp to cool completely, then cover the skillet tightly with plastic wrap or transfer the portions to an airtight container. Stored this way, it will stay fresh for up to 3–4 days. Reheat individual servings in the microwave for about 20–30 seconds or warm the entire skillet in a 300°F oven for 10–15 minutes to revive the crispiness.
- Freezer Method
For longer preservation, cool the crisp, then wrap the skillet (or portioned servings) in double layers of foil before placing it in a freezer-safe bag. It will keep for up to 2 months. To reheat, thaw overnight in the fridge, then bake at 350°F for 20–25 minutes until heated through and the topping is crisp again.
- Component Prep
You can make the apple mixture and crumble topping separately and store each in an airtight container in the fridge for up to 2 days. When you’re ready, assemble in the skillet and bake fresh—this ensures maximum crisp and flavor.
- Short-Term Cooling Rack
If you plan to serve the next day without refrigeration (during cool autumn evenings, for instance), allow the crisp to cool on a wire rack for an hour to prevent steam buildup, then cover loosely with foil. Consume within 24 hours for best results, reheating briefly if desired.
CONCLUSION
What started as a simple gathering in my kitchen has blossomed into countless moments of shared smiles, full hearts, and crumb-covered plates—all thanks to the humble Cast Iron Apple Crisp. From the first sprinkle of cinnamon to the final drizzle of melted ice cream, every stage of this recipe invites you to slow down and savor life’s little pleasures. Baking this crisp is more than just following steps; it’s about creating aroma-filled nooks of connection around your table. The effortless prep—just 20 minutes of chopping and mixing—followed by a 40-minute bake ensures that even beginner cooks can shine. And with a brief 5-minute cool-down, you’re ready to dish up six generous servings, each about 350 calories, perfect for sharing or indulging in solo moments of joy.
Feel free to print this article out and tuck it into your favorite recipe binder, or save it on your device for easy reference whenever the craving strikes. You’ll find a handy FAQ section below to address any burning questions, but don’t hesitate to leave comments, share stories, or ask for guidance if you hit a snag. Did you try mixing in cranberries for a colorful twist? Or maybe you have a secret spice blend that takes your crisp to the next level? Your feedback not only helps fellow home cooks but also inspires new variations on this classic favorite. So go ahead—bake, experiment, and most importantly, enjoy every warm, tender, crunchy bite!
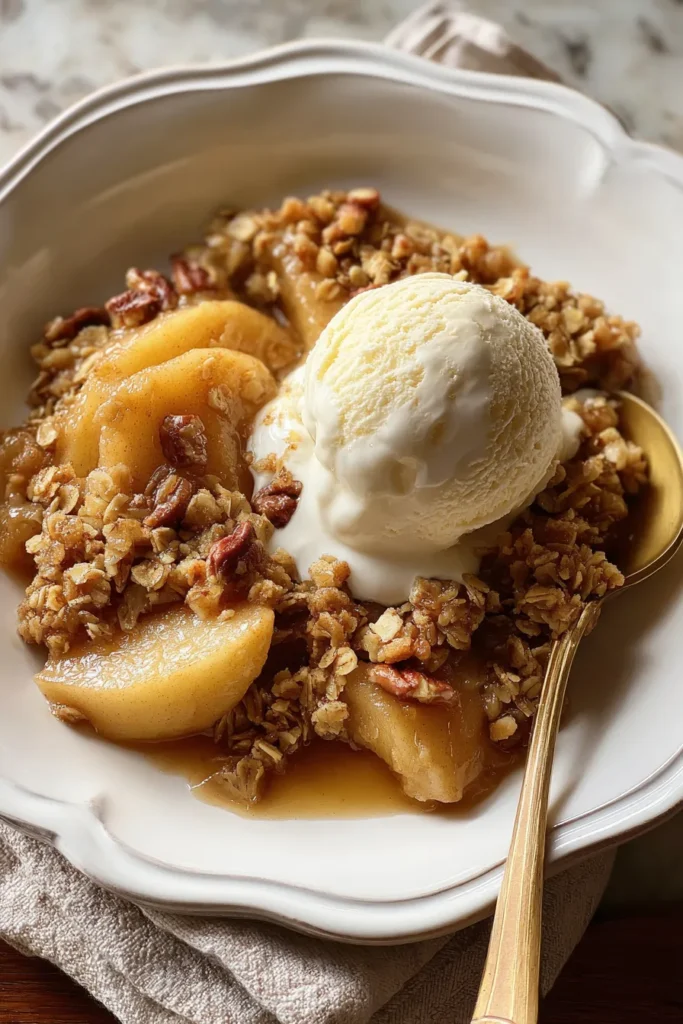

Cast Iron Apple Crisp
Description
A scrumptious blend of sweet and tart apples, with a crunchy, buttery oat topping baked to golden perfection in a cast iron skillet. This treat is a crowd-pleaser!
Ingredients
Instructions
-
Preheat your oven to 350°F (175°C).
-
In a large bowl, combine the sliced apples with lemon juice, brown sugar, cinnamon, nutmeg, and salt. Toss well to ensure the apples are evenly coated with the mixture. Set aside to allow the flavors to meld for about 10 minutes.
-
In a separate bowl, mix the rolled oats, flour, and softened butter. Use your fingers or a pastry cutter to combine until the mixture resembles coarse crumbs. If desired, stir in the chopped nuts for added texture.
-
Take a cast iron skillet (preferably 10-12 inches) and grease it lightly with butter or cooking spray. Layer the apple mixture evenly in the bottom of the skillet.
-
Spread the oat mixture evenly over the top of the apples, covering them well.
-
Place the skillet in the preheated oven and bake for about 35-40 minutes, or until the topping is golden brown and the apples are bubbly.
-
Once done, remove the skillet from the oven and let it cool for a few minutes.
-
Serve warm, topped with vanilla ice cream or whipped cream if desired.
Note
- For a twist, try adding cranberries or raisins to the apple mixture for a burst of flavor.
- Using a mix of sweet and tart apples can provide a more complex taste.
- This dish can be prepared ahead of time; store the apple mixture and crumble topping separately, then assemble and bake just before serving for the freshest taste.
- Cast iron provides excellent heat retention and even cooking, making this dish extra delicious.
- Leftovers can be stored in the fridge but are best eaten fresh; reheating in the oven will restore some of the original crispness.

