

There’s something undeniably satisfying about taking crisp, freshly harvested cucumbers and turning them into tangy, crunchy dill pickles right in your own kitchen. These homemade dill pickles strike the perfect balance between tart and savory, with vibrant notes of garlic and dill dancing on your taste buds. Thanks to a simple brine of distilled white vinegar, water, and sea salt, every bite packs a bright pop of flavor that pairs beautifully with sandwiches, burgers, or straight-up snacking when the craving hits. As someone who swears by a well-seasoned snack, I can tell you that there’s no better feeling than pulling open a jar after two weeks of curing to reveal those satisfying cracks and bubbles along the glass.
Starting this pickling project couldn’t be more beginner-friendly. With just a half-hour of hands-on prep, twenty minutes over the stove to make your brine, and a little patience for a one- to two-week rest, you’ll be rewarded with pickles that taste like they came from a boutique deli. Whether you’re brand-new to canning or you’ve been preserving veggies for years, the steps here are clear and straightforward. I still remember the first time I tried adding a handful of grape leaves to my jars—those added tannins really elevate the crisp factor! So grab your jars, wash those cucumbers, and let’s get ready to fill your pantry with pickle joy.
KEY INGREDIENTS IN CRISP HOMEMADE DILL PICKLES
Before diving into the pickling process, let’s take a closer look at the powerhouse ingredients that give these pickles their signature crunch, zing, and depth of flavor. Each component plays a vital role in preservation and taste, making sure your homemade batch stands out.
- Pickling Cucumbers
These smaller, firmer cucumbers boast a high water content and thin skin, making them ideal for pickling. Their natural crunch is the foundation of every great dill pickle, and trimming off the blossom end prevents unwanted softening.
- Distilled White Vinegar
The backbone of the brine, distilled white vinegar provides the essential acidity that curbs bacterial growth and delivers that classic tart bite. Its clean, neutral flavor lets the herbs and spices shine.
- Water
Used to dilute the vinegar, water balances out the acidity so your pickles aren’t overpoweringly sour. It also carries flavors evenly throughout the jar, ensuring every cucumber slice tastes just right.
- Sea Salt or Pickling Salt
Unlike iodized table salt, these pure salts dissolve cleanly, promoting even osmosis and crisp texture. They bring out the natural flavors of the cucumbers and herbs without introducing off-notes.
- Garlic Cloves
Peeled and crushed, garlic infuses the brine with a warm, aromatic depth. As it steeps, it mellows slightly, adding a subtle punch that complements the dill.
- Dill Seed
These tiny seeds burst with classic dill flavor, lending an earthy, slightly bitter nuance that’s essential to any dill pickle. They also contribute to the overall visual appeal with little flecks of texture.
- Black Peppercorns
Whole peppercorns introduce a gentle heat and a hint of spice complexity without overwhelming the palate. They pair beautifully with garlic and dill, rounding out the taste.
- Fresh Dill
Bundles of fresh dill heads release volatile oils that perfume the brine. Their grassy, herbaceous notes elevate the pickles from ordinary to extraordinary.
- Red Pepper Flakes (Optional)
If you crave a bit of heat, adding red pepper flakes to each jar brings a spicy kick. They also infuse the brine with a warm color and visual intrigue.

HOW TO MAKE CRISP HOMEMADE DILL PICKLES
Let’s walk through each step of the pickling process so you can achieve perfectly crisp, flavorful jars every time. From preparing your equipment to sealing and curing, these detailed instructions will guide you toward pickling success.
1. Prepare your canning jars by thoroughly washing them with hot, soapy water to remove any residue. Rinse well, then sterilize the jars by submerging them in boiling water for at least ten minutes. Carefully remove and allow them to air dry on a clean towel to prevent contamination.
2. Wash the cucumbers under cool running water, gently scrubbing away any dirt. Trim off the blossom end of each cucumber (this contains enzymes that can cause softening), then leave them whole, halve them lengthwise, or cut them into spears according to your preference.
3. In a large saucepan, combine the distilled white vinegar, water, and sea salt. Bring the mixture to a rolling boil over medium-high heat, stirring occasionally to dissolve the salt completely. Once boiling, reduce the heat to maintain a gentle simmer, keeping the brine hot and ready.
4. Into each sterilized jar, place one to two of the crushed garlic cloves, a head of fresh dill, one teaspoon of dill seed, and several black peppercorns. If you’d like extra spice, add one teaspoon of red pepper flakes per jar for a fiery twist.
5. Pack the cucumbers tightly into each jar, arranging them upright or stacked snugly so they take up minimal headspace. Leave about a half-inch of space at the top to allow for expansion and proper sealing.
6. Carefully pour the hot brine over the cucumbers, making sure every slice is completely submerged. The heat helps extract flavor from the spices and ensures an even distribution of acidity.
7. Gently tap each jar on the counter or run a thin spatula around the inside to release any trapped air bubbles. Wipe the rims clean with a damp cloth to ensure a tight seal when you put the lids on.
8. Secure the lids and rings firmly onto the jars, then place them in a hot water bath canner. Process for ten minutes, making sure the jars are covered by at least an inch of water. This step seals the lids and further preserves the pickles.
9. Remove the jars carefully and allow them to cool to room temperature on a towel or wire rack. Once cooled, move them to a cool, dark place and let them cure for at least one week—two weeks is even better for maximum flavor development.
SERVING SUGGESTIONS FOR CRISP HOMEMADE DILL PICKLES
When it comes to enjoying these homemade dill pickles, the possibilities are practically endless. Their lively crunch and bright acidity can elevate countless dishes, so feel free to get creative. Here are a few tried-and-true ways to show off your pickling prowess and serve up these tangy slices at their best.
- Classic Pickle Platter: Arrange whole spears or slices on a chilled platter alongside any leftover garlic cloves and dill sprigs from the jar. Serve with a dollop of creamy ranch dip or a tangy mustard aioli for dunking.
- Gourmet Sandwich Upgrade: Layer thick-cut pickle rounds onto a hearty sandwich or burger. The crisp acidity cuts through rich meats and cheeses, adding a lively zing that takes each bite to the next level.
- Zesty Pickle Salad: Chop pickles into bite-sized pieces and toss with diced tomatoes, red onions, and cubed cucumbers. Drizzle with olive oil and sprinkle with fresh herbs for a refreshing summer side dish.
- Charcuterie Companion: Include pickle spears on a charcuterie board alongside cured meats, artisanal cheeses, nuts, and fruit. Their bright tang balances salty, creamy, and sweet flavors beautifully.
HOW TO STORE CRISP HOMEMADE DILL PICKLES
Proper storage ensures your homemade dill pickles stay crisp, tangy, and safe to eat for months. These preservation tips will help you maintain that fresh-picked flavor and crunchy snap long after you’ve sealed the jars.
- Store unopened, sealed jars in a cool, dark pantry or cellar. Ideal temperatures range between 50°F and 70°F. Kept this way, properly sealed pickles can last up to a year without losing their characteristic crunch.
- Once opened, transfer any unused pickles to the refrigerator. Keep the jar tightly sealed or move them to an airtight container to prevent exposure to air and moisture that can soften the cucumbers. Consume within one month for peak flavor.
- Always ensure the cucumbers remain fully submerged in their brine. If the liquid level drops, top off with a simple brine of equal parts vinegar and water plus a pinch of salt to maintain the right acidity and inhibit bacterial growth.
- Label each jar with the date it was made and, if opened, the date it was first refrigerated. This helps you rotate through your pickle stash and enjoy each jar at its very best.
CONCLUSION
This guide to crafting crisp homemade dill pickles has taken you through every detail—from selecting the ideal pickling cucumbers and crafting a perfectly balanced brine to mastering the canning process and curing your jars for that irresistible crunch. By following these steps, you’ll create pickles that are bursting with garlicky, herbaceous flavor and snap with every bite. Whether you keep them on hand for quick snack attacks, pack them into your lunch, or present them as the star of your next party platter, these pickles will become a pantry staple you’ll reach for again and again.
Feel free to print this article and tuck it into your recipe binder, or save it for later reference—your future self will thank you when the pickling mood strikes! You can also find a FAQ section below to answer any lingering questions about techniques, storage, or customization options. If you give this recipe a whirl, I’d love to hear how your jars turned out. Drop your comments, questions, or feedback below—whether you’re curious about spice variations, needing help with sealing jars, or just want to share a triumphant pickle selfie, I’m here to chat all things dill pickles!
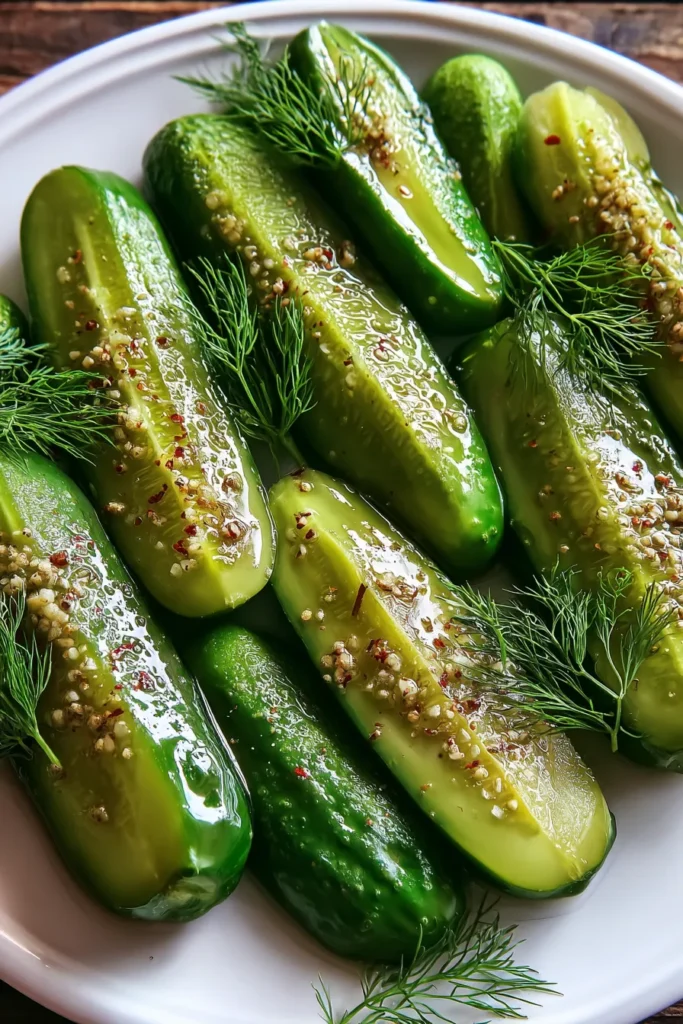

Crisp Homemade Dill Pickles
Description
These homemade dill pickles are the perfect balance of tart and crisp, infused with garlic and fresh dill. Ideal for snacking or adding a zing to any meal!
Ingredients
Instructions
-
Prepare your canning jars by thoroughly washing them with hot, soapy water. Rinse well, then sterilize them by submerging them in boiling water for at least 10 minutes. Allow them to air dry on a clean towel.
-
Wash the cucumbers well and cut off the blossom end. You can leave them whole, halve them, or slice them into spears.
-
In a large saucepan, combine the vinegar, water, and salt. Bring to a boil, then reduce the heat to keep the brine warm.
-
Into each sterilized jar, place 1-2 crushed garlic cloves, a head of dill, 1 teaspoon of dill seed, and a few peppercorns. If using red pepper flakes, add 1 teaspoon per jar.
-
Pack the cucumbers tightly into the jars, leaving about 1/2 inch headspace at the top.
-
Pour the hot brine over the cucumbers in each jar, ensuring they are completely submerged.
-
Remove any air bubbles by gently tapping the jar on the counter and adjusting the contents if necessary. Wipe the rims clean with a damp towel.
-
Secure the lids onto the jars, then process them in a hot water bath for 10 minutes to seal.
-
Allow the pickles to cool to room temperature before moving them to a cool, dark place to cure for at least one week, preferably two, for the best flavor.
Note
- The blossom end of cucumbers contains enzymes that can cause pickles to soften, so be sure to slice it off.
- For a sturdier crunch, consider adding grape leaves to the jars. They contain tannins that preserve crispness.
- Customize your pickles by experimenting with additional spices like mustard seeds, coriander seeds, or even a bay leaf for different flavors.
- These pickles will keep for up to a year in a cool, dark pantry as long as the jars remain sealed. Once opened, store in the refrigerator and consume within a month for the best taste.