

Life can get busy, but there’s always room for a little chocolate indulgence—especially when those brownies are gluten-free and irresistibly fudgy. These Decadent Gluten-Free Chocolate Brownies bring together rich cocoa, silky melted chocolate, and a tender crumb that melts on your tongue. From the moment you whisk sugar and eggs until they’re light and fluffy, you’ll feel like you’re on the brink of dessert bliss. Each bite is loaded with bursts of intense chocolate flavor and just the right amount of chew, thanks to that reliable blend of gluten-free flour. Whether you’re baking for loved ones with dietary restrictions or just craving a gooey treat that steals the show, these brownies deliver on all fronts—no compromise required.
I remember the first time I baked a gluten-free dessert that truly tasted like the real deal. I was hesitant—would the texture hold up? Could it be fudgy enough without the gluten matrix? Spoiler alert: yes, yes, yes! The secret lies in balancing premium unsweetened cocoa powder, smooth melted butter, and generous swirls of chocolate chips. A dash of baking powder gives a gentle rise, while a pinch of salt sharpens the sweetness. Optional chopped nuts add a delightful crunch. With only a handful of pantry staples, you’ll have a tray of brownies ready in under an hour. These brownies store beautifully and can be dressed up with a scoop of ice cream or a fresh berry compote for an extra-special touch. Ready to bake your next show-stopping dessert? Let’s dive in!
KEY INGREDIENTS IN DECADENT GLUTEN-FREE CHOCOLATE BROWNIES
Before you don your apron, let’s chat about the superstar ingredients that make these brownies truly special. Each component plays an important role in flavor, texture, and overall brownie happiness, so it’s worth understanding why we use them and how they work together. Here’s a closer look:
- Unsalted butter
Provides a rich, creamy base and carries cocoa flavor throughout the batter. Unsalted ensures you control the salt level precisely for balanced sweetness.
- Granulated sugar
Sweetens the brownies and helps create a crinkly, shiny top when combined with eggs and melted chocolate. It also contributes to that tender crumb we all love.
- Pure vanilla extract
Adds depth and aromatic complexity. A little vanilla accentuates the chocolate’s richness and rounds out the flavor profile.
- Large eggs
Act as a binding agent, creating structure and moisture. Whisked until fluffy, eggs trap air for a lighter texture without sacrificing fudginess.
- Gluten-free all-purpose flour
Keeps the brownies tender and holds everything together. A reliable gluten-free blend replaces wheat flour without compromising texture.
- Unsweetened cocoa powder
Offers concentrated chocolate intensity and helps set the dense, fudgy interior. It deepens color and flavor without extra sweetness.
- Baking powder
Gives a modest lift to prevent overly dense brownies. It ensures the edges rise just enough while the center stays wonderfully gooey.
- Salt
Balances sweetness and enhances chocolate flavor. Even a pinch is crucial for highlighting the cocoa’s natural notes.
- Semi-sweet chocolate chips or chunks
Provide pockets of molten chocolate throughout each bite. Chunks create even more dramatic gooey streaks.
- Chopped nuts (optional)
Pecans or walnuts introduce a satisfying crunch and nutty flavor contrast. They’re entirely optional but highly recommended for texture variation.

HOW TO MAKE DECADENT GLUTEN-FREE CHOCOLATE BROWNIES
Baking these brownies is straightforward and perfect for cooks of any skill level. From melting the chocolate to folding in the flour, each step builds on the last to create a glossy, velvety batter. Let’s walk through the process:
1. Preheat your oven to 350°F (175°C). Prepare an 8×8-inch baking dish by lining it with parchment paper, ensuring there’s some overhang for easy removal later. This prevents the brownies from sticking and makes slicing a breeze.
2. In a microwave-safe bowl, combine the butter and half of the chocolate chips. Heat in 20-second intervals, stirring between each burst until the mixture is completely melted and silky smooth. This gentle melting method prevents scorching and yields a uniform chocolate base.
3. In a large mixing bowl, whisk together the sugar, vanilla extract, and eggs until the mixture becomes light, pale in color, and slightly fluffy. This aeration helps create that desirable thin crust on top of your brownies.
4. Slowly pour the melted chocolate mixture into the egg-sugar mixture, whisking continuously to ensure a seamless blend without cooking the eggs. The result should be a glossy, ribbon-like batter that’s begging to be baked.
5. Sift in the gluten-free flour, cocoa powder, baking powder, and salt over the wet ingredients. Using a sifter or fine-mesh sieve ensures no lumps and an even distribution of leavening.
6. Gently fold the dry ingredients into the batter with a spatula, stopping once no streaks of flour remain. Overmixing can lead to cakey brownies, so handle the batter lightly.
7. Fold in the remaining chocolate chips and the optional nuts, ensuring pockets of melty chocolate and crunchy bits throughout.
8. Pour the smooth batter into the prepared baking dish and spread it into an even layer using your spatula.
9. Bake for 25–30 minutes, or until a toothpick inserted near the center comes out with a few moist crumbs. Avoid overbaking to maintain that signature fudgy interior.
10. Let the brownies cool in the pan for 10 minutes. Then, using the parchment overhang, lift the slab out and transfer it to a wire rack to cool completely before slicing.
SERVING SUGGESTIONS FOR DECADENT GLUTEN-FREE CHOCOLATE BROWNIES
Once your brownies are baked and cooled, they’re ready to shine on any dessert table. Whether you crave a classic treat or want to dress them up for special occasions, these serving ideas will take your brownies from “yum” to “wow.” Grab a few simple garnishes and watch them disappear in record time!
- A la Mode Indulgence
Serve warm brownie squares alongside a scoop of vanilla ice cream. The contrast of hot and cold elevates every bite, creating an exquisite balance of creamy sweetness and fudgy texture.
- Berry Bliss
Top your brownies with a handful of fresh raspberries or strawberries. The bright, tangy fruit cuts through the richness and adds a pop of color for an elegant presentation.
- Sweet & Salty Crunch
Sprinkle the brownies with a light dusting of sea salt flakes and crushed pretzels. This salty twist highlights the chocolate’s depth and introduces an addictive crunch.
- Decadent Drizzle
Warm a few tablespoons of heavy cream with extra chocolate chips to make a luscious ganache. Drizzle it artistically over each square for a professional patisserie touch.
HOW TO STORE DECADENT GLUTEN-FREE CHOCOLATE BROWNIES
After baking, you’ll want to keep these brownies fresh and fudgy so they’re just as divine on day two, three, or beyond. Fortunately, they store beautifully and remain moist when cared for properly. Here are some storage methods to help your brownies stay at peak deliciousness:
- Room Temperature
Place cooled brownies in an airtight container at room temperature for up to three days. This method keeps them tender and maintains that soft, chewy texture.
- Refrigeration
If you need to store them longer, arrange the brownies in a sealed container or wrap them tightly in plastic wrap, then refrigerate for up to one week. Let them come to room temperature before serving for optimal fudginess.
- Freezing Individual Squares
Once completely cooled, wrap each brownie square in plastic wrap, then place them in a freezer-safe bag. Freeze for up to three months. Thaw overnight in the refrigerator or at room temperature for a quick treat.
- Layering Tips
When stacking brownies, separate layers with parchment paper to prevent sticking. This is especially handy when you’re prepping large batches for parties or gifting.
CONCLUSION
These Decadent Gluten-Free Chocolate Brownies have all the hallmarks of a show-stopping dessert: intense chocolate flavor, a fudgy interior, and a crackly top that hints at gooey goodness beneath. From simple pantry staples to an easy, beginner-friendly process, you’ll love how quickly you can transform your kitchen into a chocolate haven. Whether you’re baking for a crowd or enjoying an impromptu solo treat, the gluten-free flour blend ensures nobody misses a thing. Don’t forget to print this article or save it on your device so you can easily revisit it whenever that brownie craving strikes. And keep an eye out for the FAQ section below if you have any questions or need troubleshooting tips on mastering the perfect bake.
I’d love to hear how your brownies turned out! Feel free to leave a comment, share your favorite customization, or ask any questions if you run into any hiccups. Your feedback helps me continue to refine recipes and share new baking adventures. Happy baking, and here’s to many delicious brownie moments ahead!
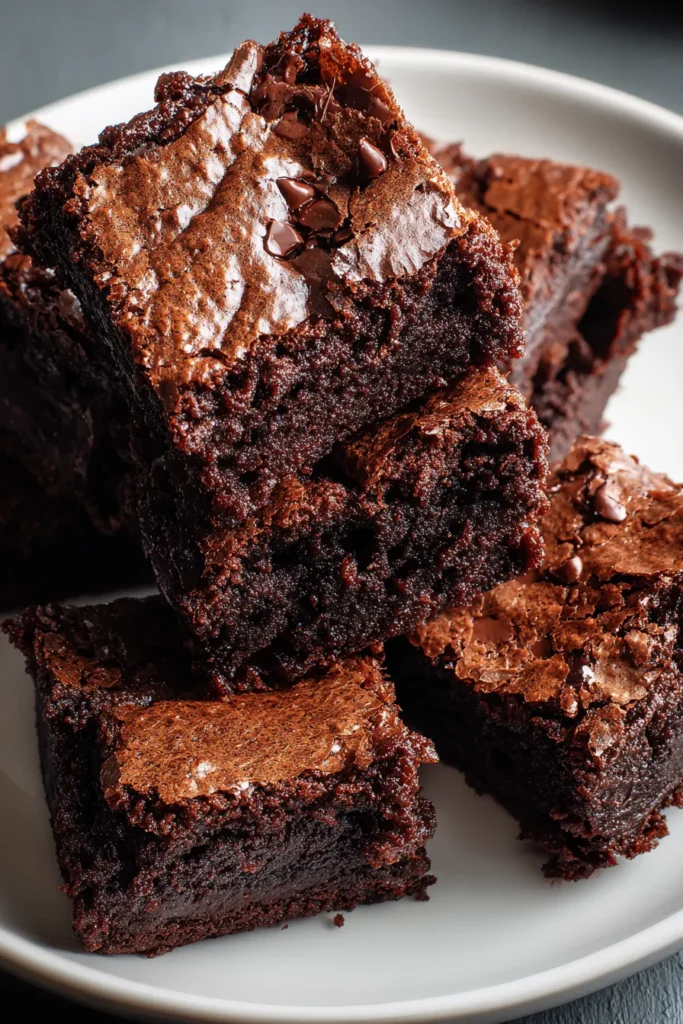

Decadent Gluten-Free Chocolate Brownies
Description
With a melt-in-your-mouth texture and bursts of chocolatey goodness, these gluten-free brownies are the epitome of dessert perfection, perfect for any sweet tooth.
Ingredients
Instructions
-
Preheat your oven to 350°F (175°C). Line an 8x8 inch (20x20 cm) baking dish with parchment paper, leaving some overhang for easy removal later.
-
In a microwave-safe bowl, combine the butter and half of the chocolate chips. Microwave in 20-second intervals, stirring in between, until fully melted and smooth.
-
In a large mixing bowl, whisk together the sugar, vanilla extract, and eggs until light and fluffy.
-
Slowly pour the melted chocolate mixture into the egg mixture, whisking continuously until fully combined.
-
Sift in the gluten-free flour, cocoa powder, baking powder, and salt into the wet ingredients. Gently fold the dry ingredients into the batter until no dry spots remain.
-
Fold in the remaining chocolate chips and the optional nuts if using.
-
Pour the batter into the prepared baking dish, spreading it evenly using a spatula.
-
Bake in the preheated oven for 25-30 minutes or until a toothpick inserted into the center comes out with a few moist crumbs attached. Avoid overbaking for fudgier brownies.
-
Allow the brownies to cool in the pan for 10 minutes. Then use the parchment overhang to lift them out of the pan and cool completely on a wire rack.
-
Slice into squares and serve.
Note
- For extra rich brownies, use dark chocolate instead of semi-sweet in the batter.
- Add a pinch of espresso powder to enhance the chocolate flavor.
- These brownies store well at room temperature in an airtight container for up to 3 days or in the refrigerator for a week.
- You can freeze these brownies for up to 3 months; just thaw overnight in the refrigerator before serving.

