

Gluten Free Cruffins are a game-changer for anyone craving a flaky, buttery treat without the gluten. These tender pastries twist up the light crumb of a muffin with crisp, laminated layers that sing with rich butter flavor. Whether you’re gluten-free out of necessity or curiosity, these cruffins are ready to elevate your breakfast or brunch routine—let’s dive into the magic of making them!
Key Ingredients
Before you begin, gather these essentials to ensure perfect layers and a tender crumb in your cruffins:
- 250 g gluten free all-purpose flour blend: Forms the dough’s foundation and ensures a light, tender crumb.
- 1 tsp xanthan gum: Improves elasticity and mimics gluten’s binding properties.
- 7 g active dry yeast: Leavens the dough, creating airy layers and volume.
- 2 tbsp granulated sugar: Feeds the yeast and adds a hint of sweetness.
- 1/2 tsp salt: Enhances flavor balance and strengthens the dough.
- 150 ml warm milk: Adds moisture and richness for a tender texture.
- 75 ml warm water: Hydrates the flour and activates the yeast.
- 200 g unsalted butter, cold: Creates flaky laminations and distinct buttery layers.
- 50 g unsalted butter, melted: Incorporated into the dough for extra richness and pliability.
- 1 large egg: Used as an egg wash to achieve a glossy, golden finish.
How To Make Gluten Free Cruffins
Crafting gluten free cruffins involves a series of careful steps—from activating the yeast to laminating the dough with cold butter, and finishing with a proof and bake. You’ll mix your dry and wet ingredients into a smooth, slightly shaggy dough, chill it with butter to maintain layer integrity, then perform classic letter folds with intermittent chilling. After rolling, cutting, twisting, and placing each cruffin into its tin, a final warm-proof helps them puff up beautifully. A quick egg wash and a high-temperature bake result in pastries that are golden on the outside and tender inside.
1. In a small bowl, combine warm milk, warm water, granulated sugar, and active dry yeast. Gently stir until the sugar dissolves, then let the mixture rest for about 5 minutes until a fluffy, foamy layer appears.
2. In a separate large bowl, whisk together the gluten free all-purpose flour blend, xanthan gum, and salt until evenly distributed.
3. Pour the foamy yeast mixture and the melted butter into the flour mixture. Stir until a shaggy dough forms, then knead lightly on a clean surface until smooth and cohesive.
4. Shape the dough into a neat rectangle, wrap it in plastic, and refrigerate for 30 minutes to firm up.
5. Place the cold unsalted butter between two sheets of parchment paper. Use a rolling pin to flatten it into a rectangle about half the size of your dough. Chill briefly if it softens.
6. Roll out the chilled dough on a lightly floured surface into a rectangle twice the size of the butter block. Center the butter, fold the dough over it, and seal the edges completely.
7. Perform three letter folds (fold in thirds), chilling the dough for 20 minutes between each fold to keep the layers distinct.
8. After the final fold, roll the dough to about 5 mm thickness. Cut into 10 cm-long strips, twist each strip, and shape it into a cruffin. Place each twist into a greased muffin tin.
9. Cover the filled tin loosely with plastic wrap and let the cruffins proof in a warm spot for 45–60 minutes until noticeably puffy.
10. Preheat the oven to 200°C. Beat the egg and brush each cruffin lightly. Bake for 15–18 minutes until golden brown. Transfer to a wire rack to cool before serving.
Serving Suggestions
These gluten free cruffins are incredibly versatile—perfect for a simple morning pick-me-up or an elegant brunch spread. Here are four fun ways to plate them:
- Dust with powdered sugar: Lightly sprinkle fine sugar over cooled cruffins for an elegant, sweet finish.
- Pair with coffee or tea: Enjoy the contrast of a crisp cruffin alongside a warm latte or fragrant tea.
- Fill with jam or custard: Slice halfway and pipe in your favorite fruit spread or pastry cream to add a burst of flavor.
- Serve with fresh fruit: Arrange berries or sliced stone fruit on the side for a refreshing balance to the pastry’s richness.
Tips For Perfect Gluten Free Cruffins
Nailing these cruffins every time comes down to ingredient quality and strict temperature control. Make sure you have a stellar gluten free flour blend with xanthan gum, and keep everything chilled between lamination steps. Rushing the proof can lead to flat twists, so wait for that visible puff before baking. Once they’re out of the oven, a brief reheat brings back the crisp layers for days after.
- Use a high quality gluten free blend with xanthan gum for optimal structure.
- Keep both the cold butter and dough in the fridge between folds to maintain distinct flaky layers.
- Proof the shaped cruffins until they look visibly puffy but are still holding their shape to avoid collapse.
- Store baked cruffins in an airtight container at room temperature for up to two days and reheat briefly before serving.
How To Store It
These cruffins taste best fresh, but savvy storage ensures you can enjoy their buttery layers later without a drop in quality. Whether you’re planning ahead or saving leftovers, follow these methods to preserve flavor and texture:
- Room temperature: Place cooled cruffins in an airtight container for up to two days, preventing unwanted moisture and keeping layers crisp.
- Refrigeration: Store in a sealed container for up to four days; allow to come to room temperature before reheating to restore tenderness.
- Freezing: Wrap individually in plastic wrap, then place in a freezer-safe bag for up to one month. Thaw overnight in the refrigerator before reheating.
- Reheating: Warm in a preheated 160°C oven for 5–7 minutes on a wire rack to revive flaky layers and restore brightness.
Frequently Asked Questions
Here are answers to the most common questions about these gluten free cruffins:
- How long does it take to prepare and bake these gluten free cruffins?
From start to finish, plan roughly 3 to 3½ hours. This includes about 10 minutes for mixing ingredients and activating the yeast, 30 minutes chilling the initial dough, 60 minutes total chilling between three letter folds, 10 minutes for rolling and shaping, 45–60 minutes proofing the shaped cruffins, and 15–18 minutes baking time.
- Why is it important to keep both the dough and butter cold during lamination?
Keeping the dough and butter cold prevents the butter from melting into the gluten free flour mixture, ensuring distinct layers. Cold butter flakes between dough folds and releases steam during baking, creating the signature flaky, airy texture. If the butter softens, it will blend into the dough and you’ll lose those layers.
- How can I tell when the shaped cruffins are properly proofed and ready to bake?
Properly proofed cruffins should look noticeably puffy, with the twists expanded but still holding their shape. A gentle poke on the surface should leave a slight indentation that slowly bounces back. If they deflate or collapse when prodded, they’ve overproofed; if they remain dense, they need more time.
- Can I substitute dairy ingredients for a vegan or dairy-free version?
Yes. Use a full-fat plant-based milk (such as almond or oat) warmed to 35–40°C, and swap unsalted butter with a high-fat vegan block butter. Make sure the dairy-free butter remains firm during lamination. You may need to chill the vegan butter more frequently, but the method and timings remain the same.
- Is it possible to prepare the dough ahead of time or freeze it?
You can refrigerate the initial dough rectangle overnight, then perform the three laminations and shaping the next day. To freeze, complete all folds, wrap tightly, and freeze for up to one month. Thaw overnight in the refrigerator before shaping and proofing, then proceed with proofing and baking as directed.
- What’s the best way to store and reheat leftover cruffins?
Store cooled cruffins in an airtight container at room temperature for up to two days. To refresh, preheat the oven to 160°C and warm the cruffins for 5–7 minutes on a wire rack. This revives the flaky layers far better than a microwave, preserving their crisp exterior.
What Makes This Special
These Gluten Free Cruffins truly shine because they merge the tender crumb of a muffin with the layered crisp of a croissant, just as the subtitle promises. The golden twists crackle on the outside while revealing an airy, buttery interior that pairs perfectly with your morning coffee or afternoon tea. Feel free to print and save this recipe for later adventures in gluten-free baking. When you give these cruffins a whirl, come back and leave a comment—you know I love hearing how your batches turn out or helping you troubleshoot any twists that need a little extra flair!
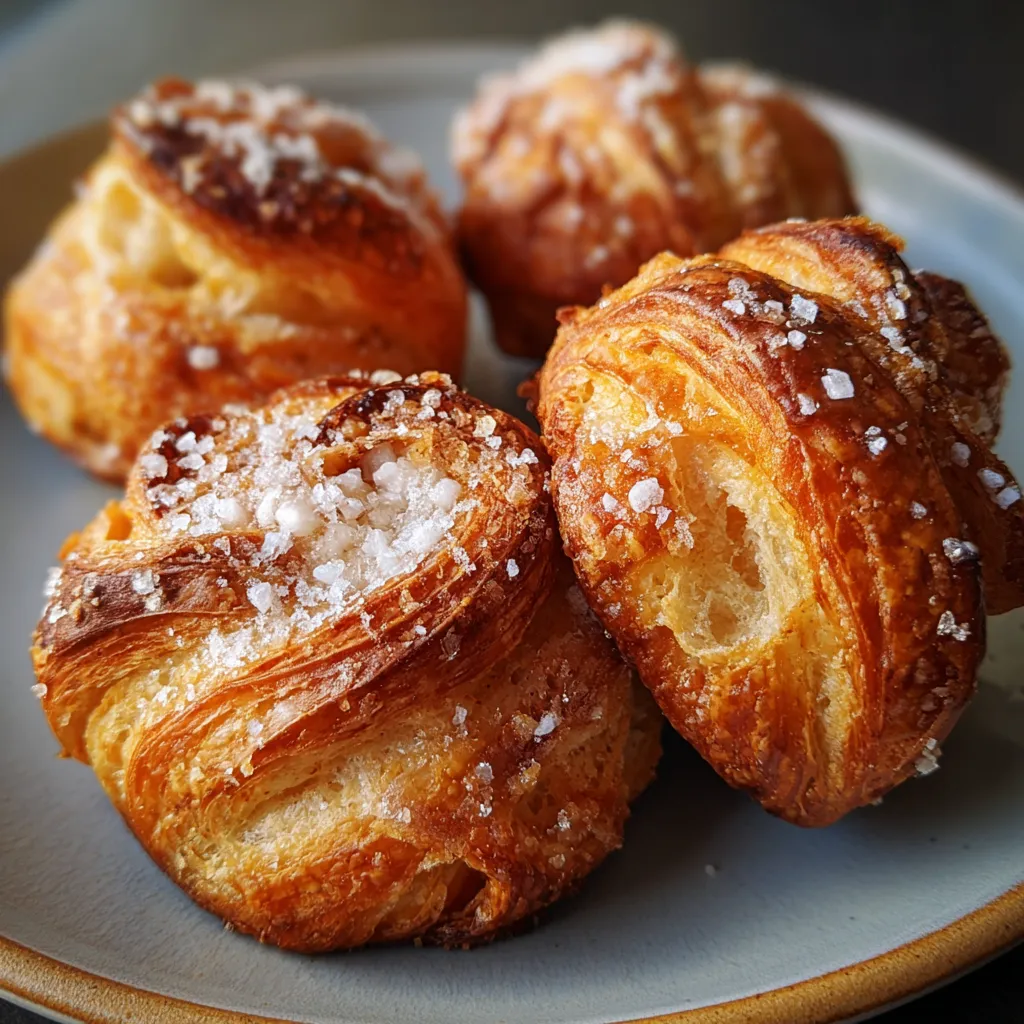

Gluten Free Cruffins
Description
Tender, golden cruffins crackle with crisp layers that reveal a soft, airy crumb inside. Each twist gleams with rich butter flavor and offers a light sweetness that pairs perfectly with morning coffee.
Ingredients
Instructions
-
In a small bowl combine warm milk, warm water, granulated sugar, and active dry yeast. Stir gently and let sit for 5 minutes until foamy.
-
In a separate large bowl whisk together gluten free all-purpose flour blend, xanthan gum, and salt.
-
Pour the yeast mixture and melted butter into the flour mixture. Stir until a shaggy dough forms, then knead lightly until smooth.
-
Shape the dough into a rectangle, wrap in plastic, and refrigerate for 30 minutes to firm up.
-
Place the cold unsalted butter between two sheets of parchment and pound into a flat rectangle. Chill briefly if butter softens.
-
Roll out the dough on a lightly floured surface to a rectangle twice the size of the butter block. Center the butter, fold the dough over it, and seal the edges.
-
Perform three letter folds (fold in thirds), chilling the dough for 20 minutes between each fold to keep layers distinct.
-
After the final fold, roll the dough to about 5 mm thickness. Cut into 10 cm-long strips, twist each strip and shape into a cruffin, placing it into a greased muffin tin.
-
Cover the filled tin loosely with plastic wrap and let the cruffins proof in a warm spot for 45–60 minutes until puffy.
-
Preheat the oven to 200°C. Beat the egg and brush each cruffin lightly. Bake for 15–18 minutes until golden brown. Cool on a wire rack before serving.
Note
- Use a high quality gluten free blend with xanthan gum for best structure.
- Keep butter and dough cold between laminations to ensure flaky layers.
- Proof the shaped cruffins until visibly puffy but not overrisen to prevent collapse.
- Store in an airtight container at room temperature for up to two days and reheat briefly before serving.

