

Creamy coconut yogurt swirled with juicy strawberry chunks and lightly sweetened with maple makes these Gluten-Free Dairy-Free Strawberry Yoghurt Bites a must-try treat. Whipped-up coconut yogurt meets ripe berries in bite-sized frozen poppers, enriched by chia seeds for that perfect hint of crunch. They’re easy to assemble, fun to enjoy, and totally guilt-free—ideal for a speedy snack or an after-dinner dessert that everyone will love. Let’s dive in and turn simple ingredients into icy, vibrant bites you’ll want to stash in your freezer for anytime cravings.
Key Ingredients
First, let’s gather the wholesome elements that give these yoghurt bites their creamy, fruity, and slightly crunchy personality:
- 1 cup dairy free coconut yogurt: Provides a rich, creamy base with a hint of tropical coconut flavor.
- 1 cup chopped strawberries: Adds fresh, juicy bursts of natural sweetness and vibrant color.
- 2 tablespoons maple syrup: Sweetens the mixture naturally while deepening the flavor profile.
- 1 teaspoon vanilla extract: Enhances the overall taste with warm, aromatic notes.
- 1 tablespoon chia seeds: Gives a subtle crunch and helps thicken the yoghurt for better bite consistency.
How To Make Gluten-Free Dairy-Free Strawberry Yoghurt Bites
Let’s transform these pantry staples into adorable frozen snacks! The process is delightfully simple and only requires a few mixing and freezing steps. You’ll use whisking, folding, and a bit of patience in the freezer to create perfect little bites that pop right out of the mold.
1. In a medium bowl, whisk together the dairy free coconut yogurt, maple syrup, and vanilla extract until the mixture is completely smooth and uniform.
2. Gently fold in the chopped strawberries and chia seeds, ensuring the fruit and seeds are evenly distributed without overmixing.
3. Spoon the blended mixture into silicone bite-sized molds or an ice cube tray, filling each cavity almost to the top.
4. Place the molds on a flat tray to keep everything level, then transfer to the freezer for consistent freezing.
5. Freeze for at least 2 hours or until the yoghurt bites are fully firm with no soft spots remaining.
6. Pop the frozen yoghurt bites out of the molds and store in a sealed container in the freezer until you’re ready to enjoy.
Serving Suggestions
These Strawberry Yoghurt Bites are simple yet versatile—perfect as a cool afternoon snack or a fun dessert centerpiece. Here are some creative ways to serve them:
- Fruit Platter Addition: Arrange alongside fresh melon, grapes, and berries for a colorful, shareable plate.
- Mint Garnish: Sprinkle finely chopped fresh mint over the bites just before serving to add a bright herbal note.
- Chocolate Drizzle: Melt dark chocolate and drizzle thin ribbons over the frozen bites for an elegant, sweet contrast.
- Yogurt Parfait Topper: Use as a decorative, chilled topping on layered parfaits or smoothie bowls for extra texture and flavor.
Tips For Perfect Gluten-Free Dairy-Free Strawberry Yoghurt Bites
Getting these bites just right is all about the little details. With a few friendly tips, you’ll guarantee flawless, dreamy results every time. Follow these pointers to make your freezing adventure as smooth as the coconut yogurt you’re using.
- Use a silicone mold for easy removal of the frozen yoghurt bites.
- Substitute maple syrup with agave nectar or honey if not strictly vegan.
- Store the bites in an airtight container to prevent freezer burn.
- Consume within one month for best flavor and texture.
How To Store It
Proper storage ensures your Strawberry Yoghurt Bites keep their creamy texture and fresh flavor. Once frozen, handle them gently and give them room to breathe so they don’t stick or get freezer-burned.
- Airtight Container: Transfer the fully frozen bites into a sealed, airtight container to lock out moisture.
- Flat Tray Freeze: Keep the molds on a flat tray during the initial freeze so each bite sets uniformly before unmolding.
- Consume Within One Month: Label with the freezing date and enjoy within a month for peak taste and texture.
Frequently Asked Questions
Here are answers to some common queries—freezing has never been this foolproof:
- How do I know when the frozen yoghurt bites are fully set and ready to remove from the molds?
The bites should be firm all the way through with no soft or liquid spots. After freezing for at least 2 hours on a flat tray, gently press the back of one mold; if it feels squishy, freeze an additional 30 minutes and test again until solid.
- Can I substitute the coconut yogurt with another dairy-free alternative, and will it affect the texture?
You can swap in almond, soy, or oat-based yogurt, though consistency may vary. Choose a thick, unsweetened variety to maintain the creamy texture.
- What options do I have if I don’t own silicone molds or an ice cube tray?
Use a mini muffin pan lined with paper or silicone liners, tiny paper cups, or a shallow baking dish—spread the mixture thinly, freeze, and then cut into bite-sized pieces.
- How can I adjust the sweetness level if the bites are too sweet or not sweet enough?
Taste the mixture before folding in fruit and seeds. To reduce sweetness, start with 1 tablespoon of maple syrup; to increase, add up to 3 tablespoons.
- Is it possible to add different fruits or mix-ins besides strawberries and chia seeds?
Absolutely. Try chopped blueberries, raspberries, diced mango, or cacao nibs—just ensure pieces are small enough for easy bites.
- How should I store the yoghurt bites to keep them fresh, and how long will they last in the freezer?
After unmolding, place the bites in a sealed, airtight container or freezer bag. Stored this way, they maintain best flavor and texture for up to one month.
What Makes This Special
There’s something irresistibly fun about tiny frozen yoghurt pops that blend the tropical creaminess of coconut yogurt with sweet strawberry pockets and a chia seed crunch. These Gluten-Free Dairy-Free Strawberry Yoghurt Bites prove that simple ingredients can deliver maximum joy—no fancy gadgets required. They’re ideal for heatwaves, after-school snacks, or just a playful twist on dessert. Feel free to print this recipe and stash it in your kitchen binder for hot days ahead. Tried them out? Drop a comment or question below—I’d love to hear how your bites turned out or help troubleshoot any freezing adventures!
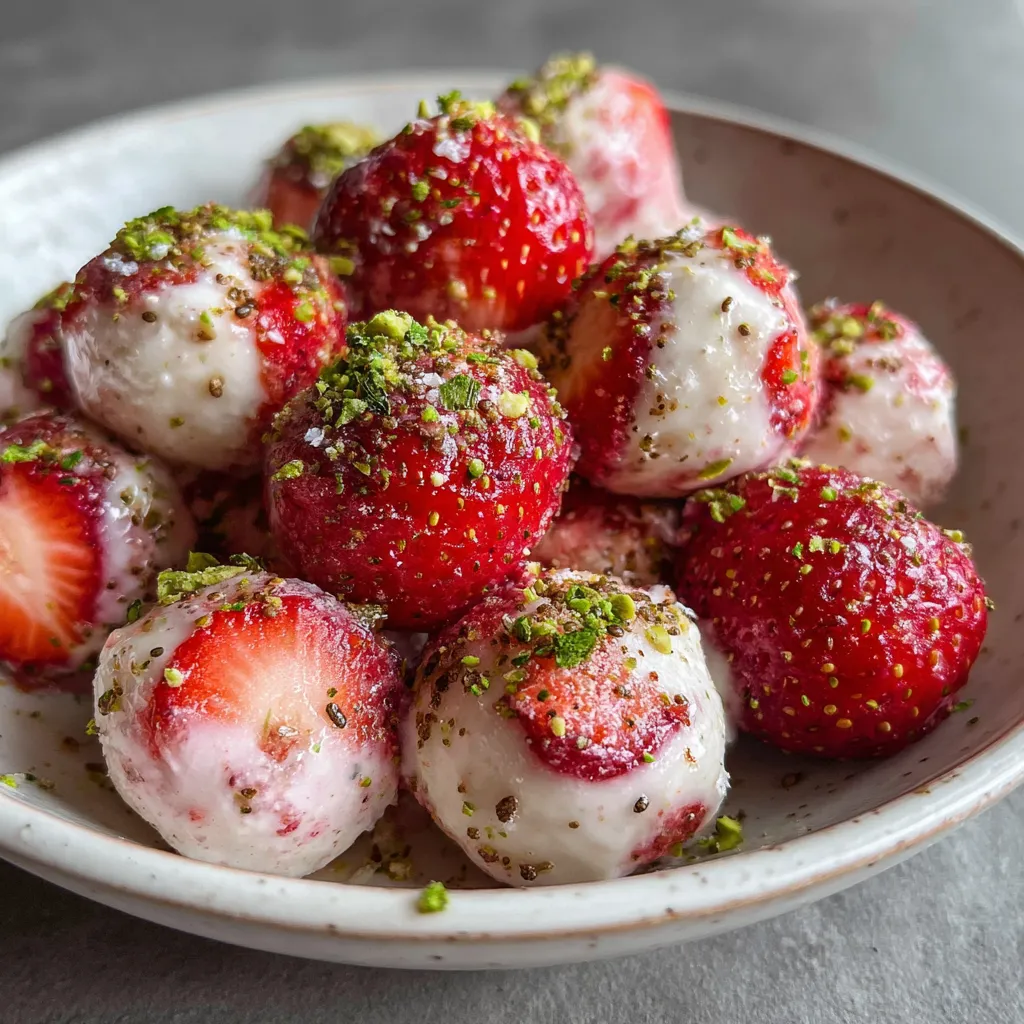

Gluten-Free Dairy-Free Strawberry Yoghurt Bites
Description
Chunks of ripe strawberry swirl through creamy coconut yogurt, lightly sweetened with maple and enriched by chia seeds. Freeze them into poppable bites for a refreshing, guilt-free treat whenever cravings strike.
Ingredients
Instructions
-
In a medium bowl, whisk the coconut yogurt, maple syrup and vanilla extract until smooth.
-
Gently fold in the chopped strawberries and chia seeds.
-
Spoon the mixture into silicone bite-sized molds or an ice cube tray.
-
Place the molds on a flat tray and transfer to the freezer.
-
Freeze for at least 2 hours or until firm.
-
Pop the yoghurt bites out of the molds and store in a sealed container in the freezer.
Note
- Use a silicone mold for easy removal of the frozen yoghurt bites.
- Substitute maple syrup with agave nectar or honey if not strictly vegan.
- Store the bites in an airtight container to prevent freezer burn.
- Consume within one month for best flavor and texture.

