

There’s something so satisfying about tucking into a bubbling pan of homemade apple cobbler fresh from the oven. Warm, gooey with perfectly spiced apples swirled under a golden, buttery crust, this dessert feels like a cozy hug on a plate. The tender apple slices, kissed by cinnamon and nutmeg, contrast beautifully with the soft, cake-like topping that soaks up every drop of sweet juices. Each bite offers a delightful combination of textures: the slightly tangy apple filling gives way to a rich, buttery topping that’s just slightly crisp around the edges. It’s the type of comforting classic that invites you to grab a fork, find your favorite spot on the couch, and savor a moment of pure indulgence.
This recipe was designed with ease in mind, making it perfect for both novice bakers and seasoned home cooks alike. With a total preparation time of just 30 minutes and a baking window of 45–50 minutes, you’ll have a stunning dessert on the table without spending hours in the kitchen. After a brief 10-minute rest, your apple cobbler will be ready to serve, yielding eight generous servings at roughly 350 calories each. Whether you’re celebrating a seasonal gathering, looking for a simple weeknight treat, or chasing away a chilly evening, this beginner-friendly dessert hits all the right notes. It’s classic fall baking at its finest—and I can’t wait to share it with you!
KEY INGREDIENTS IN HOMEMADE APPLE COBBLER
Creating the perfect apple cobbler starts with a handful of simple, pantry-friendly ingredients. Each component plays a key role in building those layers of flavor and texture—from the fruity base to the tender topping. Let’s explore what makes this dish so magical!
- Apples
These juicy fruit slices form the heart of the cobbler. When peeled, cored, and sliced, they release natural sweetness and a light tartness that balances the richness of the topping. Choose firmer varieties for the best structure.
- Granulated Sugar
Used both in the fruit filling and the topping, it sweetens the apples and encourages the golden crust formation. It also helps to draw out juices, creating that irresistible syrup beneath the topping.
- Ground Cinnamon
A classic warming spice that infuses the apple mixture with cozy, aromatic notes. It marries perfectly with the fruit’s natural flavors and enhances the overall sweetness.
- Ground Nutmeg
Adds subtle depth and a hint of warm earthiness. Just a pinch goes a long way in rounding out the spice profile without overpowering the apples.
- Lemon Juice
Provides a bright pop of acidity that prevents the apples from turning brown and cuts through the sweetness, keeping the flavors lively and balanced.
- All-Purpose Flour (for filling)
Acts as a gentle thickening agent for the apple juices, ensuring you get a luxuriously syrupy consistency that clings to every slice.
- All-Purpose Flour (for topping)
Creates structure in the batter, giving the cobbler topping its tender, cake-like texture. Combined with baking powder, it yields a light rise.
- Granulated Sugar (for topping)
Works alongside flour to sweeten and caramelize the exterior of the crust, delivering that irresistible golden-brown finish.
- Milk
Provides moisture and richness to the topping, resulting in a soft, custard-like crumb that complements the warm apples underneath.
- Unsalted Butter (melted)
Delivers deep, buttery flavor and helps bind the topping ingredients. Melting it ensures even distribution throughout the batter.
- Baking Powder
The leavening agent that gives the topping its delightful lift and airy consistency, preventing it from becoming too dense.
- Salt
Enhances all the flavors, amplifying sweetness and spice while balancing the overall taste.

HOW TO MAKE HOMEMADE APPLE COBBLER
Before diving into the step-by-step instructions, let’s appreciate how this recipe combines simple mixing and layering techniques to produce a show-stopping dessert. You’ll start by preparing the spiced apple filling, then create a smooth, tender batter that’s poured over the fruit. Finally, it all bakes together into one cohesive, mouthwatering dish. Ready to transform humble pantry staples into something extraordinary? Let’s go!
1. Preheat your oven to 375°F (190°C). Ensuring the oven is fully heated before baking helps the topping rise properly and develop a lovely golden color.
2. In a large bowl, combine the sliced apples, granulated sugar, ground cinnamon, ground nutmeg, lemon juice, and a tablespoon of flour. Use a spatula or your hands to toss until every apple slice is evenly coated, ensuring each bite bursts with spiced, juicy flavor.
3. Transfer the apple mixture into a greased 9×13 inch baking dish, spreading it out in an even layer. This helps the topping bake uniformly over the fruit.
4. In another bowl, combine the flour, sugar, baking powder, and salt. Slowly stir in the milk and melted butter, mixing until the batter is smooth and free of lumps.
5. Pour the batter over the apple mixture in the baking dish, moving the bowl around gently to ensure the topping covers the fruit completely without disturbing the layer beneath.
6. Place the baking dish in the preheated oven and bake for 45–50 minutes, or until the top takes on a deep golden brown hue and a toothpick inserted into the center of the topping comes out clean.
7. Once baked, remove the cobbler from the oven and let it cool slightly, about 10 minutes, before serving. This rest period allows the fruit juices to thicken and makes scooping a breeze.
SERVING SUGGESTIONS FOR HOMEMADE APPLE COBBLER
Serving your homemade apple cobbler is almost as fun as baking it. This section covers a variety of ways to elevate each serving so you can impress family and friends (or treat yourself!) every time. From temperature pairings to flavor accents, these ideas will take your presentation and taste to the next level.
- Creamy Vanilla Ice Cream Scoop
A generous scoop of vanilla ice cream sets atop the warm cobbler like a melting cloud. The cool creaminess perfectly contrasts the heated apple filling and buttery crust. For best results, choose a high-quality ice cream and serve immediately after scooping.
- Fluffy Whipped Cream Dollop
Whip heavy cream with a touch of sugar and vanilla extract until soft peaks form. Dollop spoonfuls of this fresh whipped cream over each serving, adding a light, airy texture that complements the richness of the cobbler.
- Drizzled Caramel Sauce
Warm up some caramel sauce on the stovetop or microwave until pourable, then drizzle in a zigzag pattern over individual portions. The sweet, buttery caramel elevates the apple flavor and creates a restaurant-worthy finish.
- Spiced Cider Pairing
Pour a mug of hot spiced apple cider to sip alongside your cobbler. The shared notes of cinnamon and nutmeg echo in both the dessert and beverage, creating a harmonious fall-themed duo.
HOW TO STORE HOMEMADE APPLE COBBLER
Proper storage ensures you can enjoy every last bite of your homemade apple cobbler without sacrificing texture or flavor. Whether you’re saving leftovers for the next day or planning ahead for future treats, follow these guidelines to maintain that fresh-baked goodness.
- Room Temperature Short-Term
Cover the baking dish loosely with aluminum foil or plastic wrap and store at room temperature for up to 24 hours. This method preserves the topping’s tenderness without letting it become soggy.
- Refrigeration for Freshness
After cooling completely, cover the dish or transfer individual portions into an airtight container. Refrigerate for 3–4 days. Bring to room temperature or gently reheat before serving to revive the flavors.
- Freezing for Long-Term Storage
Cut the cooled cobbler into squares and wrap each piece tightly in plastic wrap, then place them in a freezer-safe bag. Freeze for up to 2 months. Thaw in the refrigerator overnight, then warm in the oven at 350°F for 15–20 minutes before serving.
- Reheating Techniques
For the fastest enjoyment, microwave individual servings for about 30 seconds. For a crispier topping, reheat in the oven at 350°F (175°C) for 10–12 minutes, uncovered, until warmed through and the crust re-crisps.
CONCLUSION
This homemade apple cobbler exemplifies everything we love about comfort desserts: straightforward preparation, delightful aromas, and flavors that transport you to cozy family gatherings. From peeling and spicing your apples to pouring that rich, buttery batter, each step celebrates the joy of baking from scratch. The result is a golden-topped masterpiece that’s warm, tender, and perfectly spiced, making it a standout dessert for any occasion. Whether you serve it straight from the oven or reheat later, you’ll notice how the apples soak into the buttery topping, releasing sweet juices that mingle with cinnamon and nutmeg. Best enjoyed with a scoop of vanilla ice cream, a swirl of whipped cream, or a drizzle of caramel sauce, this cobbler delivers on both taste and nostalgia.
Feel free to print this article and save it in your recipe binder for those nights when you crave a simple, satisfying treat. You’ll also find a FAQ below to answer common questions and troubleshoot any baking concerns, helping you achieve cobbler perfection every time. If you decide to give this recipe a try—or if you have suggestions, questions, or stories of your own—please leave a comment. I’d love to hear your feedback and help you master this classic dessert. Your kitchen adventures are what make recipes like this come to life, so don’t hesitate to share how your cobbler turned out or reach out if you need a hand. Happy baking!
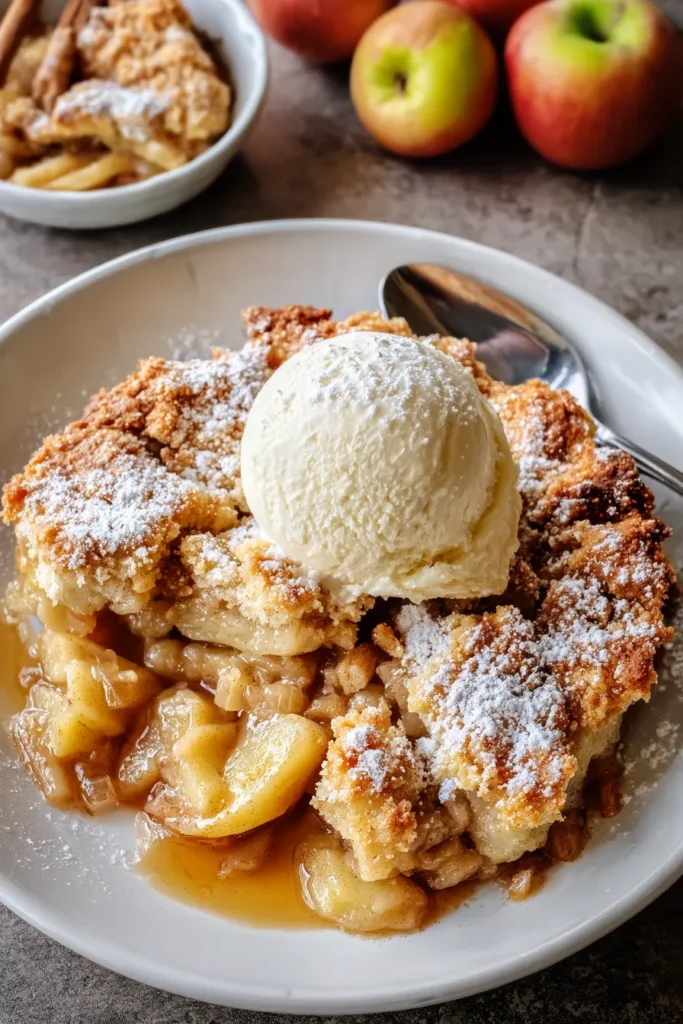

Homemade Apple Cobbler
Description
Warm and gooey with perfectly spiced apples, this homemade apple cobbler is the ultimate comfort dessert. Topped with a golden, buttery crust, it’s an inviting treat for any occasion.
Ingredients
Instructions
-
Preheat your oven to 375°F (190°C).
-
In a large bowl, combine the sliced apples, 1 cup granulated sugar, ground cinnamon, ground nutmeg, lemon juice, and 1 tablespoon of flour. Toss until the apples are evenly coated.
-
Transfer the apple mixture into a greased 9x13 inch baking dish, spreading evenly.
-
In another bowl, combine 1 cup flour, 1 cup sugar, baking powder, and salt. Stir in the milk and melted butter until the mixture is smooth.
-
Pour the batter over the apple mixture in the baking dish, ensuring it covers the fruit evenly.
-
Place the baking dish in the preheated oven and bake for 45-50 minutes or until the top is golden brown and a toothpick inserted into the topping comes out clean.
-
Once baked, remove the cobbler from the oven and let it cool slightly before serving.
Note
- For added flavor, try adding a handful of raisins or chopped nuts to the apple mixture.
- Experiment with different types of apples to find your preferred tartness.
- Serve warm with a scoop of vanilla ice cream or a dollop of whipped cream for the best experience.
- Feel free to sprinkle additional cinnamon sugar on top before baking for a carmelized crust.

