

Every spoonful of Homemade Apple Crisp is like wrapping yourself in a cozy blanket of sweet and spicy comfort. There’s something irresistibly charming about the sight of tender, cinnamon-dusted apple slices bubbling away beneath a golden oat crumble. This is not just any dessert—it’s a celebration of fall’s finest harvest, blending tart Granny Smith or honey-sweet Honeycrisp apples with just the right amount of nutmeg and cinnamon. And the best part? Despite its rich, bakery-style flavors, this recipe is delightfully beginner-friendly. With only 20 minutes of prep, 45 minutes of baking, and a 10-minute rest before serving, even the most novice home cook can achieve a show-stopping dessert. Yielding eight generous portions at around 300 calories per serving, it’s the perfect after-dinner treat to share with family, friends, or anyone who appreciates the warm, nutty, and irresistibly sweet magic of a classic apple crisp.
I still remember the first time I pulled this apple crisp from the oven: the filling was bubbling like a spirited autumn bonfire, and the topping had baked into a satisfyingly crunchy mosaic of oats and brown sugar. The scent wafting through the kitchen was nothing short of mesmerizing, drawing in curious onlookers who couldn’t resist stealing a taste. That evening, we piled every plate high and crowned each slice with a melting scoop of vanilla ice cream, creating glorious contrasts of temperature and texture—warm fruit against cold cream, soft apples against crispy oats. Whether you’re baking to celebrate a crisp Sunday afternoon or simply craving the taste of homemade comfort, this apple crisp delivers on every level. Get ready to step into a world of cozy flavors, where every bite feels like a warm hug from the inside out.
KEY INGREDIENTS IN HOMEMADE APPLE CRISP
Before diving into the baking process, let’s get acquainted with the core ingredients that transform ordinary apples into the most comforting dessert around. From the fruit itself to the buttery crumble on top, each component plays a crucial role in building layers of flavor and texture. Here’s a look at what you’ll need:
- Apples
Choose firm varieties like Granny Smith or Honeycrisp for their perfect balance of tartness and sweetness. Peeled and sliced, these apples create a tender filling that holds its shape while offering that signature apple bite.
- Lemon juice
A splash of fresh lemon juice brightens the fruit’s natural flavors and prevents those apple slices from turning brown as you assemble your crisp.
- Ground cinnamon
This warm, aromatic spice wraps around the apples, providing that quintessential fall flavor and enhancing the natural sweetness of the fruit.
- Ground nutmeg
Just a touch of nutmeg adds subtle depth and complexity, rounding out the spice blend with its sweet and slightly peppery undertones.
- Granulated sugar
Sprinkled among the apple slices, granulated sugar helps draw out the juices and sweetens the filling without weighing it down.
- All-purpose flour
Flour acts as a binder in the topping, helping to create a cohesive yet crumbly texture when combined with oats and butter.
- Old-fashioned rolled oats
These hearty oats bring a satisfying chew and wholesome character to the crumble, balancing out the soft fruit with a rustic crunch.
- Brown sugar
Packed with molasses flavor, brown sugar deepens the topping’s sweetness and helps achieve that gorgeous golden-brown color as it bakes.
- Unsalted butter
Melted butter coats the dry ingredients, ensuring the topping bakes up crispy, rich, and delightfully flaky.
- Salt
A pinch of salt brightens all the flavors, cutting through sweetness and harmonizing the spices and fruit.
HOW TO MAKE HOMEMADE APPLE CRISP
Creating this apple crisp is straightforward, and the step-by-step process ensures delicious results every time. Gather your ingredients, follow these detailed instructions, and you’ll soon have a warm, nutty, and irresistibly sweet dessert ready to enjoy.
1. Preheat your oven to 350°F (175°C). Proper preheating ensures even baking and that signature golden topping.
2. In a large bowl, combine the peeled and sliced apples with lemon juice, ground cinnamon, ground nutmeg, and granulated sugar. Toss the mixture until each apple slice is evenly coated with spices and sugar.
3. Grease a 9×13-inch baking dish and transfer the seasoned apple mixture into it, spreading the fruit layer out evenly to guarantee consistent baking.
4. In a separate bowl, whisk together the all-purpose flour, old-fashioned rolled oats, packed brown sugar, and salt until uniform.
5. Pour the melted unsalted butter over the dry mixture and stir vigorously until it clumps into a crumbly, well-combined topping.
6. Sprinkle the oat and butter mixture evenly over the top of the apples, covering every nook and cranny for a full layer of crunchy goodness.
7. Bake in the preheated oven for 40–45 minutes, or until the topping turns a rich golden brown and the apples below are tender and bubbling.
8. Remove the dish from the oven and allow the crisp to cool for a few minutes—this helps the juices settle and makes serving easier.
SERVING SUGGESTIONS FOR HOMEMADE APPLE CRISP
Once your apple crisp emerges from the oven, it’s time to think about how to serve it in the most delectable way. Whether you’re hosting a cozy gathering or simply treating yourself, these ideas will take your presentation up a notch and elevate every bite:
- Serve with a scoop of vanilla ice cream placed directly on top of a warm portion. The contrast between hot and cold creates a silky, melting drizzle that seeps into the crisp’s nooks.
- Drizzle warm caramel sauce over each slice just before serving for an extra layer of sweet, buttery richness that complements the apples beautifully.
- Dollop fresh whipped cream onto each plate and finish with a light dusting of cinnamon for a restaurant-worthy finish that’s light, airy, and perfectly spiced.
- Pair your apple crisp with a steaming cup of hot coffee or spiced tea. The warm beverage enhances the dessert’s cozy flavors and makes for a truly comforting combo.
HOW TO STORE HOMEMADE APPLE CRISP
Keeping your apple crisp fresh and flavorful after baking is all about proper storage. Whether you’re saving leftovers for later in the week or planning ahead by making it in advance, follow these methods to preserve that buttery crunch and tender filling:
- Store at room temperature in an airtight container for up to one day. This keeps the topping crisp while preventing the apples from drying out.
- Cover the baking dish tightly with plastic wrap or foil and refrigerate for up to three days. Reheat single portions in the microwave or oven to restore warmth.
- For longer storage, divide the crisp into individual portions and freeze in freezer-safe containers for up to three months. Thaw overnight in the refrigerator before reheating.
- To reheat, place slices in a preheated oven at 350°F for 10–15 minutes, uncovered, until the topping crisps back up and the filling is bubbly once more.
CONCLUSION
This Homemade Apple Crisp recipe has everything a dessert lover could crave: tender, cinnamon-spiced apples nestled under a buttery, oat-studded crumble that’s baked to golden perfection. We’ve explored each key ingredient—from the tart snap of Granny Smith apples to the rich depth of brown sugar—and walked through every step to ensure success. You’ve also seen how versatile serving suggestions, like a scoop of vanilla ice cream or a drizzle of caramel sauce, can transform a simple dish into a sensational finale for any meal. With clear storage tips at your fingertips, you’re set to enjoy leftovers that taste just as delightful as when they first came out of the oven. Feel free to print this article and save it for later; you’ll even find a FAQ section below for quick answers to common questions.
I can’t wait to hear how your apple crisp adventure turns out! If you’ve got feedback, questions on any of the steps, or a special twist you tried (perhaps adding chopped pecans or swapping in different apple varieties), drop a comment and share your experience. Cooking should be fun and interactive, so let me know if you hit any bumps in the road or discovered a nifty shortcut. Your stories and suggestions could inspire fellow bakers to whip up the coziest, most irresistible apple crisp they’ve ever tasted. Happy baking!
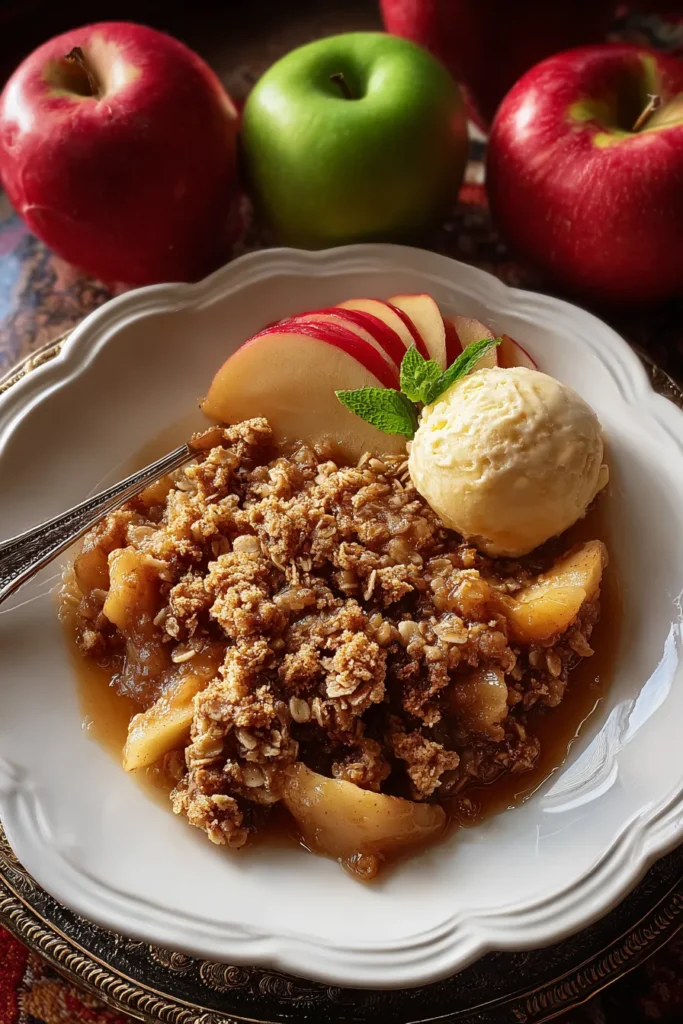

Homemade Apple Crisp
Description
Experience the comforting flavors of tender apples, sprinkled with cinnamon and nutmeg, all topped with a buttery, crunchy oat mixture. A classic treat for any dessert lover!
Ingredients
Instructions
-
Preheat your oven to 350°F (175°C).
-
In a large bowl, combine the sliced apples with lemon juice, cinnamon, nutmeg, and granulated sugar. Toss until the apples are evenly coated.
-
Transfer the apple mixture to a greased 9x13-inch baking dish, spreading it out evenly.
-
In a separate bowl, mix together the flour, oats, brown sugar, and salt.
-
Pour the melted butter into the dry mixture and stir until crumbly and well combined.
-
Sprinkle the oat mixture evenly over the apples, covering them thoroughly.
-
Bake in the preheated oven for 40-45 minutes, or until the topping is golden brown and the apples are bubbly.
-
Remove from the oven and allow to cool for a few minutes before serving.
Note
- Serve warm with a scoop of vanilla ice cream for a delicious contrast.
- You can use a mix of different apples for a more complex flavor.
- Add chopped nuts like walnuts or pecans to the topping for added crunch.
- Store leftovers covered in the refrigerator for up to 3 days.

