

There’s nothing quite like biting into a slice of homemade apple pie, its flaky, buttery crust giving way to tender, cinnamon-kissed apple slices. This classic dessert, perfect for fall baking and comforting any occasion, wraps generations of tradition into one glorious pastry. Savor the sweetness of autumn as you celebrate gatherings with loved ones or treat yourself to a cozy evening at home. With just a handful of pantry staples and fresh apples, you’ll create a pie that smells like childhood memories and tastes like warmth in every forkful. Whether you’re new to pie crust or a seasoned home cook, this recipe is designed for beginners yet delivers a professional finish.
Experience the warm, buttery crust embracing sweet and tart apple slices, spiced with earthy cinnamon and nutmeg. This Homemade Apple Pie takes about 30 minutes of hands-on preparation, a one-hour bake, and a one-hour rest for the filling to set—perfect for planning ahead on a busy baking day. Each slice clocks in around 400 calories, making it a richly satisfying dessert course for any table. As you follow these steps, you’ll witness how chilled butter and ice water transform into flaky layers, and crisp apples fold into a luscious filling. By the time you’ve mastered rolling out your dough and sealing the top crust with a golden egg wash, you’ll be ready to share this delicious, comforting dessert with everyone you cherish.
KEY INGREDIENTS IN HOMEMADE APPLE PIE
Before we dive into the step-by-step guide, let’s talk about the stars of this recipe. Every ingredient has a special role, working together to build that tender crust and saucy, spiced filling you know and love.
- All-purpose flour
This versatile flour forms the foundation of your pie crust, giving structure to each flaky layer. A bit more is used in the filling to help thicken the juices released by the apples as they bake.
- Salt
Just a pinch of salt enhances all the flavors in both the crust and the filling, balancing sweetness and sharpening the taste of the buttery layers.
- Sugar
Sugar sweetens the dough and the apple filling alike, drawing out the fruit’s natural juices while creating a caramel-like glaze around each slice.
- Unsalted butter
Chilled and diced, this butter is the secret to a tender, flaky crust. The cold bits create steam pockets as they bake, puffing up the pastry to golden perfection.
- Ice water
Adding ice-cold water brings the dough together without melting the butter. It helps maintain those flaky layers and makes the dough pliable enough to roll out.
- Ground cinnamon
A warm, comforting spice that infuses your apple filling with that familiar holiday-in-the-air flavor.
- Ground nutmeg
Nutmeg offers an earthy, slightly sweet counterpoint to cinnamon, rounding out the spice profile and adding depth.
- Apples
A mix of sweet and tart varieties gives the best texture and flavor contrast. Peel, core, and slice them evenly so they cook uniformly.
- Lemon juice
Adds a bright, tangy note that prevents the apples from turning brown and keeps the filling lively.
- Diced butter
Small bits of butter dotted on top of the filling melt into pockets of extra richness, making every bite luxurious.
- Egg
Beaten into an egg wash, it gives the top crust that glossy, golden-brown finish that looks straight out of a bakery display.

HOW TO MAKE HOMEMADE APPLE PIE
Let’s walk through this recipe from start to finish. You’ll learn how to craft a perfect flaky crust, assemble a spiced apple filling, and bake it all to golden-brown glory. Each step builds on the last, guiding you toward pie perfection.
1. In a large bowl, combine the flour, salt, and sugar. Add the diced butter and use a pastry cutter or your fingertips to work it into the flour mixture until it resembles coarse crumbs with pea-sized pieces.
2. Stir in the ice water, one tablespoon at a time, until the dough just comes together. Avoid overworking it to keep the crust tender. Divide the dough into two equal halves, shape each into a disc, wrap in plastic wrap, and refrigerate for at least one hour.
3. Preheat your oven to 425°F (220°C), allowing it to reach temperature while you prepare the filling and roll out the crust.
4. In another bowl, toss the sliced apples with sugar, a little extra flour, lemon juice, cinnamon, and nutmeg until every slice is evenly coated.
5. On a lightly floured surface, roll out one disc of dough into a circle large enough to fit a 9-inch pie dish. Carefully lift and press it into the dish, gently pushing it into the edges.
6. Pour the apple filling into the crust, spreading it evenly, and dot the top with the diced butter for pockets of buttery richness.
7. Roll out the second disc of dough and drape it over the apples. Trim the excess, then crimp or flute the edges to seal. Use a sharp knife to cut a few slits in the top crust for steam to escape.
8. Brush the top crust with the beaten egg to create a glossy, golden finish once baked.
9. Bake in the preheated oven for 15 minutes. Then reduce the heat to 375°F (190°C) and continue baking for another 35–45 minutes, or until the crust is deeply golden and the apples are tender when pierced.
10. Remove the pie from the oven and let it cool completely before slicing, so the filling sets and you get clean, beautiful slices.
SERVING SUGGESTIONS FOR HOMEMADE APPLE PIE
Once your pie has cooled and settled, it’s time to think about presentations that make each slice irresistible. Whether you’re hosting a festive dinner or enjoying a quiet weekend treat, these serving ideas add flair and extra flavor to your classic apple pie.
- Classic à la mode
Serve a warm slice with a scoop of cold vanilla ice cream. The ice cream’s creamy sweetness melts over the hot filling, creating a luscious, temperature-contrast sensation.
- Whipped dream
Top each piece with a dollop of freshly whipped cream lightly sweetened and flavored with a hint of vanilla, offering cloud-like lightness alongside the denser pie slices.
- Caramel drizzle
For added decadence, warm some caramel sauce and drizzle it over the pie just before serving. The rich, buttery sauce complements the spices and deepens each bite.
- Cheddar crunch
For an old-country twist, pair your pie with a thin slice of sharp cheddar cheese on the side or melted on top. The savory bite contrasts delightfully with the sweet, spiced apples.
HOW TO STORE HOMEMADE APPLE PIE
Proper storage ensures your apple pie stays as delicious as day one. Whether you have leftovers or want to bake ahead for a gathering, these tips will help keep your pie fresh, flaky, and full of flavor.
Storing a baked apple pie requires balancing temperature and moisture to maintain that crisp crust and tender filling. At room temperature, the pie is best enjoyed within two days. The crust may soften slightly but will still taste wonderful. For longer storage, refrigeration or freezing is the way to go, with a few extra steps to prevent sogginess and freezer burn.
- Room temperature
Cover the cooled pie loosely with aluminum foil or a pie plate lid and keep it on the counter for up to 48 hours. This method preserves the flakiness of the crust while keeping the filling at serving temperature.
- Refrigerator
For up to five days, wrap the cooled pie in plastic wrap or place it in an airtight container. Chilling helps the flavors meld, but the crust may lose some crispness. Warm individual slices in a 300°F oven for about 10 minutes to restore flakiness.
- Freezer (whole pie)
Wrap the unbaked or fully cooled pie securely in plastic wrap, then in a layer of foil. Label with the date and freeze for up to three months. Bake from frozen, adding 10–15 minutes to the total baking time, until the crust is golden and the filling bubbles.
- Freezer (slices)
For quick dessert fixes, wrap individual cooled slices in plastic, then foil, and freeze on a baking sheet. Transfer to a freezer bag for up to two months. Reheat frozen slices in a 350°F oven for about 15–20 minutes, or until heated through.
CONCLUSION
You’ve just taken a journey through the art of baking a traditional Homemade Apple Pie—one that celebrates the sweet-tart harmony of apples spiced with cinnamon and nutmeg, all embraced by a golden, flaky crust. From chilling the butter to mixing the perfect filling, each step combines to create a dessert worthy of gatherings, cozy nights in, or any moment that deserves a touch of warmth and nostalgia. With beginner-friendly techniques, clear instructions, and tips on serving and storage, this recipe is designed to become a staple in your baking repertoire. Feel free to print this article and keep it tucked in your recipe binder for easy reference on the next crisp-air afternoon when apple season calls.
Baking a pie is more than following measurements—it’s about sharing memories, experimenting with flavors, and enjoying the process. Save this guide for later, and remember you can find a FAQ below to address any questions you might have. If you try this recipe, I’d love to hear how it turns out—drop a comment with your baking triumphs, tweaks, or any questions you have. Happy baking, and may your kitchen be filled with the joy of a perfectly baked apple pie!
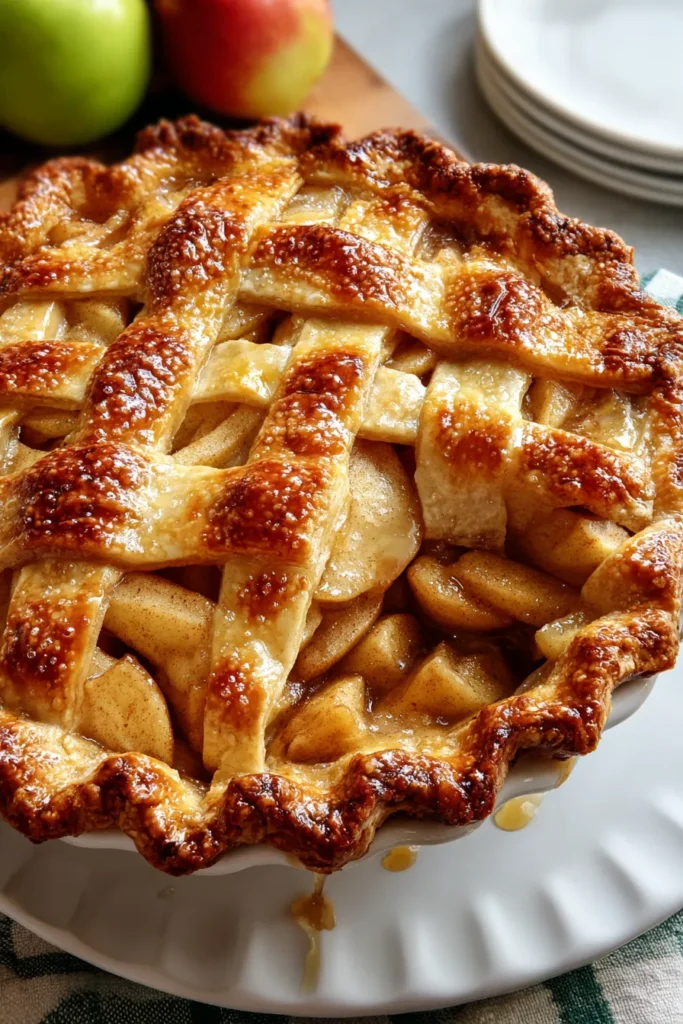

Homemade Apple Pie
Description
Experience the warm, buttery crust embracing sweet and tart apple slices, spiced with earthy cinnamon and nutmeg. This classic pie is a delightful way to celebrate any gathering!
Ingredients
Instructions
-
In a large bowl, combine the flour, salt, and sugar. Add the diced butter into the flour mixture and mix until the mixture resembles coarse crumbs.
-
Stir in the ice water, a tablespoon at a time, until the dough comes together. Divide dough into halves and form into two discs. Wrap them in plastic wrap and refrigerate for at least an hour.
-
Preheat your oven to 425°F (220°C).
-
In another bowl, mix sliced apples with the sugar, 2 tablespoons flour, lemon juice, cinnamon, and nutmeg.
-
Roll out one disc of dough on a lightly floured surface until it is large enough to fit into a 9-inch pie dish. Carefully place the dough into the pie dish and press into the edges.
-
Pour the apple filling into the pie crust and dot the mixture with butter.
-
Roll out the second disc of dough and place it over the apples. Trim and crimp the edges to seal. Cut slits into the top crust to allow steam to escape.
-
Brush the top crust with beaten egg to give it a golden finish.
-
Bake in the preheated oven for 15 minutes. Reduce the temperature to 375°F (190°C) and continue baking for 35 to 45 minutes, or until apples are tender and crust is golden brown.
-
Allow the pie to cool before serving for the filling to set properly.
Note
- Use a mix of apple varieties for a balance of sweetness and tartness.
- Ensure butter is chilled to make the crust flakier.
- Allow the pie to cool completely if you want clean, sharp slices.
- The egg wash gives a glossy, professional look to the pie.
- Serve with vanilla ice cream or whipped cream for an indulgent treat.

