

These cookies are like a warm hug in dessert form, blending the comforting flavors of rich cocoa with the gooey charm of marshmallows that pop with every bite. As you take that first taste, you’ll notice the tender crumb yielding to pockets of melted chocolate chips and soft marshmallow bits—each morsel a little surprise for your taste buds. The name says it all: Marshmallow Hot Cocoa Surprise Cookies. They’re perfect when you want a cozy indulgence without the fuss, capturing the essence of sipping a steaming cup of cocoa next to a crackling fire, but with portable cookie convenience. Whether you’re an experienced baker or just diving into intermediate-level recipes, you’ll love how simple ingredients—flour, butter, cocoa, and sugar—come together to create such decadence.
These cookies aren’t just about flavor; they’re about making moments special. Picture pulling a fresh batch from the oven, their edges perfectly set and centers still delightfully soft. A generous dusting of powdered sugar transforms each cookie into a snowy treat that’s as fun to look at as it is to eat. With a prep time of about 20 minutes, bake time of 12 minutes, a brief 5-minute rest, and yielding around 24 cookies (each about 150 calories), you can whip up a crowd-pleasing dessert without a full afternoon commitment. These are ideal for dessert plates, holiday cookie exchanges, and gifting—especially when you customize with holiday peppermint marshmallows or drizzle with extra melted chocolate. Dive in, and let’s explore what makes these Marshmallow Hot Cocoa Surprise Cookies so irresistibly cozy and fun!
KEY INGREDIENTS IN MARSHMALLOW HOT COCOA SURPRISE COOKIES
Before you roll up your sleeves and get baking, let’s talk about the star players in this recipe. Each ingredient contributes its own magic, transforming basic pantry staples into a cookie that tastes like a steaming cup of cocoa with an unexpected marshmallow twist.
- Unsalted butter
Provides a rich, creamy foundation and tender texture. Its fat content helps achieve that melt-in-your-mouth softness while carrying the chocolate and marshmallow flavors.
- Granulated sugar
Adds sweetness and structure. When creamed with butter, it helps aerate the dough, giving your cookies a light lift and slight crisp on the edges.
- Brown sugar
Brings moisture and a hint of caramel complexity. Its molasses content deepens the cookie’s flavor and keeps the centers soft and chewy.
- Eggs
Offer structure, moisture, and binding power. Beating them one at a time ensures even incorporation and a smooth dough.
- Vanilla extract
Enhances all the sweet flavors and brightens the cocoa. A little vanilla adds depth and aromatic warmth.
- All-purpose flour
Forms the backbone of the dough. It creates structure while allowing the cookies to spread just enough for a tender bite.
- Unsweetened cocoa powder
Delivers intense chocolate flavor without added sweetness. It’s the key to that rich, deep cocoa taste reminiscent of a cozy mug of hot chocolate.
- Baking soda
Acts as a leavening agent, ensuring a gentle rise that yields a soft, slightly puffy texture.
- Salt
Balances sweetness and enhances the chocolate profile. It prevents the dough from tasting flat.
- Semi-sweet chocolate chips
Provide bursts of melty chocolate throughout. Their slightly bittersweet edge cuts through the sugar for perfect harmony.
- Mini marshmallows
Create gooey pockets that ooze as the cookies bake, mimicking that classic hot cocoa marshmallow experience.
- Powdered sugar
The final snowy dusting that adds a festive look and a hint of extra sweetness on the surface.
HOW TO MAKE MARSHMALLOW HOT COCOA SURPRISE COOKIES
Ready to turn these ingredients into cookie magic? Follow the step-by-step guide below to achieve soft-centered cookies with molten marshmallow surprises in every bite. Remember to work with room-temperature butter and fresh marshmallows for the best results.
1. Preheat your oven to 350°F (175°C). Line two large baking sheets with parchment paper to prevent sticking and promote even browning.
2. In a large mixing bowl, cream together the softened butter, granulated sugar, and brown sugar using an electric mixer on medium speed until the mixture is light and fluffy, about 3–4 minutes. Scrape down the sides of the bowl as needed to ensure everything is well combined.
3. Add the eggs one at a time, mixing on low speed after each addition until fully incorporated. This gradual approach prevents the dough from curdling. Stir in the vanilla extract until the mixture turns smooth and fragrant.
4. In a separate bowl, whisk together the all-purpose flour, unsweetened cocoa powder, baking soda, and salt. This step ensures even distribution of dry ingredients and avoids any lumps of cocoa.
5. Gradually add the dry flour mixture to the wet ingredients, mixing on low speed until just combined. Take care not to overmix, as this can make the cookies tough rather than tender.
6. Gently fold in the semi-sweet chocolate chips and mini marshmallows using a spatula, ensuring they are evenly distributed throughout the dough without smashing the marshmallows completely.
7. Use a cookie scoop or spoon to drop rounded tablespoons of dough onto the prepared baking sheets, spacing them about 2 inches apart to allow for spreading.
8. Bake in the preheated oven for 10–12 minutes, or until the cookies are set but still soft in the center. You may notice the marshmallows oozing slightly—that’s part of the fun!
9. Remove the cookies from the oven and let them cool on the baking sheets for 5 minutes. This resting time helps them firm up without losing their soft centers.
10. Transfer the cookies to a wire rack to cool completely. Once cooled, dust with powdered sugar to achieve a snowy, festive finish that highlights each marshmallow surprise.
SERVING SUGGESTIONS FOR MARSHMALLOW HOT COCOA SURPRISE COOKIES
These cookies are already a show-stopper on their own, but with a few creative serving ideas, you can elevate them into a dessert experience that dazzles friends and family. Whether you’re hosting a holiday party, a cozy movie night, or just craving an indulgent treat, these suggestions will inspire you to serve these cookies in memorable ways.
- Hot cocoa companion
Arrange the cookies on a platter beside steaming mugs of homemade hot chocolate. Encourage guests to alternate sips of cocoa with bites of cookie. The warmth of the drink will meld beautifully with the gooey marshmallow centers, creating a harmonious flavor pairing.
- Decadent ice cream sandwiches
Gently split cooled cookies in half and sandwich a scoop of vanilla or chocolate ice cream between them. Roll the edges in extra mini marshmallows, chocolate chips, or crushed candy cane for a playful texture contrast that keeps things festive during any season.
- Festive dessert tray
For holiday gatherings, switch to peppermint-flavored marshmallows or drizzle the cooled cookies with melted white chocolate tinted red and green. Arrange on a decorative plate with candy canes and sugared cranberries to create an eye-catching dessert centerpiece.
- Edible gift jars
Layer cookies in a clear mason jar with ribbon and a handwritten tag. Add a small packet of powdered sugar on top. Recipients can dust their own cookies just before serving, making this a thoughtful and interactive gift that keeps the cookies looking fresh.
HOW TO STORE MARSHMALLOW HOT COCOA SURPRISE COOKIES
Once you’ve baked a batch of these irresistible cookies, you’ll want to keep them fresh and soft so you can enjoy that gooey marshmallow magic days later. Proper storage techniques will preserve both texture and flavor, ensuring each cookie tastes like it just came out of the oven.
Storing at room temperature is ideal if you plan to eat your cookies within a few days. Place them in an airtight container with layers separated by parchment paper to prevent sticking. Keep the container in a cool, dry spot away from direct sunlight or heat sources.
- Refrigeration
If you need to extend their shelf life to about a week, you can store the cookies in the fridge. Use an airtight container and allow cookies to return to room temperature for 15–30 minutes before serving so the centers soften up again.
- Freezing baked cookies
To freeze completed cookies, first let them cool completely. Arrange them in a single layer on a baking sheet in the freezer. Once firm, transfer them to a freezer-safe bag or container, separating layers with parchment paper. Thaw at room temperature for 30–45 minutes before enjoying.
- Freezing cookie dough
For ultimate convenience, scoop the dough onto a parchment-lined tray and flash-freeze until solid. Transfer dough balls to a sealed bag and store in the freezer for up to three months. When you’re ready, bake directly from frozen—add an extra 2–3 minutes to the bake time.
CONCLUSION
Baking Marshmallow Hot Cocoa Surprise Cookies is more than just following a recipe—it’s an invitation to create warmth, joy, and delightful memories in your own kitchen. From the moment you mix together the butter, sugars, and cocoa powder, you’ll feel the anticipation build as the sweet aroma of baking cookies fills the air. Those little pockets of melted chocolate chips and oozing marshmallows bring instant smiles, and the dusting of snowy powdered sugar turns each treat into a sparkly indulgence that’s as much fun to look at as it is to devour. Whether you’re a home cook seeking a new challenge at the intermediate difficulty level or you simply want a cozy dessert to share with loved ones, this recipe delivers. With preparation and baking times totaling under an hour, you’ll have 24 soft, chewy, surprise-filled cookies ready to brighten any day. Feel free to save or print this article so you can revisit the recipe whenever you need a sweet pick-me-up.
Don’t forget that there’s a FAQ section below to answer any last-minute questions about ingredients, baking techniques, or storage tips—so scroll down if you’re curious or need clarification. And if you give these cookies a whirl, I’d love to hear how they turned out for you: What marshmallow variations did you try? Did you add any special drizzles or toppings? Your comments, questions, and feedback are always welcome, whether you’re celebrating a holiday season or simply indulging in a quiet moment at home. Happy baking!
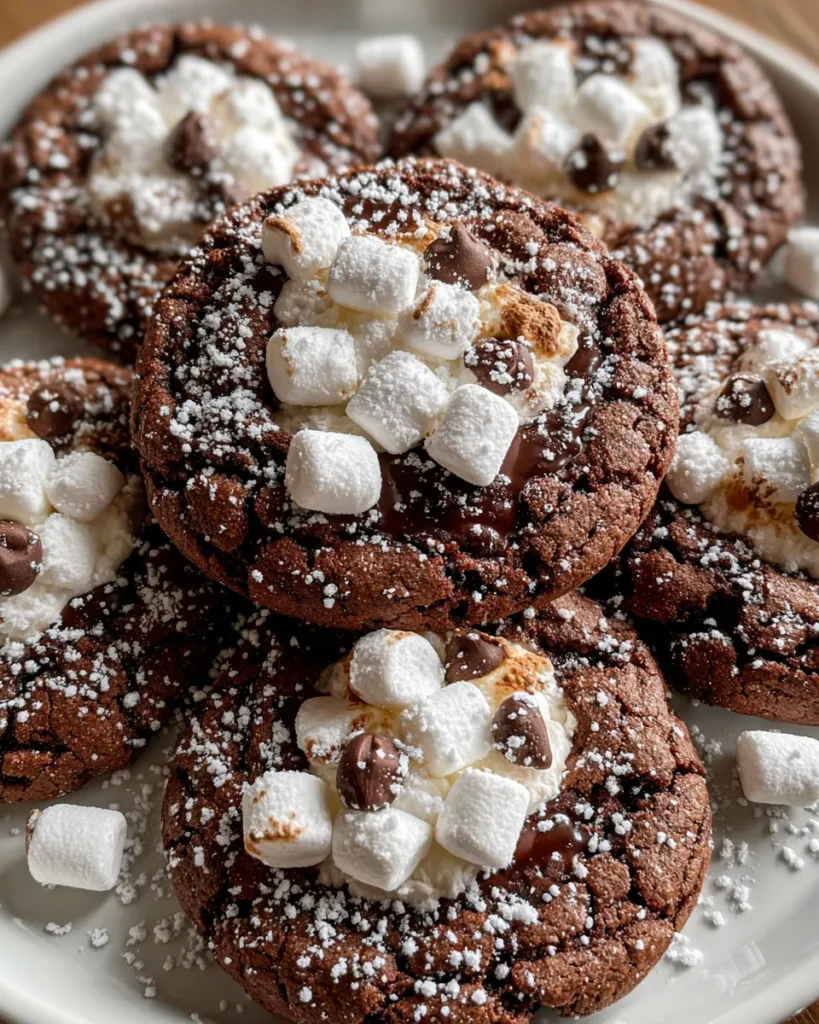

Marshmallow Hot Cocoa Surprise Cookies
Description
These cookies blend rich chocolate and gooey marshmallows for a cozy treat, reminiscent of warm cocoa. Perfectly soft, each bite is a delicious surprise!
Ingredients
Instructions
-
Preheat your oven to 350°F (175°C). Line baking sheets with parchment paper.
-
In a large mixing bowl, cream together the softened butter, granulated sugar, and brown sugar until light and fluffy.
-
Add the eggs one at a time, mixing well after each addition. Stir in the vanilla extract until fully combined.
-
In a separate bowl, whisk together the all-purpose flour, cocoa powder, baking soda, and salt.
-
Gradually add the flour mixture to the wet ingredients, mixing until just combined. Be careful not to overmix.
-
Fold in the semi-sweet chocolate chips and mini marshmallows until they are evenly distributed throughout the dough.
-
Use a cookie scoop or spoon to drop rounded tablespoons of dough onto the prepared baking sheets, spacing them about 2 inches apart.
-
Bake in the preheated oven for 10-12 minutes, or until the cookies are set but still soft. The marshmallows might ooze slightly, which is normal.
-
Remove from the oven and let the cookies cool on the baking sheets for 5 minutes before transferring them to a wire rack to cool completely.
-
Once the cookies are cooled, dust them with powdered sugar to create a snowy finish.
Note
- For an extra indulgent treat, drizzle melted chocolate over the cooled cookies before serving.
- You can substitute the mini marshmallows for peppermint marshmallows for a festive twist during the holidays.
- Store the cookies in an airtight container for up to one week to maintain freshness.
- Experiment with different types of chocolate chips, such as white chocolate or milk chocolate, for varied flavors.

