

Red velvet brownies have a way of turning a simple dessert tray into a show-stopping centerpiece thanks to their vibrant hue, fudgy crumb, and creamy swirls of white chocolate. This isn’t just any chocolate treat: by blending a hint of cocoa with a splash of apple cider vinegar and a dose of red food coloring, you achieve that trademark deep red color and a subtle tang that cuts through the sweetness. Whether you’re a seasoned baker with shelves full of gadgets or a home cook craving a fun weekend project, these brownies come together in about 15 minutes of prep time and 30–35 minutes of baking. After a brief 10–15 minute rest period, you’ll have twenty-four perfectly portioned squares, each clocking in around 350 calories. As an intermediate-level dessert, it’s a great way to level up your baking skills while still keeping things approachable. Topped with white chocolate chips that melt into pockets of sweet contrast, these brownies manage to balance richness and fluffiness in every mouthwatering forkful. I first tested this recipe at a summer potluck last year and watched them vanish within minutes—proof that the crowd can’t resist that signature crimson crumb coupled with chocolatey elegance. Plus, it’s dessert that doubles as a conversation starter: people will ask how you achieved that perfect scarlet color and plan to swipe the recipe right out of your hands. From casual weeknight treats to festive holiday gatherings, these red velvet brownies bring an extra dash of wow to any occasion.
I love how red velvet brownies combine two beloved dessert worlds into one: the tender crumb of classic red velvet cake meets the dense, fudgy character of a brownie bar. Working in my small kitchen, I’ve experimented with different mixing techniques to find that sweet spot—beating the eggs just enough for a light, airy lift without losing that signature chew. The sweet dance between granulated sugar and packed brown sugar keeps each square gloriously moist, while a whisper of vanilla extract adds warmth. Baking enthusiasts will appreciate the role of apple cider vinegar: it reacts with the cocoa powder to enhance the reddish tint and deepen the cocoa’s flavor profile. And don’t even get me started on those white chocolate chips; they’re like little gems that burst with creamy sweetness. If you’ve been searching for a dessert that’s equal parts eye-catching and utterly irresistible, look no further. This intermediate-level recipe is your new best friend in the baking world!
KEY INGREDIENTS IN RED VELVET BROWNIES
Before you dive into the kitchen, let’s break down the star players in this sensational dessert. Each ingredient contributes to that moist texture, vibrant color, and rich flavor that make these brownies a standout.
- Unsalted butter: Provides a silky, rich base that melts into the sugars for a smooth batter and adds a luscious mouthfeel.
- Granulated sugar: Balances sweetness with a subtle crunch when creamed, helping build structure and tender crumb.
- Brown sugar: Brings moisture and depth of flavor thanks to its molasses content, intensifying the fudgy texture.
- Eggs: Act as a binding agent and leavening helper, giving the batter lift and a slightly airy, yet dense consistency.
- Vanilla extract: Enhances the overall flavor profile with warm, aromatic notes that meld beautifully with cocoa.
- Red food coloring: Delivers that signature red velvet shade, turning ordinary cocoa into a vibrant pop of color.
- Apple cider vinegar: Reacts with baking powder and cocoa to boost the reddish tint and add a faint tang, balancing the sweetness.
- All-purpose flour: Provides structure and support, ensuring the brownies hold their shape without becoming cakey.
- Unsweetened cocoa powder: Infuses chocolate flavor and contributes to the richness, while remaining subtle enough to let the red hue shine.
- Baking powder: Offers gentle lift so the brownies are fudgy yet tender, rather than flat and dense.
- Salt: Enhances all the flavors, cutting through sweetness and rounding out the taste profile.
- White chocolate chips: Add creamy pockets of sweetness and contrast, melting into gooey delights with every warm bite.

HOW TO MAKE RED VELVET BROWNIES
Let’s roll up our sleeves and transform those vibrant ingredients into a tray of sumptuous brownies. Follow these detailed steps to ensure your batch comes out perfectly moist, beautifully colored, and utterly irresistible.
1. Preheat your oven to 350°F (175°C). Line a 9×13-inch baking pan with parchment paper or lightly grease it with butter to ensure easy removal and a neat presentation.
2. In a medium saucepan over low heat, melt the butter, stirring gently until it becomes completely liquid. Once fully melted, remove from heat and allow it to cool for a few minutes so it doesn’t cook the eggs when added.
3. In a large mixing bowl, combine the granulated sugar, brown sugar, cooled melted butter, and vanilla extract. Stir vigorously until the mixture is smooth, glossy, and fully incorporated.
4. Add the eggs one at a time, beating well after each addition. Continue until the batter is light, fluffy, and slightly thickened—this helps incorporate air for a tender crumb.
5. Stir in the red food coloring and apple cider vinegar, ensuring the vibrant hue is evenly distributed throughout the batter. The vinegar will react with the cocoa to deepen the red tone.
6. In a separate bowl, sift together the all-purpose flour, unsweetened cocoa powder, baking powder, and salt. Sifting prevents clumps and promotes an even mix.
7. Gradually add the dry ingredients into the wet mixture, folding gently until just combined. Be careful not to overmix—you want a batter that’s cohesive but still tender.
8. Fold in the white chocolate chips until they’re evenly dispersed, creating little pockets of creamy sweetness.
9. Pour the batter into the prepared pan, using a spatula to spread it evenly from edge to edge for uniform thickness.
10. Bake in the preheated oven for 30–35 minutes, or until a toothpick inserted into the center comes out with a few moist crumbs clinging to it—this ensures fudgy brownies rather than dry cake.
11. Allow the brownies to cool in the pan on a wire rack for at least 10–15 minutes before lifting them out and cutting into 24 squares. Cooling improves texture and makes slicing cleaner.
SERVING SUGGESTIONS FOR RED VELVET BROWNIES
After pouring your heart into baking these decadent treats, it’s time to think about presentation and flavor pairings that will delight every palate. Whether you’re hosting a casual get-together or craving a solo indulgence, how you serve these red velvet brownies can elevate the experience. A scoop of ice cream, a sprinkling of fresh berries, or even a simple dusting of powdered sugar can turn each bite into a moment of pure bliss. These suggestions will help you showcase your baking prowess and ensure your brownies become the star of any table.
- Cream Cheese Frosting Drizzle
Whip up a tangy cream cheese frosting and drizzle it over cooled brownies. The smooth, slightly tart frosting pairs perfectly with the sweet, cocoa-rich base. For a finished look, use a piping bag to create decorative swirls.
- Warm with Vanilla Ice Cream
Serve a warm brownie square alongside a scoop of vanilla bean ice cream. The contrast of hot and cold, fudgy and creamy, creates an irresistible dessert mashup that guests will rave about. Plate on a chilled dish to keep the ice cream from melting too fast.
- Layered Dessert Cups
Cut brownies into small cubes and layer them in individual cups with whipped cream, fresh raspberries, and a dusting of cocoa powder. These parfait-style servings are perfect for brunches or buffet tables, offering a refined look with minimal effort.
- Festive Garnishes
Top each brownie with a sprinkle of edible glitter, crushed freeze-dried strawberries, or colored sprinkles to match any holiday theme. Not only does this add visual appeal, but it also introduces fun textures that delight both kids and adults.
HOW TO STORE RED VELVET BROWNIES
Every batch of brownies tastes best when it’s fresh and moist, so proper storage is key to preserving that luscious texture and vibrant color. Whether you need to keep them on the counter for a couple of days or stash extras in the freezer for future cravings, these methods will help maintain flavor and crumb structure. Pay attention to humidity and temperature, as brownies can become soggy or dry out if not stored correctly. With the right technique, you’ll enjoy bakery-style goodness long after your initial baking session.
- Room-Temperature Airtight Container
Place cooled brownie squares in a single layer or with parchment between layers inside an airtight container. Store at room temperature for up to 3 days. This method preserves the fudgy texture and keeps them soft.
- Refrigeration
For longer storage of up to a week, wrap brownies individually in plastic wrap, then place them in a sealed container in the refrigerator. Bring to room temperature or warm gently before serving to revive that freshly baked feel.
- Freezing
Freeze brownies for up to 3 months by first wrapping each square tightly in plastic wrap and then in aluminum foil to prevent freezer burn. Transfer to a zip-top bag and label with the date. Thaw overnight in the refrigerator or at room temperature.
- Portable Snack Packs
If you’re on the go, wrap individual brownies in parchment paper and tuck them into a lunchbox or reusable snack bag. They’ll stay fresh for up to two days without risking condensation or staleness.
CONCLUSION
We’ve taken a deep dive into every aspect of crafting these irresistibly rich and decadent red velvet brownies: from the star ingredients that contribute to their moist texture and vibrant color, to the step-by-step process that ensures a perfect bake every time. You’ve discovered how unsalted butter, dual sugars, and cocoa powder come together, enhanced by vanilla and apple cider vinegar, and crowned with luscious white chocolate chips. The instructions demystify each stage—preheating the oven to 350°F, melting butter, beating in eggs, sifting dry ingredients, and folding in those dreamy chocolate morsels—so you can bake with confidence. You’ve also explored creative serving suggestions, whether drizzling cream cheese frosting or plating alongside vanilla ice cream. Storage techniques guarantee you won’t lose that freshly baked quality, whether kept at room temperature, refrigerated, or frozen for future indulgence. Feel free to print and save this article for quick reference in your favorite recipe binder, and rest assured you’ll find a handy FAQ below to address any lingering questions about substitutions, troubleshooting, or ingredient swaps.
If you give these red velvet brownies a try, I’d love to hear how they turned out! Leave a comment with your baking experience, swap in your own twists, or share photos of your final masterpiece. Got questions on tips and tricks? Need clarification on a specific step? Drop your inquiries below—I’m here to help you bake, troubleshoot, and celebrate every gorgeous, ruby-red bite. Happy baking!
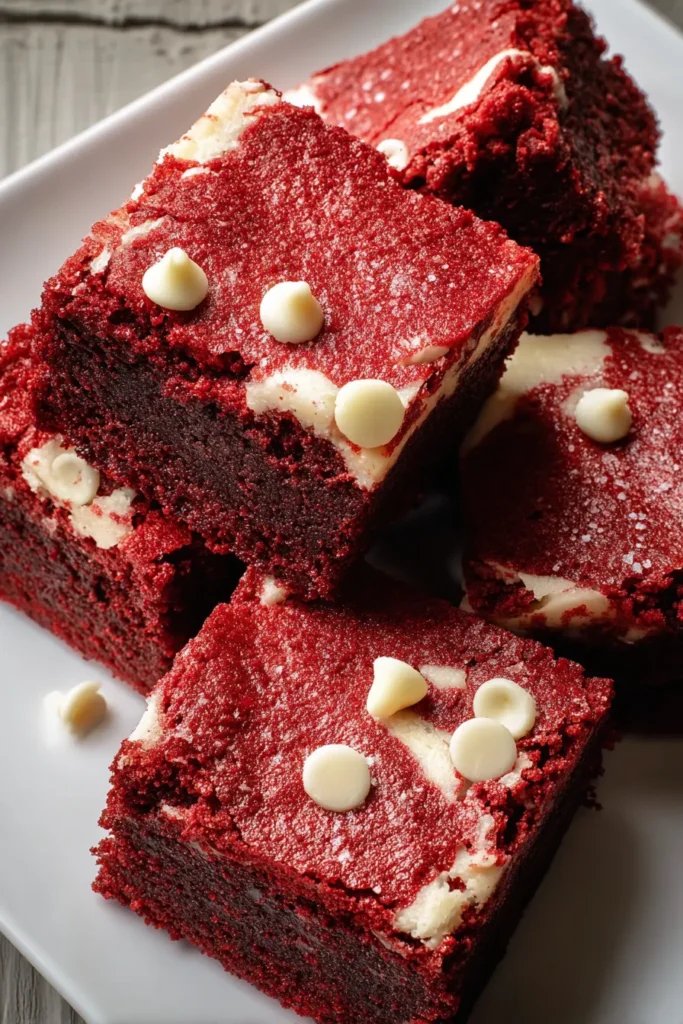

Red Velvet Brownies
Description
Experience the vibrant colors and rich flavor of these red velvet brownies, crowned with creamy white chocolate chips. Perfectly moist and oh-so-delicious!
Ingredients
Instructions
-
Preheat your oven to 350°F (175°C). Grease a 9x13-inch baking pan lightly with butter or line it with parchment paper for easy removal.
-
In a medium saucepan, melt the butter over low heat until completely liquid. Remove from heat and let it cool for a few minutes.
-
In a large mixing bowl, combine the granulated sugar, brown sugar, melted butter, and vanilla extract. Stir until the mixture is smooth and fully incorporated.
-
Add the eggs one at a time, beating well after each addition until the mixture is light and fluffy.
-
Stir in the red food coloring and apple cider vinegar, mixing until the color is evenly distributed.
-
In a separate bowl, sift together the flour, cocoa powder, baking powder, and salt.
-
Gradually add the dry ingredients into the wet mixture, stirring gently until just combined. Do not overmix.
-
Fold in the white chocolate chips until they're evenly distributed throughout the batter.
-
Pour the batter into the prepared baking pan, spreading it evenly with a spatula.
-
Bake in the preheated oven for 30-35 minutes, or until a toothpick inserted into the center comes out with a few moist crumbs.
-
Allow the brownies to cool in the pan on a wire rack before cutting them into squares.
Note
- Red velvet is traditionally known for its moist texture and vibrant color.
- You can add a cream cheese frosting on top for extra flavor reminiscent of a classic red velvet cake.
- If you cannot find red food coloring, beetroot powder can be a natural alternative.
- Be sure to monitor the baking time closely as overbaking can result in dry brownies.

