

Red Velvet Cake Pops are the ultimate crowd-pleaser when you crave something fun, colorful, and downright delicious. These bite-sized crimson orbs marry moist red velvet cake and tangy cream cheese frosting, then don a crisp white chocolate coat with striking scarlet candy ribbons. Perfect for parties, gifts, or just a sweet afternoon pick-me-up, they’re as joyful to make as they are to eat—let’s dive in and turn your kitchen into a pop paradise!
Key Ingredients
To whip up these delightful Red Velvet Cake Pops, you’ll need a handful of pantry staples and a few specialty items. Each component plays a key role in creating the perfect balance of flavor, texture, and that iconic ruby hue:
- 240 g all purpose flour: Provides the delicate structure for a tender crumb.
- 30 g unsweetened cocoa powder: Adds the subtle chocolate undertone classic to red velvet.
- 1 tsp baking powder: Gives your cake lift and lightness.
- 1/2 tsp baking soda: Helps with rise and keeps the crumb soft.
- 1/2 tsp salt: Enhances all the sweet and tangy flavors.
- 200 g granulated sugar: Sweetens the batter and contributes to a fine crumb.
- 115 g unsalted butter, softened: Brings moisture and richness.
- 2 large eggs: Bind ingredients and add structure.
- 1 tsp vanilla extract: Deepens the overall flavor profile.
- 240 ml buttermilk: Introduces tang and tenderizes the cake.
- 2 tbsp red food coloring: Delivers that signature vibrant red.
- 400 g cream cheese frosting: Combines with crumbs to form a moldable “dough.”
- 300 g white chocolate coating: Creates a glossy, crisp outer shell.
- 50 g red candy melts: Offers bold decorative contrast.
- 20 piece lollipop sticks: Turn rounds into handheld delights.
How To Make Red Velvet Cake Pops
Baking cake pops is a multi-step adventure that transforms simple ingredients into playful treats. You’ll start by preparing a classic red velvet cake, then crumble and bind it with cream cheese frosting. Chilling is crucial for shape and stability, before dipping in smooth white chocolate and finishing with vibrant red candy drizzles. Ready to roll? Here’s the full breakdown:
1. Preheat the oven to 175°C and line a 23 cm round cake pan with parchment paper, pressing it flat so the cake releases cleanly.
2. In a large bowl, whisk together 240 g all purpose flour, 30 g unsweetened cocoa powder, 1 tsp baking powder, 1/2 tsp baking soda, and 1/2 tsp salt until evenly combined.
3. In a separate bowl, cream 200 g granulated sugar and 115 g unsalted butter until light and fluffy, scraping down the sides as needed.
4. Beat in the 2 large eggs one at a time, then stir in 1 tsp vanilla extract and 2 tbsp red food coloring until the batter is uniformly colored.
5. Alternately add the dry ingredients and 240 ml buttermilk to the butter mixture, beginning and ending with the dry ingredients, mixing just until combined to avoid overworking the batter.
6. Pour the batter into the prepared pan and bake for 25 to 30 minutes, or until a toothpick inserted in the center comes out clean.
7. Allow the cake to cool completely on a wire rack, then crumble it into fine crumbs in a large bowl, ensuring no large chunks remain.
8. Fold in 400 g cream cheese frosting until the crumbs hold together like a firm dough, making sure all bits are evenly coated.
9. Roll the mixture into 20 equal balls, place them on a baking sheet lined with parchment paper, and chill in the refrigerator for 30 minutes to firm up.
10. Melt the 300 g white chocolate coating in a heatproof bowl over simmering water, stirring until smooth and lump-free.
11. Dip the tip of each lollipop stick into the melted white chocolate, then insert it halfway into each chilled cake ball and return to the refrigerator for 10 minutes so the stick adheres securely.
12. Dip each cake pop into the melted white chocolate coating, gently tap off excess, then drizzle or dip in 50 g red candy melts for decoration. Place on parchment paper and chill until fully set.
Serving Suggestions
Show off your Red Velvet Cake Pops in style and let their vibrant colors shine. Whether you’re hosting a party or enjoying a cozy treat at home, these suggestions will take your presentation to the next level:
- On a decorative platter: Arrange pops upright in a shallow vase or on a tiered cake stand for an eye-catching centerpiece.
- Paired with cold milk: Serve alongside a glass of chilled milk to balance the sweetness and highlight the cream cheese tang.
- Garnished with edible glitter: Lightly dust the white chocolate shell with fine edible glitter for an extra festive sparkle.
- Packaged as party favors: Tie each stick with a colorful ribbon and gift in clear treat bags for a memorable take-home delight.
Tips For Perfect Red Velvet Cake Pops
Baking these cake pops is half the fun, and mastering a few simple tips will ensure they turn out flawlessly every time. Think of this section as your friendly kitchen pep talk—no judgment here, only sweet success ahead!
- Use at least 48% cocoa butter white chocolate for a smooth coating
- Ensure the cake is fully cooled to prevent melting the frosting during mixing
- Chill the cake balls well before dipping to help them retain shape
- Store finished cake pops in an airtight container in the refrigerator for up to 3 days
How To Store It
Keeping your Red Velvet Cake Pops fresh and tasty is easy when you follow a few smart storage tips. Whether you’re prepping ahead or saving leftovers, here’s how to maintain that perfect snap and tender crumb:
- Refrigerate in an airtight container: Stand them upright in a single layer to avoid sticking and preserve the crisp coating.
- Freeze undecorated cake balls: Spread on a baking sheet, freeze solid, then transfer to freezer bags for up to 1 month.
- Thaw and finish decorating: Move frozen balls to the fridge overnight before dipping so they thaw evenly.
- Serve at room temperature: Remove from the fridge 15 minutes before serving to bring out the best flavor and texture.
Frequently Asked Questions
Got questions? Let’s clear up any cake-pop confusion so you can bake with confidence:
- How long does it take to prepare and finish these Red Velvet Cake Pops?
From start to finish, plan on about 1 hour 15 minutes active time plus chilling and baking. Mixing and baking the cake takes about 40 minutes (10 minutes prep, 25–30 minutes bake), cooling fully takes 30 minutes, rolling and chilling the cake balls another 40 minutes (30-minute initial chill, 10-minute stick set), and dipping/decorating about 20–30 minutes.
- Can I substitute ingredients if I don’t have buttermilk or cream cheese frosting?
Yes. For buttermilk, use 240 ml whole milk mixed with 1½ tablespoons vinegar or lemon juice, let it sit 5 minutes. For cream cheese frosting, you can use 400 g of a sturdy buttercream, though the tang and moisture balance will differ slightly; ensure the mixture holds together like dough before rolling.
- How do I achieve a smooth, crack-free chocolate coating on my cake pops?
Use high-quality white chocolate with at least 48% cocoa butter, chop it finely, and melt it gently over simmering water, stirring constantly. Keep the coating at around 30–32°C (86–90°F) to prevent it from being too thick or too thin. Tap off excess coating after dipping and let each pop set upright on parchment to avoid pooling and cracking.
- Why is it important to chill the cake balls before dipping?
Chilling firms the cake-ball-frosting mixture, preventing it from crumbling or melting into the coating. The first 30-minute chill ensures shape retention when inserting sticks; the additional 10-minute chill after stick insertion solidifies the bond so the cake pop won’t slide off when dipped.
- How can I prevent cake pops from falling off the sticks during dipping?
Dip just the tip of each stick into melted chocolate before inserting it halfway into the chilled ball—this acts as glue. Return them to chill for 10 minutes so the chocolate sets around the stick. Also, dip straight down and hold the pop at a slight angle to let excess coating drip off evenly, reducing weight stress on the stick.
- What is the best way to store cake pops and how long will they stay fresh?
Store fully set cake pops upright in an airtight container in the refrigerator for up to 3 days. To maintain the best texture, bring them to room temperature for 15 minutes before serving. For longer storage, you can freeze undecorated cake balls for up to 1 month, then thaw and complete the dipping step when ready.
- Can I adjust the red color intensity without affecting the texture?
Yes. Use gel or paste food coloring for vibrant color without thinning the batter. The recipe calls for 2 tablespoons red coloring; you can reduce to 1 tablespoon for a milder hue or increase to 3 tablespoons for a deeper red, just ensure the batter remains smooth and evenly colored before baking.
What Makes This Special
What sets these Red Velvet Cake Pops apart is their playful burst of color, the harmony of tangy cream cheese with tender red velvet crumbs, and that satisfying snap of white chocolate—all in a perfectly handheld bite. They’re more than a dessert; they’re a conversation starter at any gathering. Feel free to print this guide and keep it for next time you need a party showstopper. If you give them a try, drop a comment or question below—I’d love to hear how your crimson creations turned out!
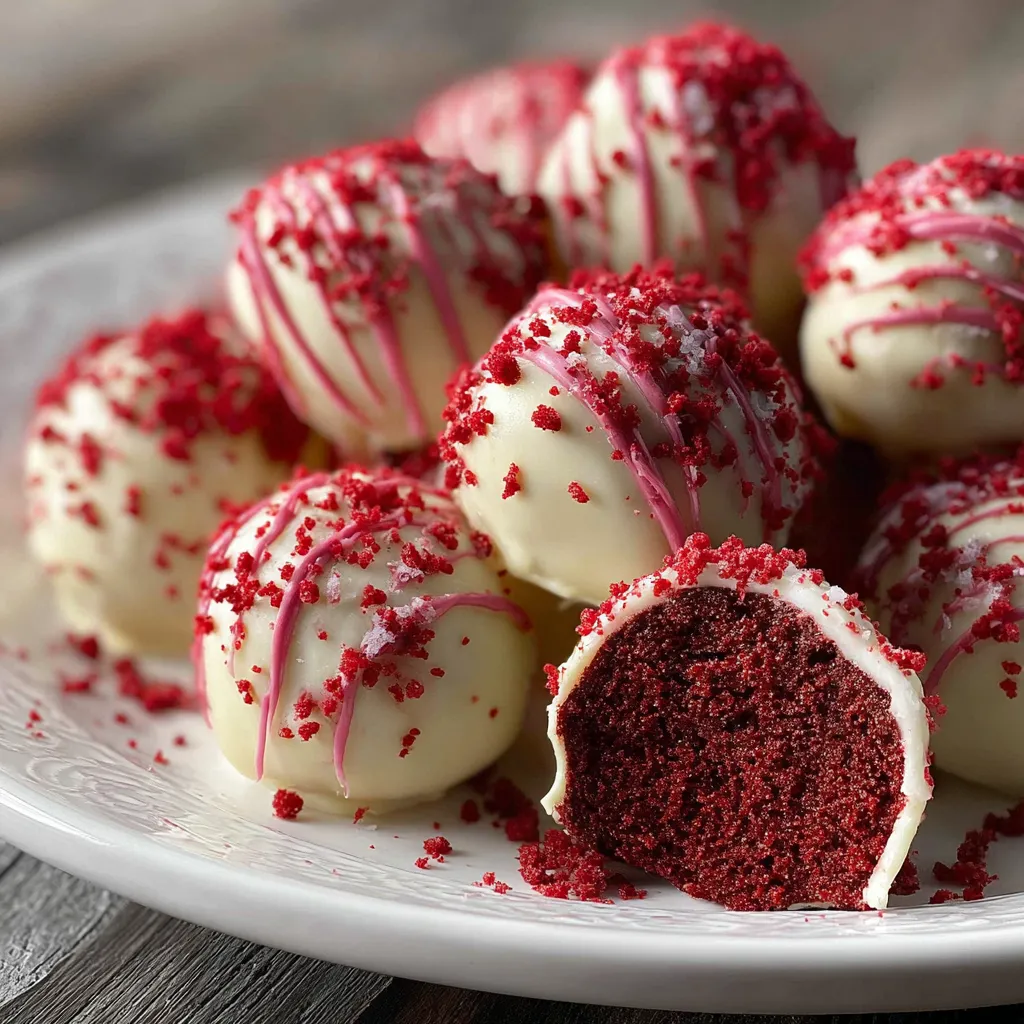

Red Velvet Cake Pops
Description
Moist cake crumbs blend with silky cream cheese frosting to form perfect spheres, chilled, then dipped in glossy white chocolate and decorated with scarlet candy drizzles for a playful pop of flavor and color.
Ingredients
Instructions
-
Preheat the oven to 175°C and line a 23 cm round cake pan with parchment paper.
-
In a bowl whisk together all purpose flour, unsweetened cocoa powder, baking powder, baking soda, and salt.
-
In a separate bowl cream granulated sugar and softened butter until light and fluffy.
-
Beat in eggs one at a time, then stir in vanilla extract and red food coloring until evenly combined.
-
Alternately add the dry ingredients and buttermilk to the butter mixture, beginning and ending with the dry ingredients.
-
Pour batter into the prepared pan and bake for 25 to 30 minutes or until a toothpick inserted in the center comes out clean.
-
Allow the cake to cool completely on a wire rack, then crumble it into fine crumbs in a large bowl.
-
Fold in cream cheese frosting until the crumbs hold together in a dough-like consistency.
-
Roll the mixture into 20 equal balls, place them on a baking sheet, and chill in the refrigerator for 30 minutes.
-
Melt the white chocolate coating in a heatproof bowl over simmering water, stirring until smooth.
-
Dip the tip of each lollipop stick into the melted white chocolate, insert it halfway into each chilled cake ball, and return to the refrigerator for 10 minutes.
-
Dip each cake pop into the melted white chocolate coating, gently tap off excess, then drizzle or dip in melted red candy melts to decorate. Place on parchment paper and chill until set.
Note
- Use at least 48% cocoa butter white chocolate for a smooth coating
- Ensure the cake is fully cooled to prevent melting the frosting during mixing
- Chill the cake balls well before dipping to help them retain shape
- Store finished cake pops in an airtight container in the refrigerator for up to 3 days

