

Crunchy, vibrant, and bursting with tangy flair, refrigerator pickled radishes are nothing short of a flavor explosion in the realm of quick pickles. These slender ruby-hued slices transform an everyday root vegetable into a zesty garnish that jazzes up everything from simple salads to gourmet sandwiches. With a crisp bite and lively acidity, each radish slice delivers a refreshing pop that keeps you coming back for more. Whether you’re elevating a sandwich with a dazzling color contrast or adding a spark to a green salad, these pickled radishes become your secret weapon for layering texture and brightness. There’s an addictive quality to their snappy crunch that brightens even the simplest of meals.
What makes this recipe so special is its incredible ease and speed. In just 15 minutes of hands-on preparation and a brief 5-minute simmer on the stove, you’ll have a homemade tangy treat ready to rest for 24 hours in the fridge, soaking up flavors and developing complexity. No need for elaborate canning equipment—this is a classic refrigerator pickle method perfect for beginners and seasoned home cooks alike. With basic pantry staples like white vinegar, sugar, salt, mustard seeds, peppercorns, and garlic, you’ll coax out a balanced blend of sweet, salty, and spicy notes that complement the radishes’ natural peppery bite. By the next day, you’ll uncover the vivid magenta hues deepening in color and flavor, transforming these crisp rounds into a zesty condiment. This is the kind of quick and easy recipe you’ll want to keep on rotation for adding a burst of brightness to appetizers, lunches, and snacks.
KEY INGREDIENTS IN REFRIGERATOR PICKLED RADISHES
Every ingredient in this recipe plays a starring role in building that signature tangy, slightly sweet pickle brine. From the foundation of crisp radishes to the aromatic spices, each component contributes depth and brightness. Let’s break down what you’ll need:
- Fresh radishes
These vibrant root vegetables provide essential crunch and natural peppery flavor. Thin slicing ensures each piece absorbs the brine uniformly, creating consistent bursts of tang in every bite.
- White vinegar
The heart of the pickling solution, vinegar brings acidity that both preserves the radishes and delivers that characteristic tang. Its clean profile allows other spices to shine without overpowering the delicate radish flavor.
- Water
Used to dilute the vinegar, water creates a balanced brine concentration. It helps prevent the pickles from becoming overly sharp, allowing a harmonious blend of sweet, salty, and sour.
- Sugar
A touch of sweetness counters the acidity and salt, creating a well-rounded flavor profile. Sugar also aids in the pickling process by helping to break down the radishes just enough for better brine absorption.
- Salt
Essential for seasoning and preservation, salt draws moisture from the radishes and intensifies their natural flavor. It enhances all the other spices while ensuring crispness.
- Mustard seeds
These tiny seeds deliver warm, nutty undertones and a subtle heat that complements the peppery radishes. They add a hint of texture and visual appeal in the brine.
- Black peppercorns
Whole peppercorns bring an extra layer of spicy complexity. As they infuse, they impart gradual heat and aromatic depth.
- Garlic cloves
Smashed garlic introduces pungency and savory warmth, infusing the brine with a rich, garlicky undertone that balances the sharpness of vinegar.
- Red pepper flakes (optional)
For those who love a bit of kick, a pinch of red pepper flakes amps up the heat. Adjust to your taste to personalize the spice level.
- Fresh dill sprigs (optional)
Adding dill at the end brings a bright herbal note. The feathery fronds lighten the brine and lend a hint of freshness that complements the intensity of pickling spices.

HOW TO MAKE REFRIGERATOR PICKLED RADISHES
Crafting these vibrant pickles is a breeze, with clear steps that guide you from prep to fridge in under 20 minutes. Gather your tools, line up your ingredients, and get ready to enjoy a tangy crunch in no time.
1. Begin by thoroughly washing the radishes under cold running water to remove any residual dirt or grit. Using a sharp knife or mandoline, slice them into even, paper-thin rounds. Consistency is key here for uniform pickling and that perfect crisp texture.
2. In a small saucepan, combine white vinegar, water, sugar, and salt. Place the pan over medium heat and stir occasionally as the mixture warms. Bring it to a gentle boil, ensuring the sugar and salt fully dissolve into the liquid.
3. Once the brine reaches a boil, remove the saucepan from heat. Immediately stir in mustard seeds, black peppercorns, smashed garlic cloves, and red pepper flakes if you’re craving a bit of extra spice. This step lets the spices infuse without overcooking the garlic.
4. Carefully transfer the sliced radishes into a clean glass jar, layering them evenly. Tuck in fresh dill sprigs between the layers if you prefer a dill-infused aroma. A well-packed jar ensures every slice gets covered by the brine.
5. Pour the hot vinegar mixture directly over the radishes, making sure each slice is fully submerged. Give the jar a gentle shake or tap on the counter to remove air bubbles. Then let it sit at room temperature until the liquid cools completely.
6. Seal the jar with a tight-fitting lid and place it in the refrigerator for at least 24 hours. This resting period allows the radishes to absorb all the zesty, aromatic flavors. Longer storage deepens the taste, so feel free to wait up to a week for maximum tang.
7. Once the wait is over, dive in! Enjoy your pickled radishes as a tangy addition to salads, sandwiches, tacos, or simply as a vibrant, standalone snack.
SERVING SUGGESTIONS FOR REFRIGERATOR PICKLED RADISHES
Whether you’re hosting a laid-back brunch or spicing up a weekday lunch, these pickled radishes are the ultimate multitaskers. Their vivid color and zesty bite effortlessly brighten any dish and add a refreshing counterpoint to rich flavors. With their lively taste and satisfying crunch, they’re equally at home topping grain bowls or nestled alongside creamy cheeses on a snack board. As you plate your pickled radishes, think about texture contrasts, color balance, and complementary flavors. The radishes’ tangy profile pairs beautifully with fatty proteins, mild starches, and crisp fresh greens. Below are four fun and flavorful ways to enjoy these tangy gems.
- Salad topper
Scatter a handful of pickled radish slices over a bed of mixed greens, feta cheese, and toasted nuts. The crisp acidity cuts through the creamy cheese and adds depth to your leafy greens.
- Sandwich upgrade
Layer pickled radishes on your favorite sandwich—be it turkey, roast beef, or veggie. They provide a snap of brightness and crunchy texture that elevates every bite.
- Grain bowl garnish
Nestle the radishes on quinoa, rice, or farro bowls alongside roasted veggies, avocado, and a drizzle of tahini. Their tangy punch balances hearty grains and rich dressings.
- Charcuterie board accent
Tuck a small bowl of pickled radishes between cheese wedges, cured meats, and crackers. Their vibrant hue and zesty flavor create an eye-catching, palate-cleansing contrast.
HOW TO STORE REFRIGERATOR PICKLED RADISHES
Proper storage not only maintains the crunch and bright flavor of your pickled radishes but also extends their shelf life so you can enjoy them for days. Once you’ve filled and sealed your jars, refrigeration is key to preserving that signature tang and vivid color. A consistent cold environment stops bacterial growth and maintains the freshness of both the vegetables and the brine. Keep the jar in the main body of the fridge rather than the door, where temperatures can fluctuate with every open and close. Always use a clean utensil when retrieving pickles to avoid introducing contaminants and minimize exposure to air.
- Keep the sealed jar in the coldest part of your refrigerator to ensure the pickles stay crisp and safe. Avoid the door where temperatures vary.
- Use a clean fork or tongs each time you remove radishes. Introducing crumbs or residue can shorten the pickles’ lifespan and affect flavor.
- Store the jar upright with the lid securely tightened. This prevents leaks and ensures the brine fully covers every slice.
- For best quality, enjoy the pickled radishes within 1–2 weeks. Beyond that, they remain safe but may lose some of their initial crunch and vibrancy.
CONCLUSION
Refrigerator pickled radishes are a deceptively simple recipe that packs a vibrant punch. By marrying bright white vinegar, a hint of sugar, and an array of aromatic spices, you transform humble radishes into crunchy, tangy delights that elevate countless dishes. From the first slice to the final jar lid twist, this beginner-friendly method requires minimal effort—just thinly slice, simmer your brine, and let the fridge work its magic for 24 hours. Along the way, you’ll encounter the satisfying process of layering crisp radishes and pouring steaming-hot brine, watching as the living magenta hues intensify by the day. These pickles stay fresh for up to two weeks, so you can sprinkle them onto salads, sandwiches, grain bowls, or charcuterie boards whenever a burst of brightness is called for.
Feel free to print this article and save it for those moments when you crave a quick, crunchy kick in your meals. You can also find a FAQ below to answer any lingering questions about variations, substitutions, and troubleshooting. If you try this recipe or need extra guidance—whether it’s adjusting the spice level, experimenting with different spices like coriander seeds or juniper berries, or ensuring your radishes stay perfectly crisp—please share your comments, questions, or feedback. I’d love to hear how these zesty pickles transform your home-cooked creations!
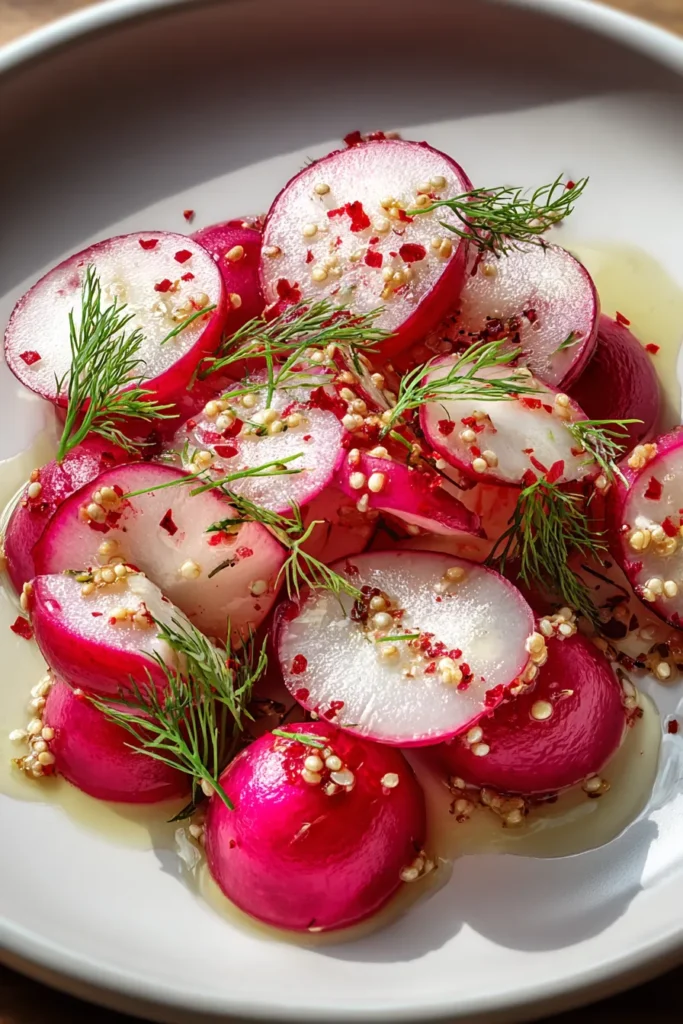

Refrigerator Pickled Radishes
Description
These vibrant, tangy radishes bring a kick to any meal! Their crunchy texture and bold flavors make them an exciting addition to salads and sandwiches.
Ingredients
Instructions
-
Begin by thoroughly washing the radishes under cold water and then thinly slice them using a sharp knife or a mandoline for even slices.
-
In a small saucepan, combine the white vinegar, water, sugar, and salt. Bring the mixture to a boil over medium heat, stirring occasionally until the sugar and salt have completely dissolved.
-
Remove the saucepan from heat. Stir in the mustard seeds, black peppercorns, garlic cloves, and red pepper flakes, if you like a bit of heat.
-
Carefully place the sliced radishes into a clean glass jar, layering them evenly. Add fresh dill sprigs if you like the flavor.
-
Pour the hot vinegar mixture over the radishes in the jar, ensuring that all the slices are fully submerged, and allow it to cool to room temperature.
-
Once cooled, seal the jar with a tight-fitting lid and refrigerate it for at least 24 hours to allow the flavors to meld together. The pickles will develop more flavor the longer they sit.
-
Enjoy your pickled radishes as a tangy addition to salads, sandwiches, or as a standalone snack!
Note
- For a sweeter pickle, increase the amount of sugar to 2 tablespoons.
- These pickles are best consumed within 1-2 weeks for optimal freshness and crunch.
- Try experimenting with different spices like coriander seeds or juniper berries for unique flavor variations.
- Pickling is a traditional method of preserving and can be applied to a variety of vegetables using this basic brine recipe.

