

If you’ve ever wondered how to turn that leftover sourdough discard into something spectacular, this garlic pull apart bread is the perfect solution. There’s something so satisfying about watching everyday ingredients come together and transform into a bubbling, golden loaf that practically begs to be torn apart and shared. The magic starts with that tangy sourdough discard, which adds depth and character, and evolves into fluffy layers of bread infused with melted garlic butter. As you knead the soft, elastic dough you’ll notice how it becomes a little smoother and silkier under your hands, promising those signature pull apart moments. In every bite, you’ll experience the perfect balance of tang and richness, with ribbons of savory garlic butter weaving through each pillowy layer. This recipe is beginner-friendly and invites you to experiment with flavors, whether you’re a seasoned sourdough baker or simply someone looking for a cozy weekend project.
This recipe is tailored for home cooks who want to impress without intimidating themselves. With a total preparation time of about 30 minutes, followed by a 2-hour rest period and a 30-minute bake, you can plan it around your day without stress. It yields roughly 12 servings at around 200 calories each, ideal for family gatherings or casual dinner parties. You’ll find it’s versatile enough to slot into any meal — whether you’re serving it as an appetizer to kick off a sumptuous feast, a side to your favorite pasta or soup, or even the centerpiece at an intimate brunch. The pull apart format makes sharing effortless, encouraging laughter and conversation as everyone reaches in to peel away a warm, buttery piece. Whether you’re pairing it with a bright green salad, a bowl of steaming marinara sauce, or a swig of chilled wine, this bread brings people together with its comforting flavor. It’s the kind of recipe you’ll return to time and again, especially once you realize how simple it is to transform that humble discard into pure garlic-infused bliss.
KEY INGREDIENTS IN SOURDOUGH DISCARD GARLIC PULL APART BREAD
Every ingredient in this garlic pull apart bread plays its part, from the rich tang of the sourdough discard to the flaky layers of butter and garlic. Let’s break down what you’ll need and how each component contributes to that perfect loaf.
- Sourdough discard: Brings a delightful tang and subtle complexity to the dough, boosting flavor while reducing food waste.
- All-purpose flour: Provides structure and gluten that give the bread its soft, yet sturdy crumb.
- Active dry yeast: Acts as the leavening agent to help the dough rise beautifully, creating those irresistible pockets and airiness.
- Warm water: Activates the yeast; maintaining around 110°F ensures the yeast becomes frothy without being killed by excessive heat.
- Granulated sugar: Feeds the yeast for a stronger rise and adds a whisper of sweetness to balance the tang of the discard.
- Salt: Enhances overall flavor and tightens gluten development in the dough, while also seasoning the garlic butter to perfection.
- Unsalted butter (melted): Adds richness to the dough, making it tender and moist.
- Large egg: Binds ingredients, enriches the dough, and contributes to a golden crust.
- Milk: Softens the crumb and adds a subtle creaminess for a richer loaf.
- Unsalted butter (softened): Forms the base of the garlic butter spread, ensuring even and luscious layers of flavor.
- Garlic: Delivers that signature punch of savory aroma and taste, finely minced for even distribution.
- Fresh parsley: Infuses a bright, herbal note that balances the richness of butter and Parmesan.
- Grated Parmesan cheese: Sprinkles on top to crisp into a golden, savory crust and add a nutty finish.

HOW TO MAKE SOURDOUGH DISCARD GARLIC PULL APART BREAD
With your ingredients prepped and ready, these step-by-step instructions will guide you from mixing to the final golden bake.
1. In a small bowl, combine the warm water, sugar, and yeast. Let it sit for about 5 minutes until it becomes frothy, signaling that the yeast is active and ready.
2. In a large mixing bowl, combine the sourdough discard, melted butter, egg, and milk. Mix until smooth and well combined, creating a cohesive base for your dough.
3. Add the frothy yeast mixture to the wet ingredients and stir until fully incorporated, ensuring an even distribution of yeast throughout the batter.
4. Gradually add the flour and salt, stirring until a dough forms. Turn it out onto a lightly floured surface and knead for about 5–7 minutes until smooth and elastic.
5. Place the dough in a lightly oiled bowl, cover it with a damp cloth, and let it rise in a warm place for about 1 to 1.5 hours, or until doubled in size.
6. Meanwhile, prepare the garlic butter by mixing the softened butter, minced garlic, chopped parsley, and salt in a small bowl. Set aside.
7. Once the dough has risen, punch it down and turn it out onto a lightly floured surface. Roll the dough into a large rectangle, approximately 12×18 inches.
8. Spread the garlic butter mixture evenly over the dough. Sprinkle the grated Parmesan cheese on top for that irresistible cheesy crust.
9. Cut the dough into squares approximately 3×3 inches. Stack the squares in groups of 3–4 and place them upright in a lightly greased loaf pan.
10. Cover the pan with a damp cloth and let the dough rise for about 30 minutes, or until noticeably puffy.
11. Preheat your oven to 350°F (175°C). Once the dough has risen, bake for 25–30 minutes or until golden brown and cooked through.
12. Allow the bread to cool in the pan for a few minutes before removing. Serve warm to enjoy every tender, buttery layer.
SERVING SUGGESTIONS FOR SOURDOUGH DISCARD GARLIC PULL APART BREAD
Once your golden pull apart bread emerges from the oven, it’s time to think about how you’ll present those pillowy, garlic-scented pieces. Whether you want a simple sidekick to a weeknight meal or a show-stopping appetizer for guests, this bread adapts beautifully. Let its warmth and inviting aromas shine by choosing complementing dishes and thoughtful garnishes that enhance each pull and every bite.
- Serve as a side next to pasta dishes or soups. Arrange warm slices on a decorative platter, garnish with extra chopped parsley, and offer a small bowl of olive oil for dipping.
- Create mini sandwiches by tearing off individual segments and stuffing them with deli meats, fresh greens, and sliced tomatoes for a playful handheld meal.
- Pair with savory dips like pesto, marinara sauce, or a tangy yogurt herb dip. Place the loaf alongside a trio of dipping bowls for an interactive appetizer.
- Build a bread board centerpiece alongside an assortment of cheeses, cured meats, olives, and fresh fruit. Let guests help themselves to pull apart chunks for a communal, festive experience.
HOW TO STORE SOURDOUGH DISCARD GARLIC PULL APART BREAD
After savoring the last bite of your homemade garlic pull apart bread, you might wonder how to keep it tasting just as fresh the next day. Though nothing quite matches the magic of fresh-baked bread, these storage methods will help preserve moisture, texture, and that signature garlic-herb flavor. By choosing the right container and environment, you can extend the enjoyment of every tender pull and buttery layer, making sure your hard work pays off for multiple meals.
- Room temperature: Once cooled completely, wrap the loaf tightly in plastic wrap or aluminum foil, then store at room temperature for up to 2 days. This method maintains a soft crumb without drying out.
- Refrigeration: For longer freshness (up to 5 days), place the wrapped bread in an airtight container and refrigerate. Be aware refrigeration can slightly firm the crust—just reheat before serving to restore softness.
- Freezing: Slice or portion the bread into desired serving sizes, wrap each portion tightly in plastic wrap, then place in a freezer-safe bag. Freeze for up to 3 months.
- Thawing best practices: To reheat frozen portions, unwrap and place on a baking sheet in a preheated 325°F oven for 10–12 minutes, or until warmed through. This revives the soft interior and crisp exterior.
CONCLUSION
We’ve journeyed from reclaiming that tangy sourdough discard to pulling apart slabs of golden, garlic-studded delight, and now you have a full roadmap to recreate this comforting treat in your own kitchen. You’ve learned how each ingredient—from flour and eggs to melted butter and Parmesan cheese—works together to deliver flavor, texture, and an unforgettable aroma. The step-by-step process, complete with rising times and kneading tips, ensures your loaf turns out soft and airy, while the garlic butter and parsley swirl through every layer for maximum impact. Serving suggestions range from simple pasta companions to lively bread board centers, giving you endless ways to showcase this pull apart bread. Storage and reheating tips help you savor leftovers without sacrificing that fresh-baked quality. Feel free to print this article or save it for future baking adventures, and don’t forget there’s an FAQ section below to answer any additional questions you might have.
If you give this recipe a try, we’d love to hear how it turned out for you. Leave a comment with your favorite way to serve the bread or any tweaks you made to personalize the flavor. Have a question about rising times, ingredient swaps, or troubleshooting? Drop it below so we can help. Your feedback and stories not only help fellow home cooks but also inspire new kitchen creations. Happy baking!
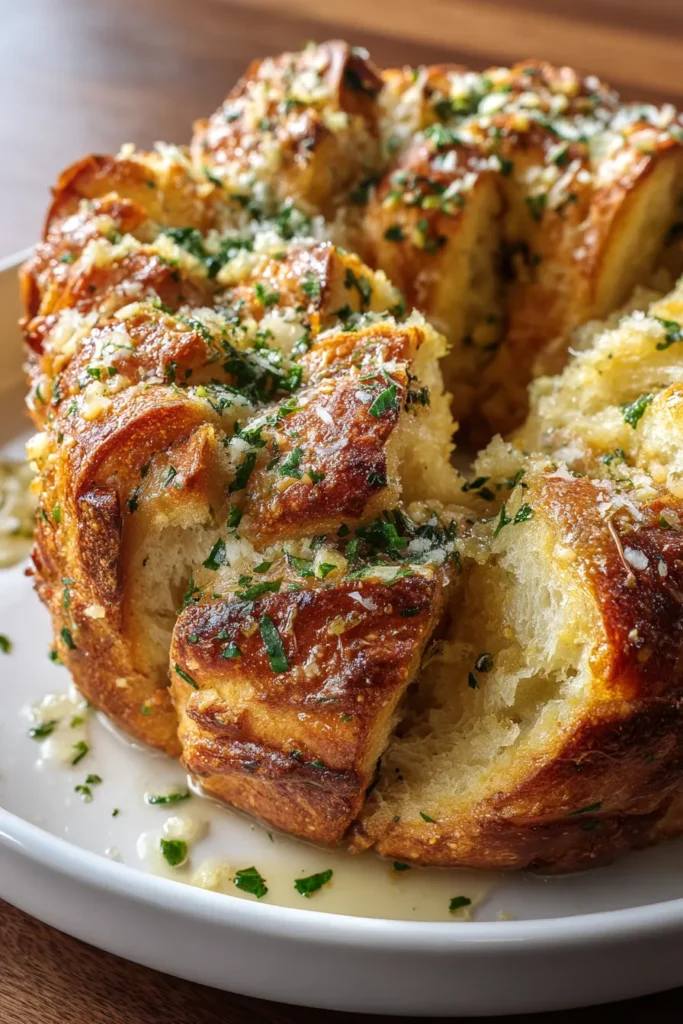

Sourdough Discard Garlic Pull Apart Bread
Description
Experience the warmth of freshly baked bread infused with garlic and herbs. Each pull reveals a tender, buttery bite that’s perfect for sharing with loved ones.
Ingredients
Instructions
-
In a small bowl, combine the warm water, sugar, and yeast. Let it sit for about 5 minutes until it becomes frothy.
-
In a large mixing bowl, combine the sourdough discard, melted butter, egg, and milk. Mix until well combined.
-
Add the frothy yeast mixture to the wet ingredients and stir until fully incorporated.
-
Gradually add the flour and salt, stirring until a dough forms. Knead the dough for about 5–7 minutes until smooth and elastic.
-
Place the dough in a lightly oiled bowl, cover it with a damp cloth, and let it rise in a warm place for about 1 to 1.5 hours, or until doubled in size.
-
Meanwhile, prepare the garlic butter by mixing the softened butter, minced garlic, chopped parsley, and salt in a small bowl. Set aside.
-
Once the dough has risen, punch it down and turn it out onto a lightly floured surface. Roll the dough into a large rectangle, approximately 12x18 inches.
-
Spread the garlic butter mixture evenly over the dough. Sprinkle the grated Parmesan cheese over the buttered dough.
-
Cut the dough into squares approximately 3x3 inches. Stack the squares in groups of 3-4 and place them upright in a lightly greased loaf pan.
-
Cover the pan with a damp cloth and let the dough rise for about 30 minutes, or until puffy.
-
Preheat your oven to 350°F (175°C). Once the dough has risen, bake for 25-30 minutes or until golden brown and cooked through.
-
Allow the bread to cool in the pan for a few minutes before removing. Serve warm.
Note
- Sourdough discard adds a unique tangy flavor and helps reduce food waste.
- This bread pairs perfectly with pasta dishes or soups.
- You can customize the filling with different herbs or cheeses according to your taste.
- Ensure the water for the yeast is not too hot to avoid killing the yeast.
- This is a great recipe to make together with family or friends for a fun cooking experience.

