

Sink your teeth into this spooktacular Vampire Bite Red Velvet Cheesecake – a hauntingly delicious treat! If you’ve ever felt the allure of a dark dessert that balances drama with decadence, this cheesecake is your culinary soulmate. A crisp, chocolatey Oreo crust meets the velvety, crimson layers of a classic red velvet cheesecake filling, all crowned with a spiderweb of melted chocolate and a pool of raspberry “blood” for that chilling vampire bite effect. This recipe is rated Intermediate, making it perfect for adventurous home bakers who love a fun challenge. You’ll spend about 30 minutes prepping, 1 hour baking, and then allow a 4-hour chill for the best results—including enough time for your guests to catch their breath before they go back for more.
When you finally un-mold that 9-inch springform pan and reveal the smooth, scarlet surface, you’ll feel like the master of a midnight feast. The combination of cream cheese, sour cream, and just a hint of cocoa imparts a tangy richness that plays beautifully against the sweet Oreo base. And let’s not forget that dramatic swirl of Vanilla Bean Paste and the eerie spiderweb pattern in melted chocolate—it’s practically screaming to be the centerpiece of your next Halloween party or gothic gathering. With 450 calories per slice (based on 12 generous servings), it’s indulgence with a side of theatrics. Whether you’re serving it at a spooktacular bash or simply craving a red velvet twist on cheesecake, this Vampire Bite creation promises crowd-pleasing flavor and a memorable presentation.
KEY INGREDIENTS IN VAMPIRE BITE RED VELVET CHEESECAKE
Every wickedly delightful dessert starts with the right ensemble of ingredients. In this section, we’ll introduce the essential players that give our cheesecake its hauntingly rich texture, vivid color, and unforgettable taste.
- Crushed Oreo cookies
These crushed chocolate wafers form the foundation of our crust, providing a crunchy contrast to the creamy filling and carrying a hint of coffee-like depth.
- Unsalted butter
When melted, it binds those Oreo crumbs into a sturdy, flavor-packed base, ensuring each slice holds together with just the right spring.
- Cream cheese
The heart of any cheesecake, this velvety dairy product beats to a smooth, rich rhythm, lending tanginess and body to our red velvet layers.
- Granulated sugar
Sweetness is key to balance the tang of cream cheese and sour cream, while giving structure and a delicate crumb to the filling.
- Vanilla extract
A teaspoon of pure vanilla extract amplifies the overall flavor, bringing warmth and aromatic complexity to each forkful.
- Eggs
Acting as emulsifiers, these large eggs add structure and creaminess, making sure the filling sets with a silky, custard-like consistency.
- Sour cream
This tangy addition lightens and smooths the batter, while preventing cracks and enhancing the cheesecake’s luscious mouthfeel.
- Cocoa powder
A hint of unsweetened cocoa deepens the red velvet character with subtle chocolate notes and enriches the overall hue.
- Red food coloring
Two tablespoons of vibrant red dye create that signature red velvet shade, turning each slice into a striking visual treat.
- White vinegar
A splash of acidity heightens the red velvet flavor and interacts with the cocoa powder for optimal color development.
- Vanilla Bean Paste
Dropped in veins atop the batter, this paste creates an eerie marbling effect and infuses pockets of intense vanilla flavor.
- Chocolate chips
Once melted, they’re piped into a spiderweb pattern that contrasts beautifully with the red background, adding a rich chocolate accent.
- Raspberry sauce
Drizzled over the spiderweb, this sweet-tart glaze pools like fresh “blood,” delivering the final dramatic vampire bite.

HOW TO MAKE VAMPIRE BITE RED VELVET CHEESECAKE
Ready to conjure this chilling dessert? Follow each step carefully to ensure a creamy, crack-free cheesecake with all the right flavors and vibrant color.
1. Preheat your oven to 325°F (163°C). Lightly grease a 9-inch springform pan, lining the bottom with parchment paper if you like, to make removal seamless.
2. In a medium bowl, combine the crushed Oreo cookies and melted butter. Stir until the mixture resembles wet sand, ensuring every crumb is coated.
3. Press the Oreo crumb mixture firmly into the bottom of the prepared pan, creating an even crust layer about half an inch thick. Set aside on a flat surface.
4. In a large mixing bowl, beat the softened cream cheese on medium speed until it’s smooth and creamy, with no lumps remaining.
5. Add the granulated sugar and vanilla extract, and continue to blend until the mixture is homogeneous and velvety.
6. With the mixer on low speed, incorporate the eggs one at a time, scraping down the sides after each addition to ensure they’re fully mixed in.
7. Add the sour cream, cocoa powder, red food coloring, and white vinegar, then mix just until the color and texture are even—avoid overmixing to reduce air bubbles.
8. Pour the cheesecake batter over the Oreo crust, using a spatula to smooth the top into an even surface.
9. Drizzle Vanilla Bean Paste in a veiny pattern across the surface. Use a toothpick to swirl gently, creating a marbled veil without overworking the batter.
10. Bake for 55–65 minutes, until the center is just set—it should jiggle slightly in the middle but not appear wet. The edges may pull back slightly from the pan.
11. Turn off the oven and crack the door open. Let the cheesecake cool inside for about 30 minutes to prevent cracks, then remove and cool to room temperature.
12. Cover and refrigerate for at least 4 hours or overnight to ensure a firm, sliceable consistency.
13. Before serving, melt the chocolate chips gently in a microwave or double boiler. Transfer to a piping bag or use a spoon to draw a spiderweb pattern over the chilled cheesecake.
14. Finally, drizzle the raspberry sauce over the spiderweb lines, letting it pool in spots to mimic a dramatic “vampire bite.” Serve immediately and watch your guests swoon!
SERVING SUGGESTIONS FOR VAMPIRE BITE RED VELVET CHEESECAKE
When that chilling masterpiece is ready, presentation makes all the difference. Serve your Vampire Bite Red Velvet Cheesecake in a dimly lit room or on a dark platter for maximum dramatic effect. Let the swirling veins of Vanilla Bean Paste and glossy spiderweb stand out. To elevate the experience, consider these creative ideas that will have your guests raving (and maybe a little spooked):
- Serve each slice on a dark slate or black plate, letting the deep red and white marbling pop. Add a few fresh raspberries on the side for extra color contrast.
- Garnish each portion with a dollop of whipped cream piped into little rosettes and a fresh mint leaf, which complements the raspberry tang with a hint of cool brightness.
- Dust the edges of the cheesecake lightly with edible red glitter or a fine sprinkle of cocoa powder for a mystical shimmer that catches the light.
- Pair a slice with a glass of chilled milk or a sweet port wine. The creamy or fruity notes in the drink will harmonize with the rich red velvet and the raspberry “blood.”
HOW TO STORE VAMPIRE BITE RED VELVET CHEESECAKE
Proper storage ensures your Vampire Bite Red Velvet Cheesecake keeps its striking appearance and luscious taste, even days after baking. Always handle with care, as the chilled layers are delicate but reward your caution with perfect slices every time.
- Refrigerate whole or in slices, covered tightly with plastic wrap or stored in an airtight container. This preserves moisture and prevents the cake from absorbing other fridge odors.
- If you plan to keep it longer than three days, freeze individual slices by wrapping them in a double layer of plastic wrap and placing them in a freezer-safe zip-top bag. Thaw in the refrigerator overnight before serving.
- Store the raspberry sauce separately in a small jar or container. Add the sauce just before serving to maintain its vivid color and fresh flavor.
- To avoid dry edges, place a small, lightly moistened paper towel over the surface inside the storage container. This extra step locks in humidity without making the cake soggy.
CONCLUSION
This Vampire Bite Red Velvet Cheesecake is a showstopper that blends spooky style with unforgettable flavor. From the chocolatey Oreo crust to the creamy, tangy red velvet filling, and the dramatic spiderweb and raspberry “bite,” each component plays its part in turning dessert into a theatrical experience. By following the detailed steps in the Key Ingredients and How to Make sections, you’ll achieve a smooth, crack-free cheesecake that’s as stunning as it is delicious. Don’t forget to experiment with your own berry sauces or garnishes to customize the “blood” effect and make the recipe truly your own. With a prep time of 30 minutes, bake time of around an hour, and a required 4-hour chill, you can plan this treat well in advance for any hauntingly fun occasion.
Feel free to print this article and save it for later use, so the next time you crave a blood-red indulgence, you’ll have everything at your fingertips. You can also find a FAQ below for troubleshooting common cheesecake challenges. If you try this recipe, please leave a comment or reach out with any questions or feedback. I love hearing how your cheesecake turns out and am here to help if you need tips on perfecting that spiderweb design or achieving the ideal texture. Happy baking, and may your next slice be as bewitchingly delicious as your first!
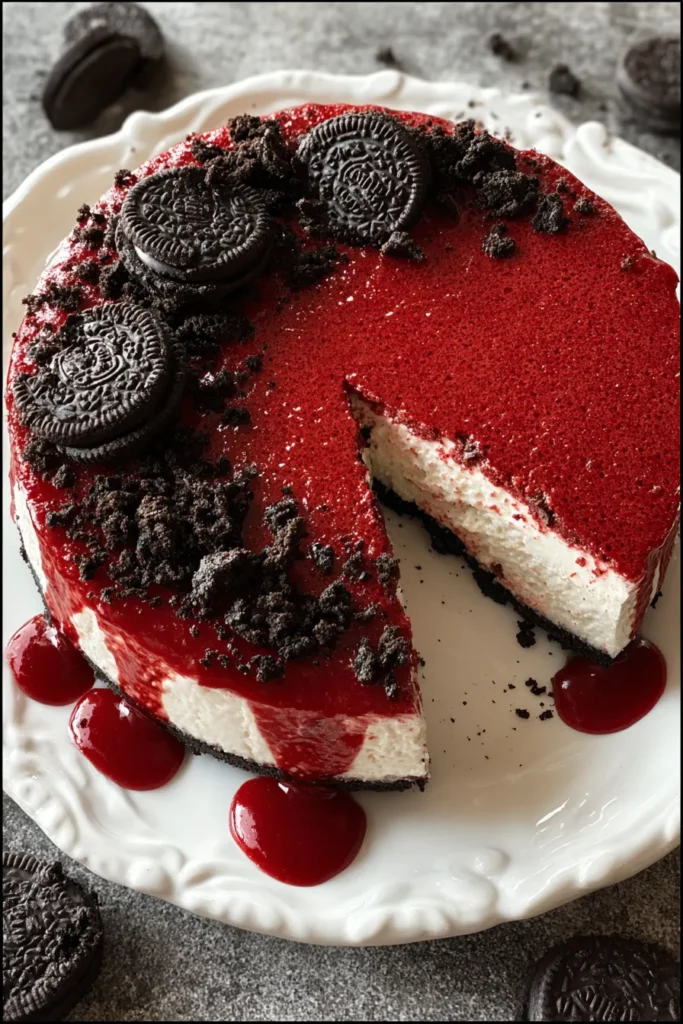

Vampire Bite Red Velvet Cheesecake
Description
This rich red velvet cheesecake combines creamy layers with a chocolatey Oreo crust, topped off with a raspberry sauce that creates the perfect 'vampire bite.'
Ingredients
Instructions
-
Preheat your oven to 325°F (163°C). Prepare a 9-inch springform pan by greasing it lightly.
-
Combine crushed Oreo cookies and melted butter in a bowl until it resembles wet sand.
-
Press the Oreo mixture firmly into the bottom of your springform pan to form the crust. Set aside.
-
In a large bowl, beat the softened cream cheese until smooth and creamy.
-
Add the sugar and vanilla extract to the cream cheese, and blend well until fully mixed.
-
Incorporate the eggs one at a time, beating slowly on low speed, ensuring they are fully mixed in before adding the next.
-
Add in sour cream, cocoa powder, red food coloring, and vinegar, mixing until the color is evenly distributed and the mixture is smooth.
-
Pour the cheesecake mixture over the prepared crust, smoothing the top with a spatula.
-
Drizzle with Vanilla Bean Paste in veins pattern across the top and swirl slightly with a toothpick, being careful not to overmix.
-
Place the cheesecake in the oven and bake for about 55-65 minutes, or until the center is just set and the top begins to lightly brown.
-
Once baked, remove from the oven and let it cool to room temperature before refrigerating for at least 4 hours or overnight.
-
Before serving, melt chocolate chips and create a spiderweb pattern on top of the cheesecake using a piping bag or small spoon.
-
Drizzle the raspberry sauce over the spiderweb and let it pool slightly to create a 'vampire bite' effect.
-
Serve chilled and enjoy your spooky treat!
Note
- To prevent cracks in your cheesecake, make sure all your ingredients are at room temperature before starting.
- You can use a water bath to help bake the cheesecake evenly and avoid cracks.
- Experiment with different berry sauces for a varied "bloody bite" effect.
- For added texture, consider adding a layer of chocolate ganache on top before creating the spiderweb design.

